*Affiliate Links – Some links may be affiliate links, meaning that any clicks may result in a small commission to keeping Coffee With Summer running at no additional cost to you.
The most popular question that I’m asked almost daily when it comes to social media is, “How do you edit your photos for Instagram?” Instagram is definitely the most favorited social media platform for today’s generation (despite their terrible algorithms and games). This platform was made to be visual, inviting, and exciting.
[bctt tweet=”How I Edit My Photos For Instagram” username=”SummerTelban”]
To those who’ve requested this post, today is the day! I have been wanting to write this post up for a very long time now, so I’m glad to finally be doing that for you. Thank you for your super duper patience with me!
Today, I’m going to be sharing how I edit my typical stock photos/flat lay photos. Full disclaimer up front: I am not a pro. I am not a photographer. I am simply someone who loves learning and growing in photography. I edit to suit my personal preference of aesthetic. 🙂
HOW I EDIT MY PHOTOS FOR INSTAGRAM:
First things first, I do not take the vast majority of my Instagram photos with my phone. On very rare occasions, I do use my iPhone 6s, but that’s usually when I’m out and about without my DSLR. I shoot with a Canon EOS 5D Mark II with typically, a 50mm lens 1.8. I only shoot in RAW format simply because it gives you more data to work with when editing. With that being said, I start my editing on my laptop with Camera Raw in Photoshop.
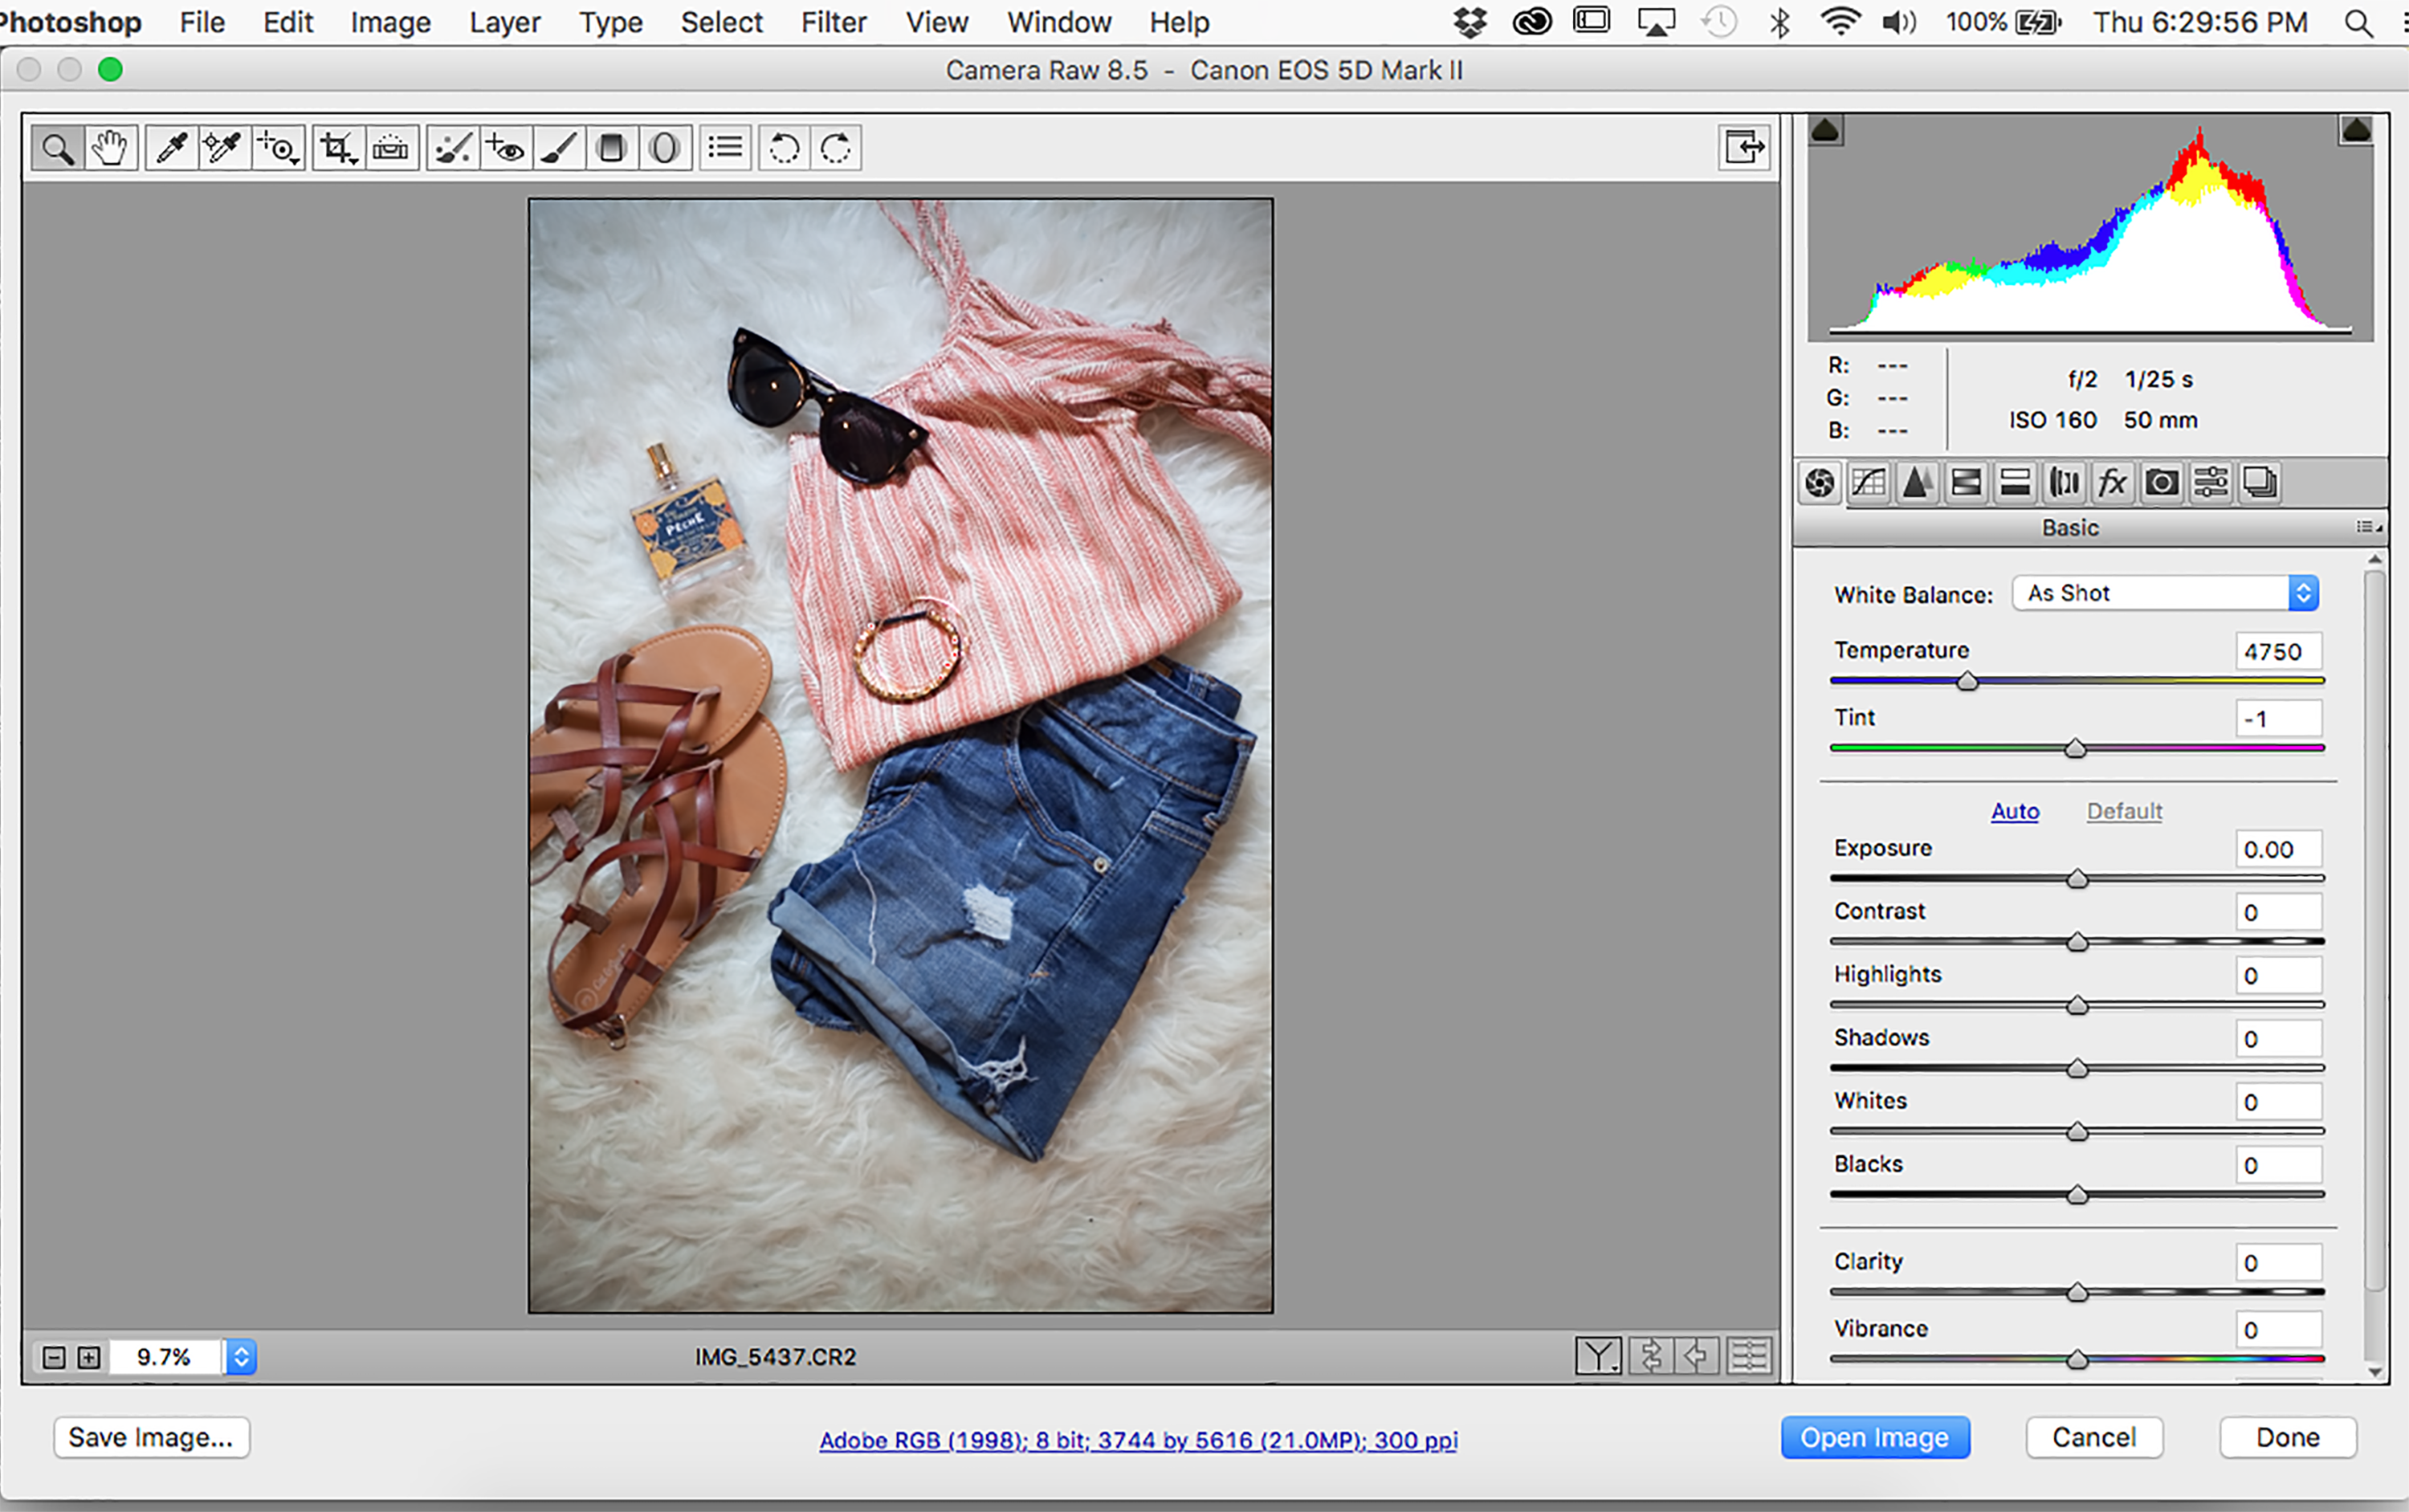
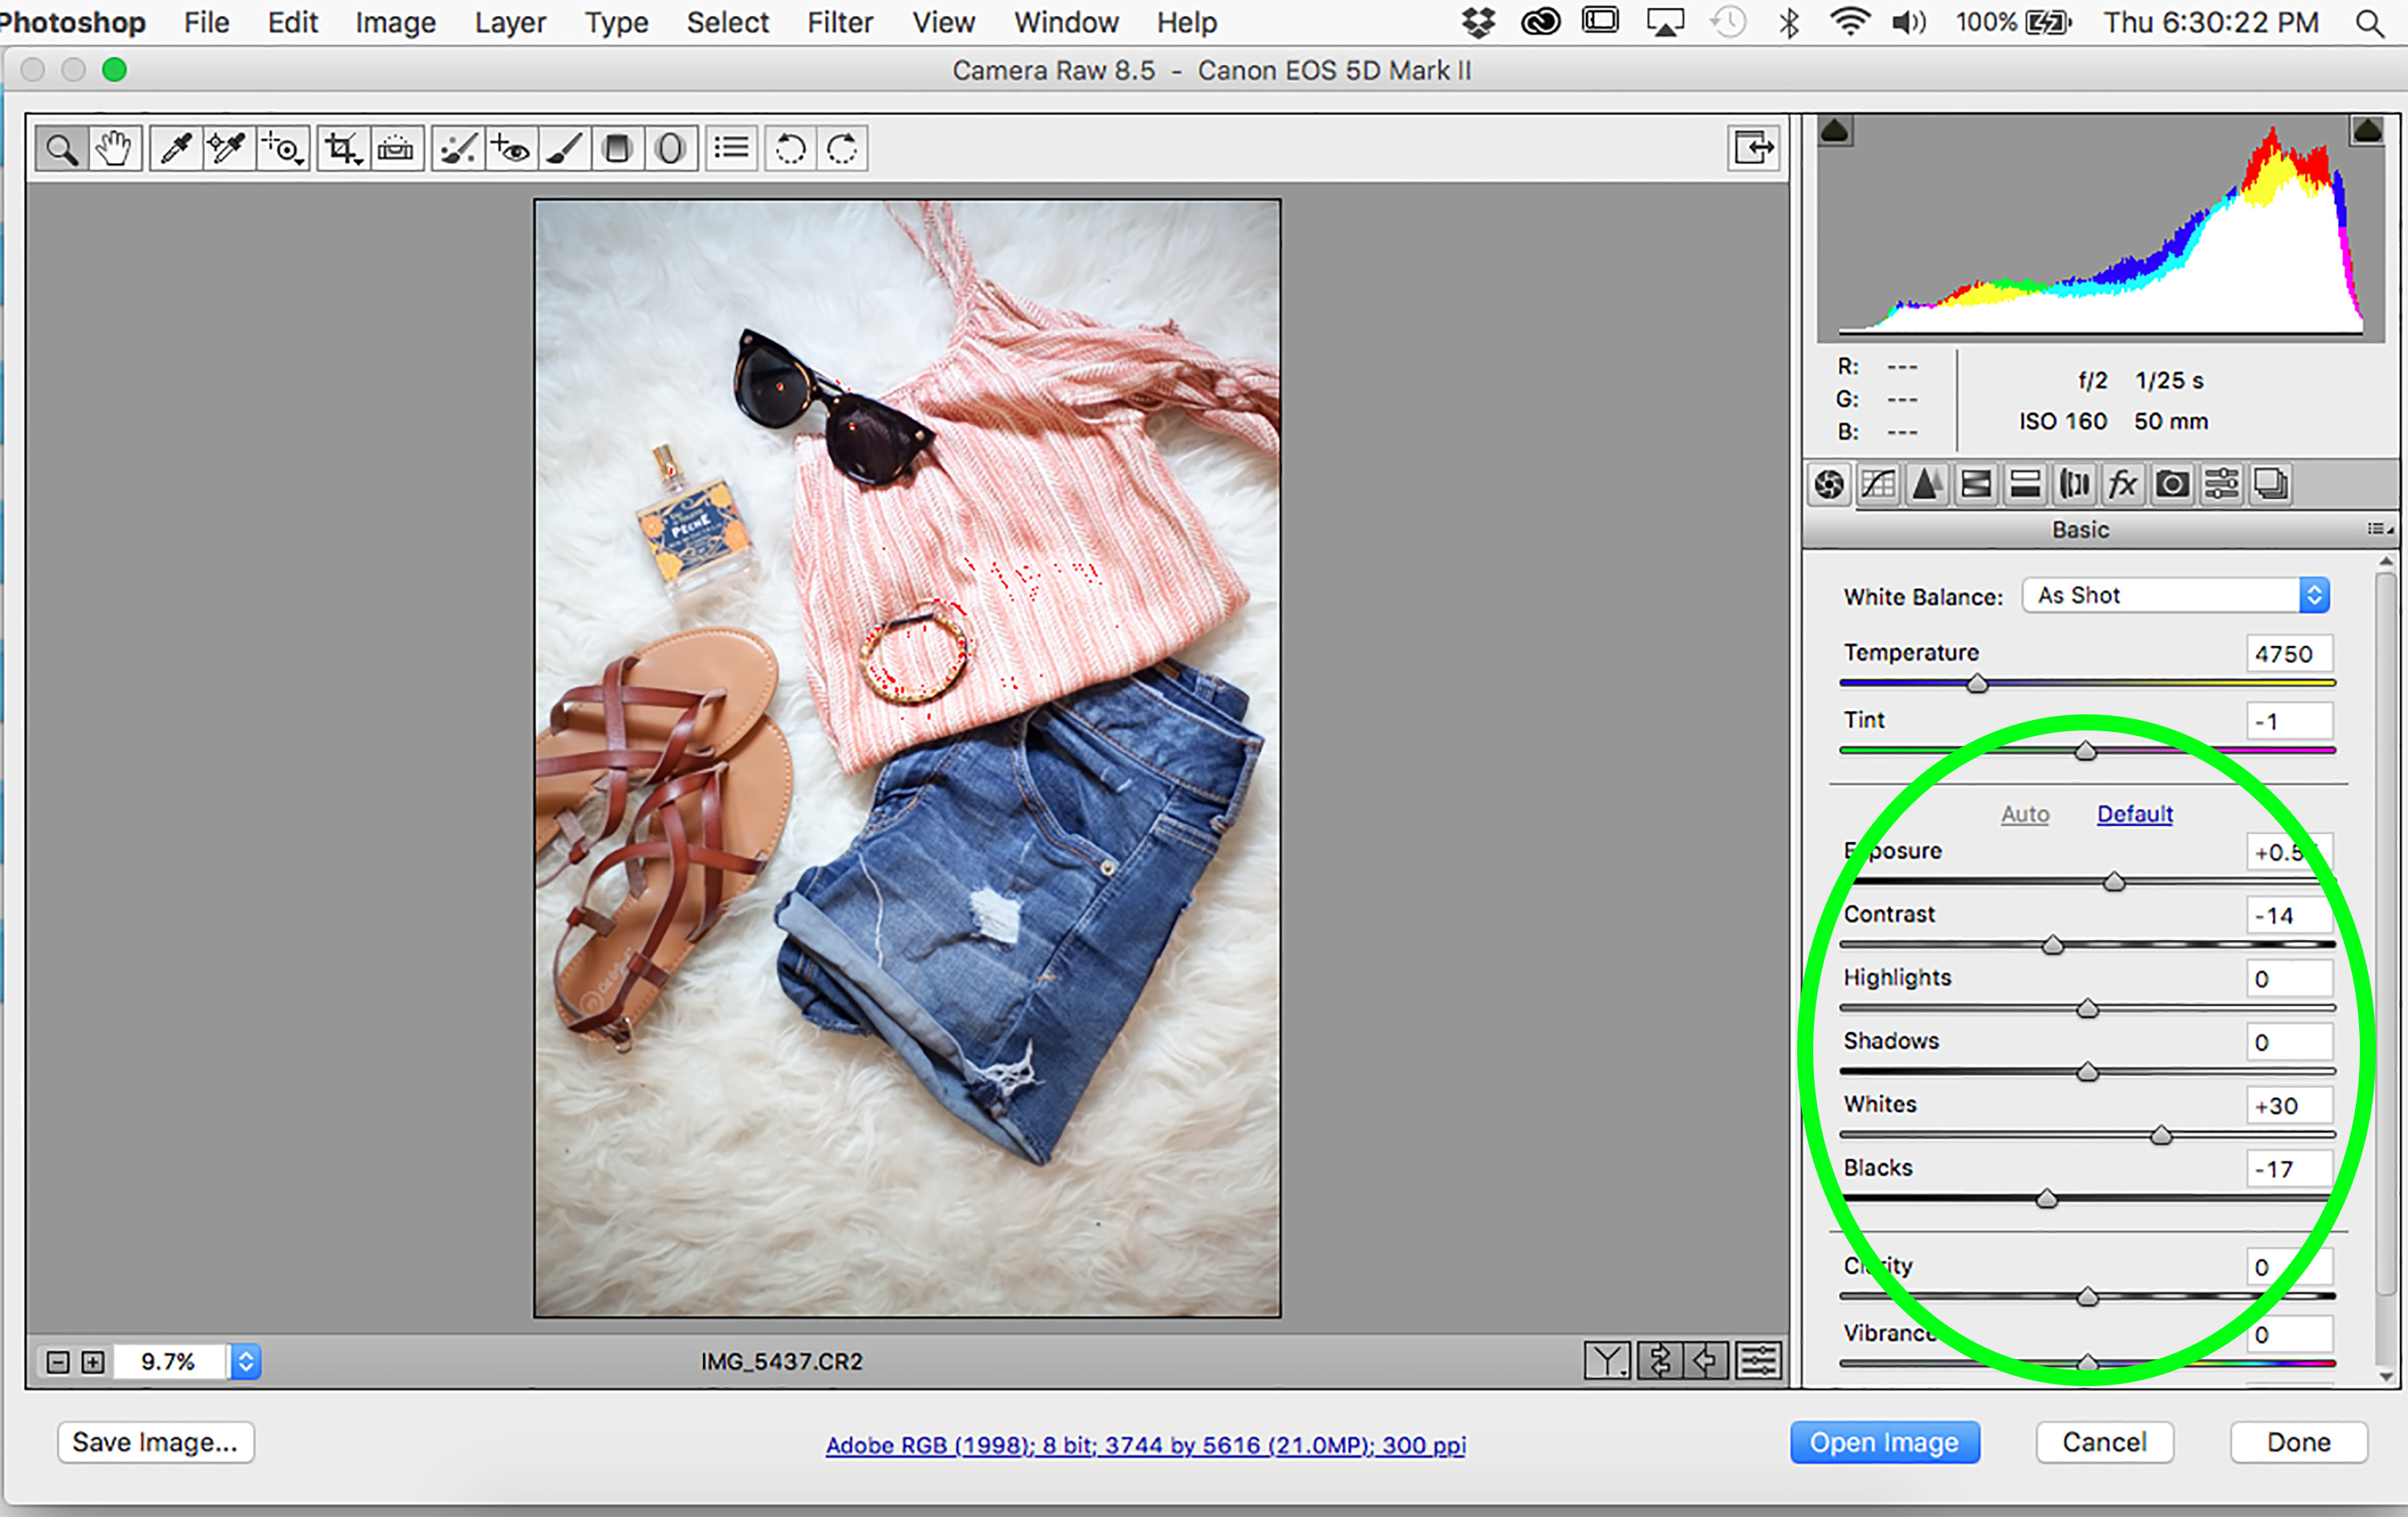
The first thing I do is click “Auto” underneath the “Basic” adjustment setting. From there, I usually play around with the exposure, whites, shadows, and highlights if I need to. I really love bright and crisp photos, so that’s really what I’m gauging for when I’m editing. If I’m shooting on a white background, like this white faux fur shag rug, I really want to make sure the white coloring is strictly white.
When I shot these photos, it was about 5:30 in the evening, so the majority of my natural lighting was gone, making it a little bit more challenging with editing. Depending on my light situation, the whites in my photos can look yellow or blue, even if my white balance is set correctly when shooting. This is where I start to play more in-depth to get the look I am aiming for.
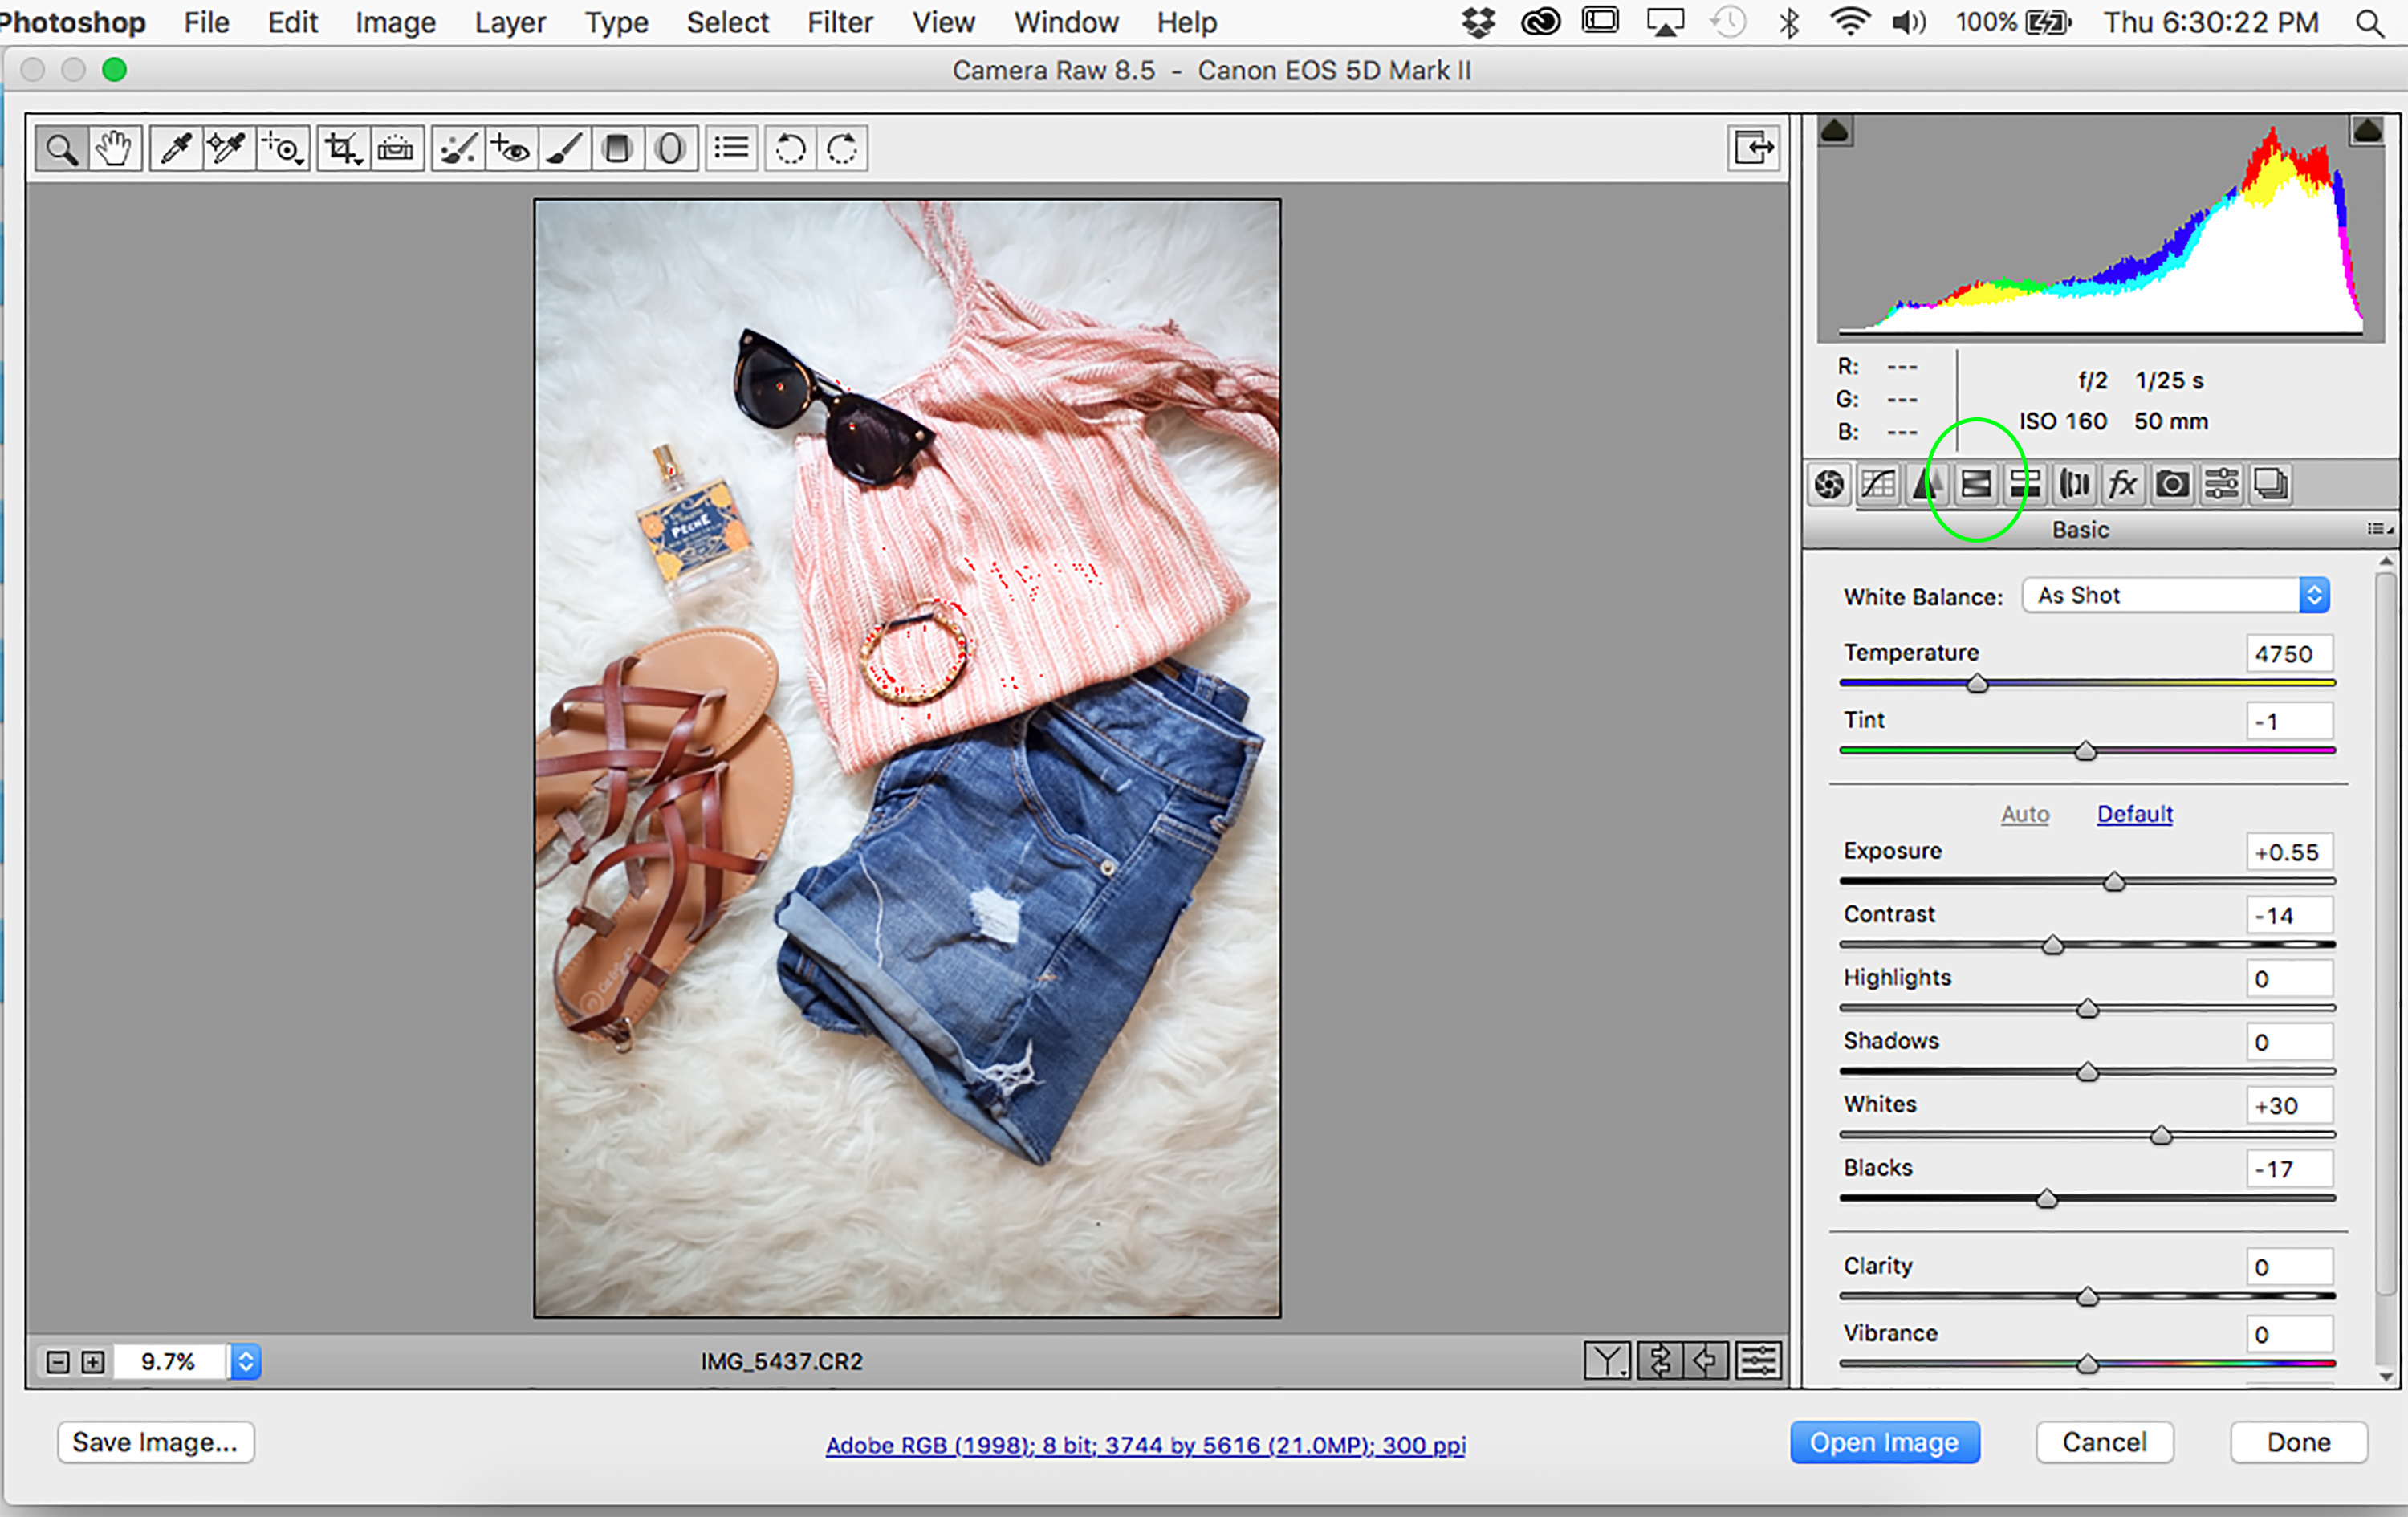
To fix the yellows and blues, I simply click over to the fourth section in the menu bar on the right. This brings me to the HSL/Grayscale section.
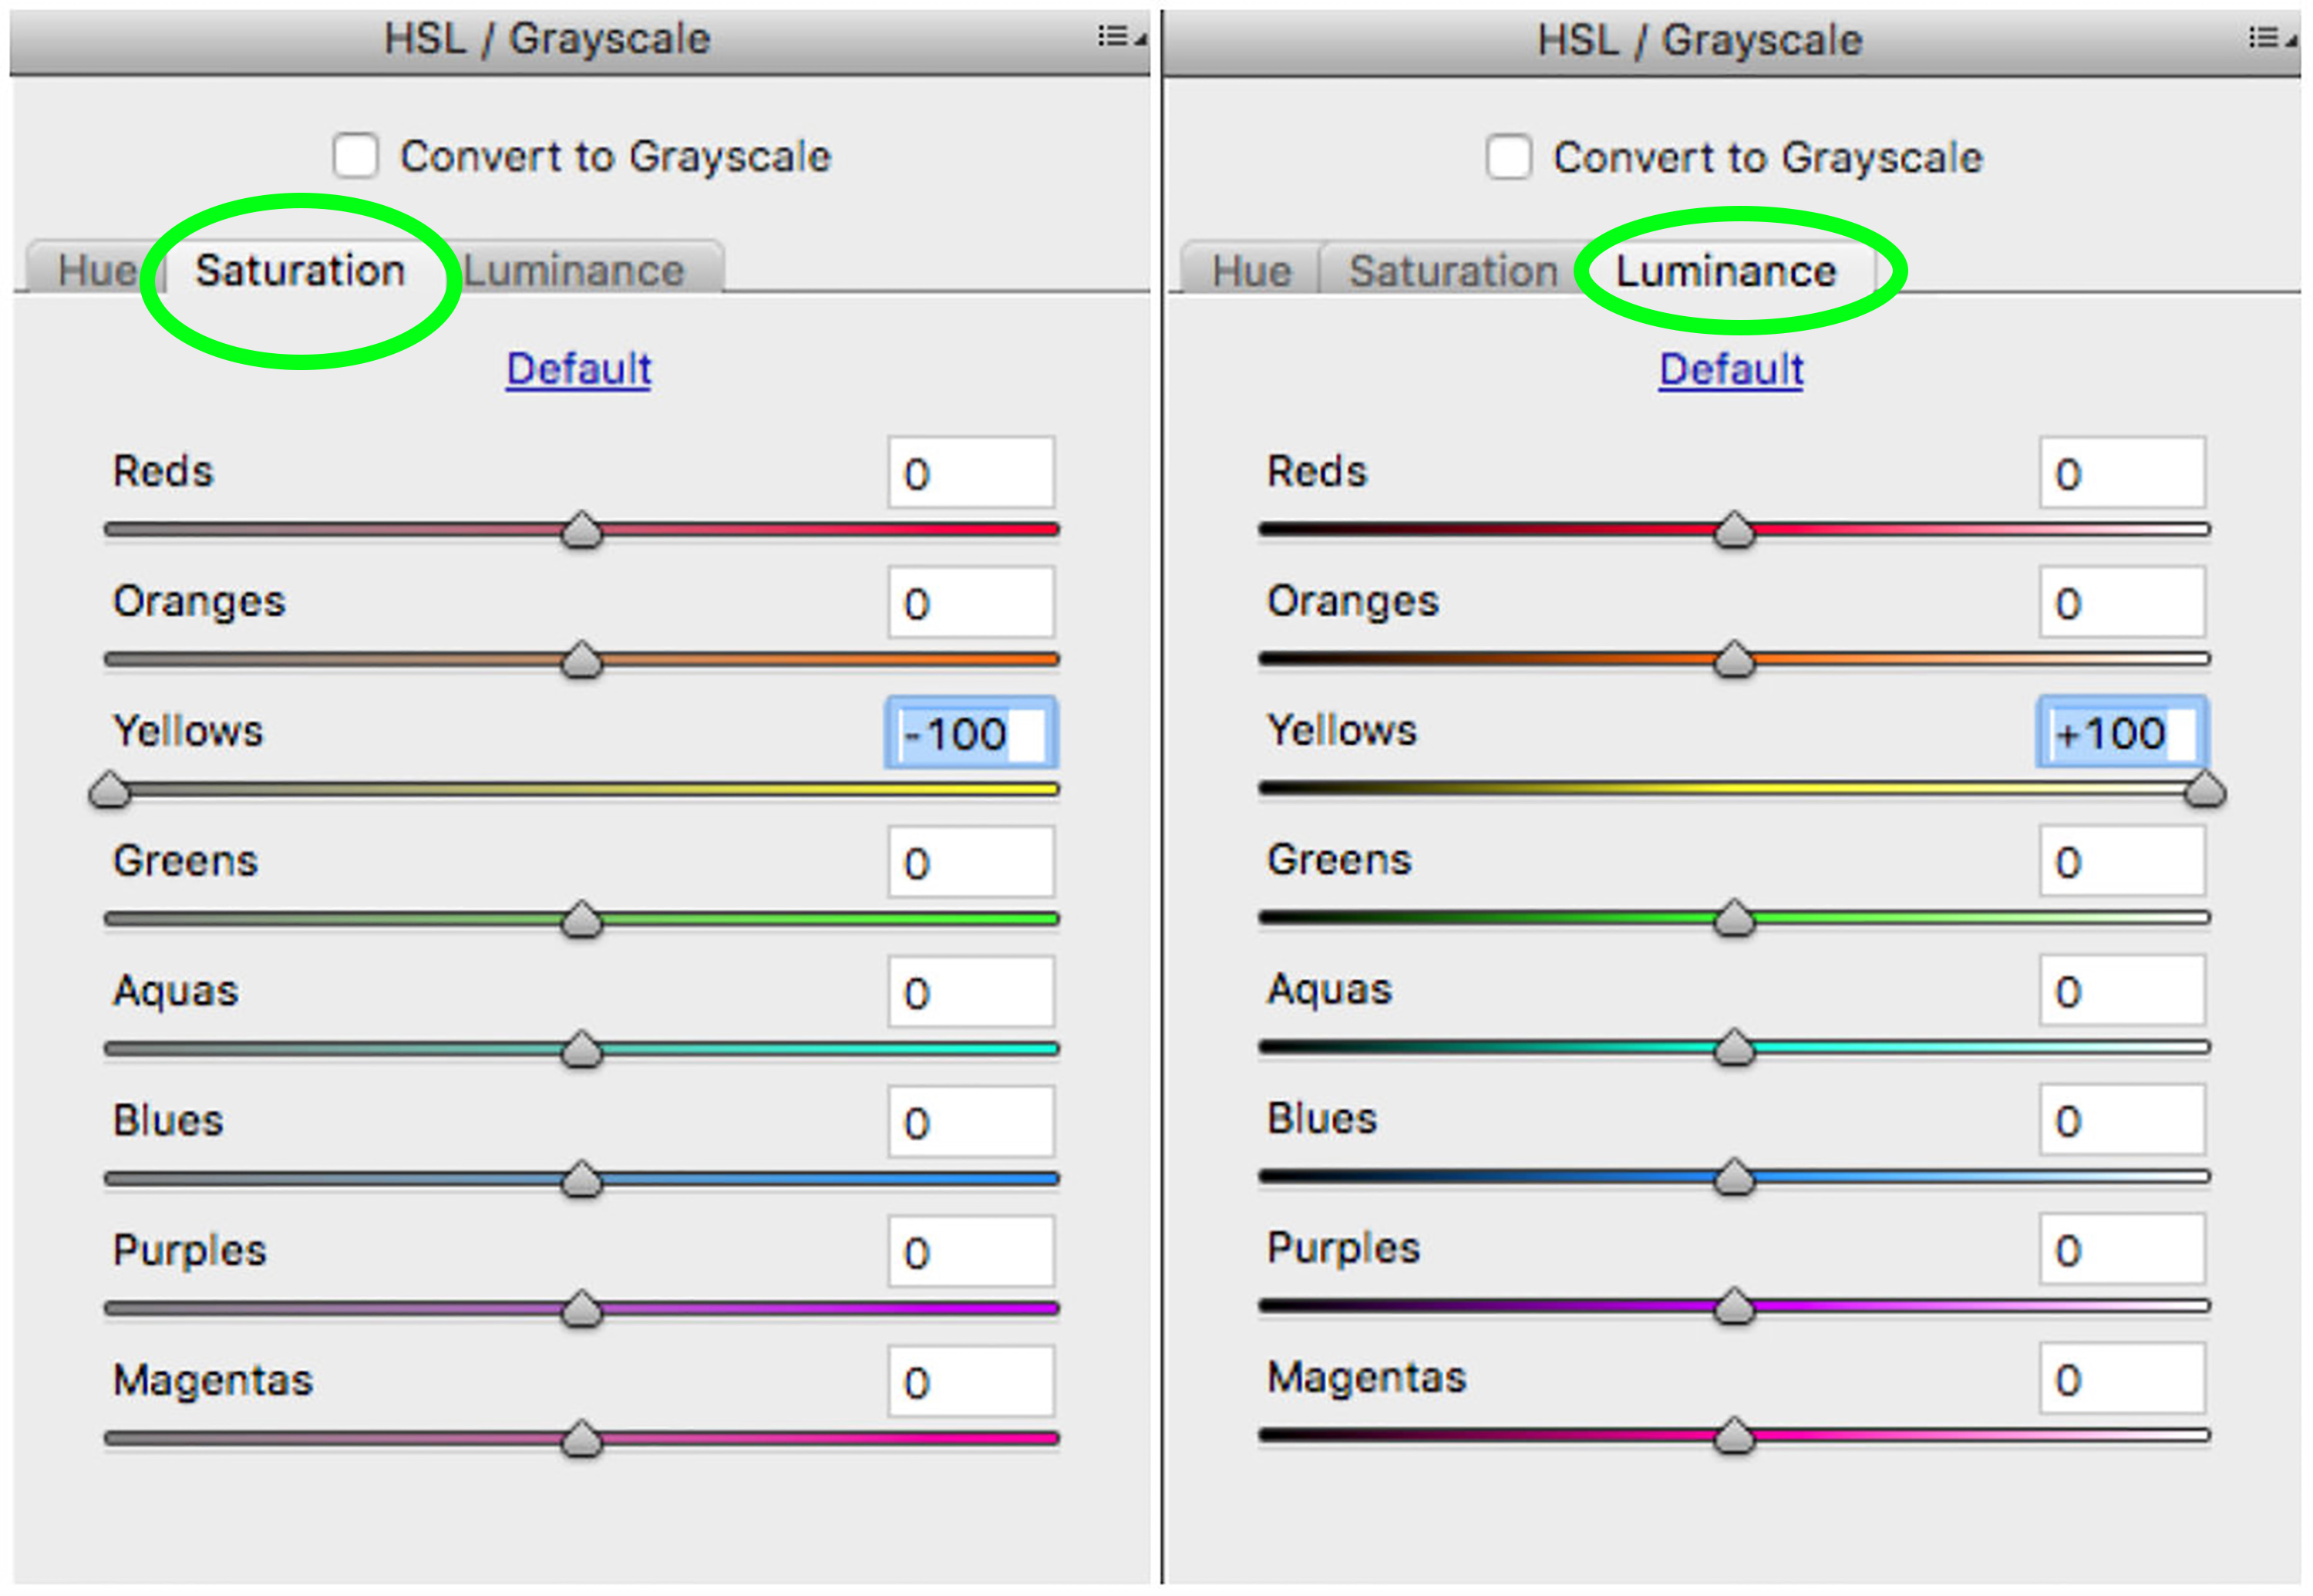
The first thing I go to here is “Saturation”. Since I struggled with a bit too much warmth for this photo, I took down the saturation for the yellows as far as I needed it to go. Then, I click over to “Luminance” and boost it all the way up for the yellows. With the yellows saturation being completely gone, when I boost the luminance up all of the way, it brightens up what were yellows in the photo.
PHOTOSHOP:
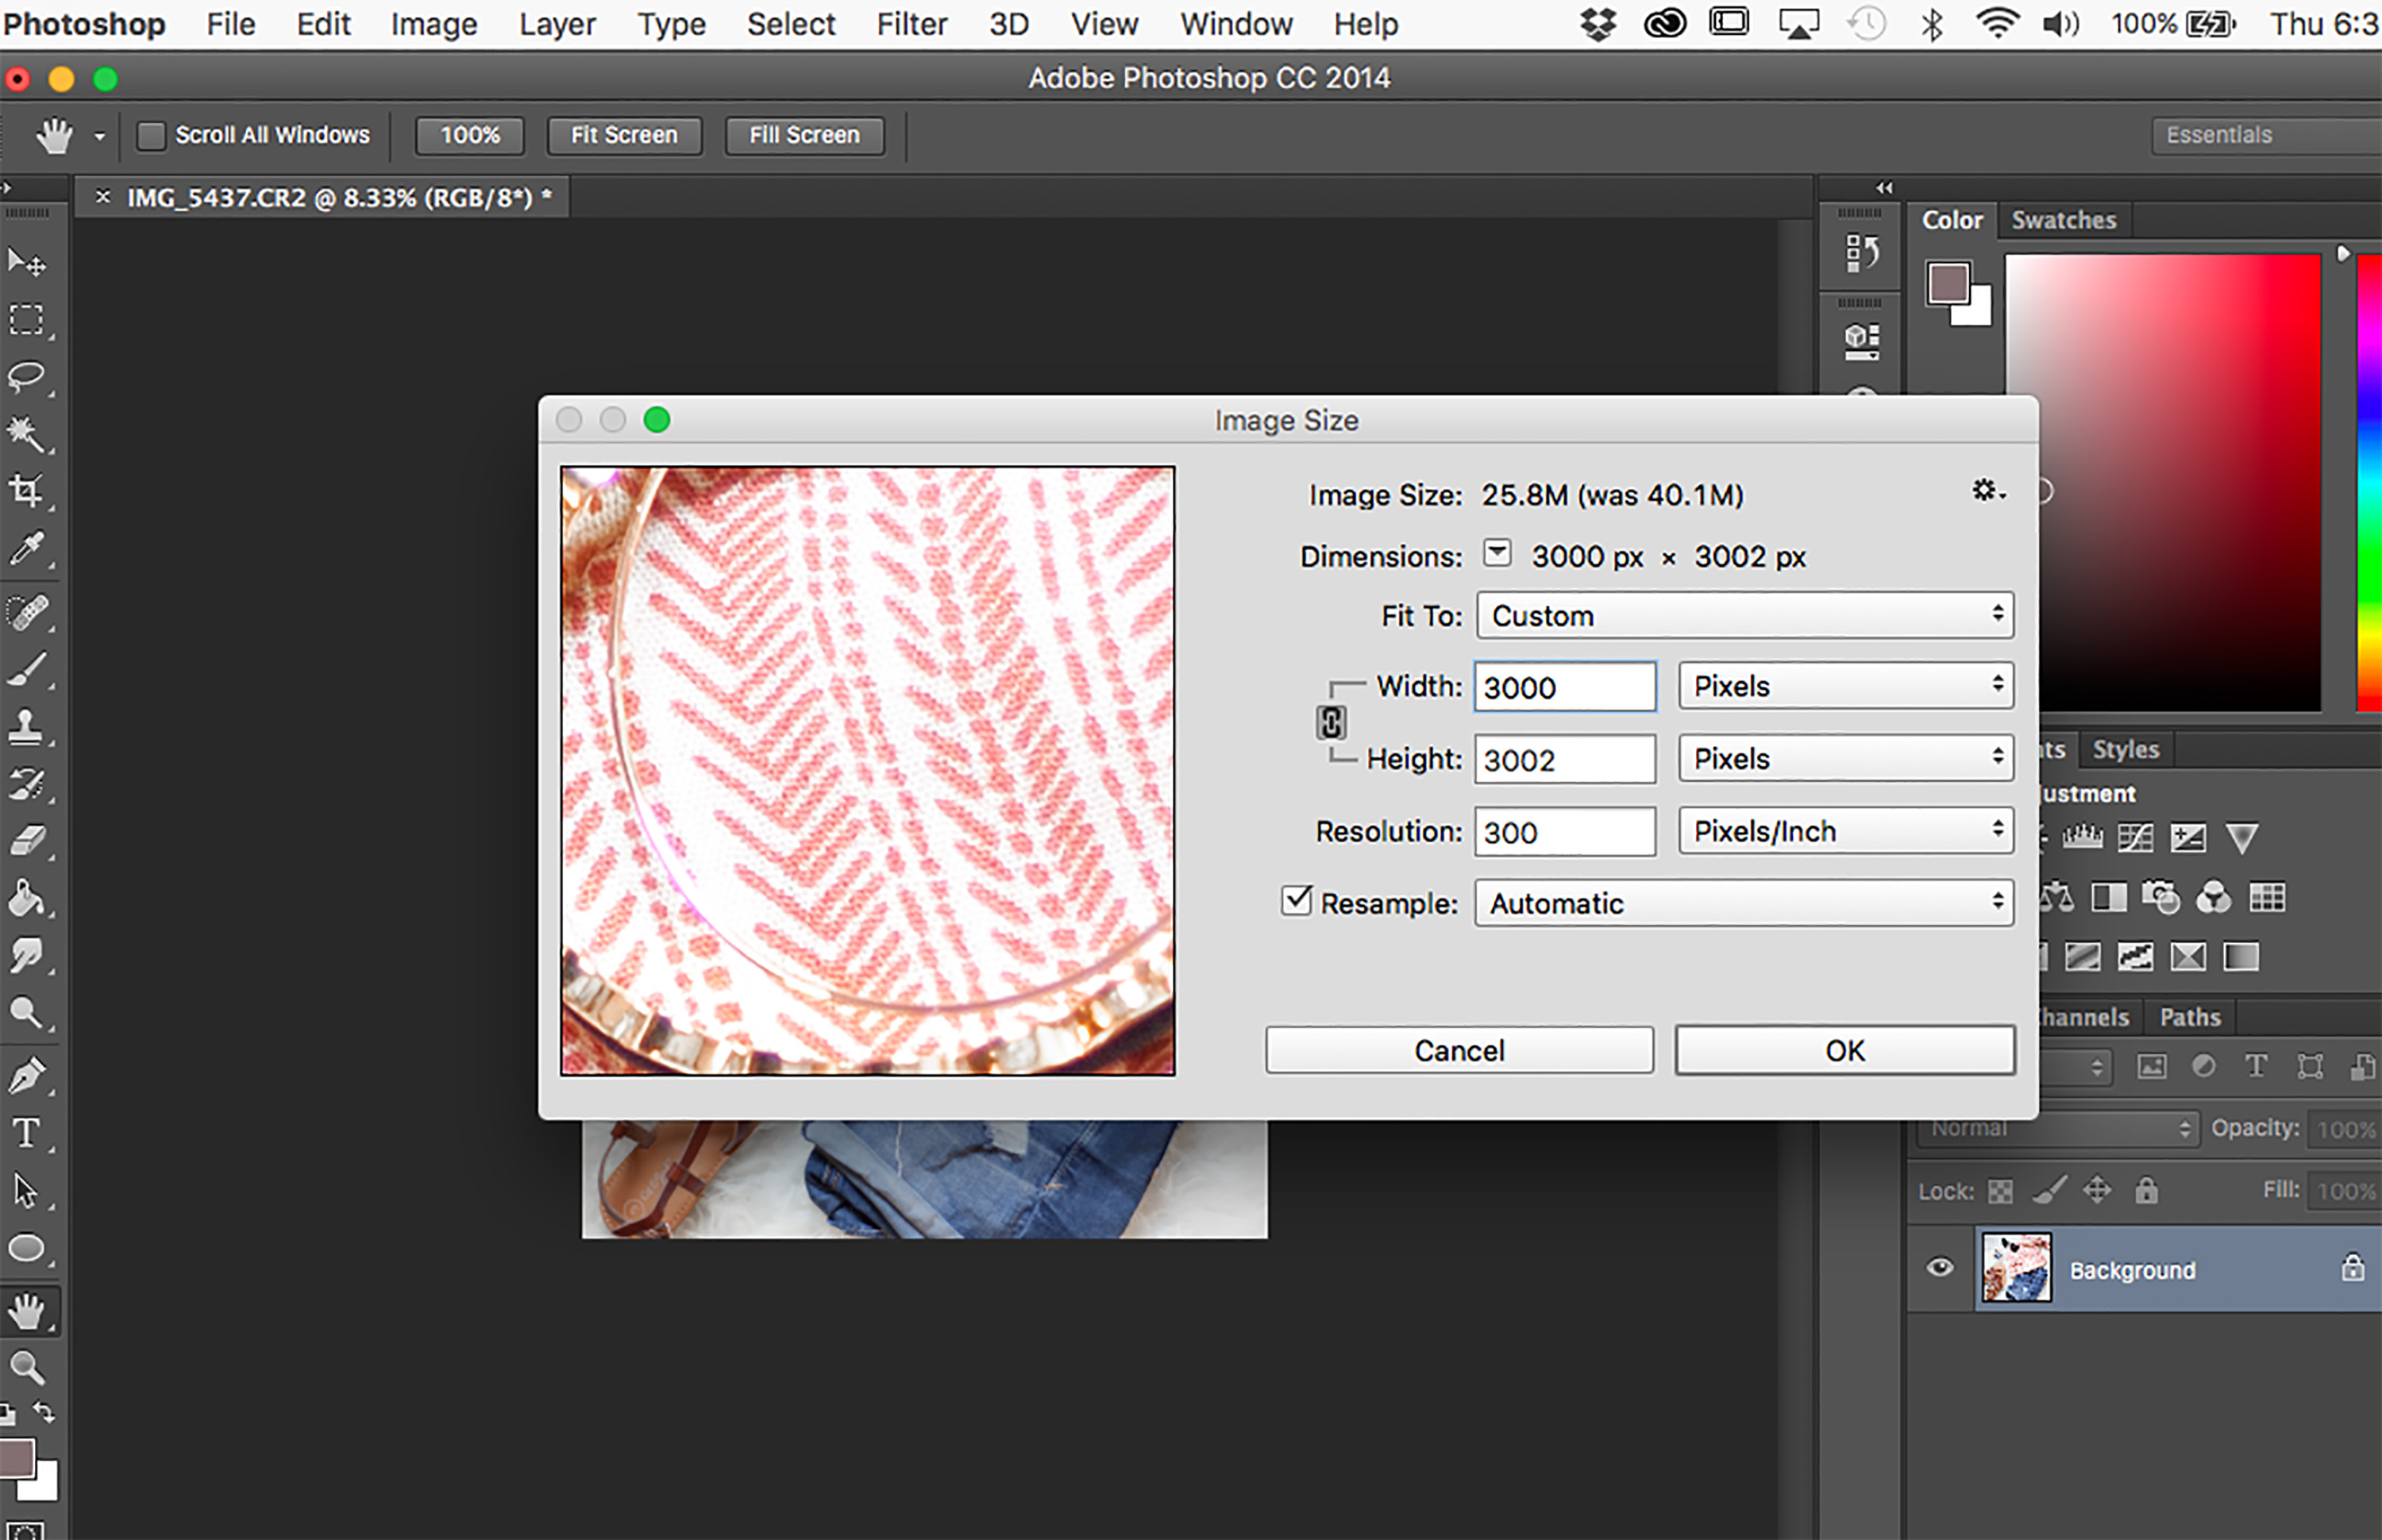
After I finish with the basics edits in Camera Raw, I think click to open my photo in Photoshop. Here, I usually adjust the brightness a very tiny bit and then I crop as needed. Then I size my photo down, but not too small to where it may appear grainy. I prefer to always keep my image width at 3000 pixels.
LIGHTROOM:
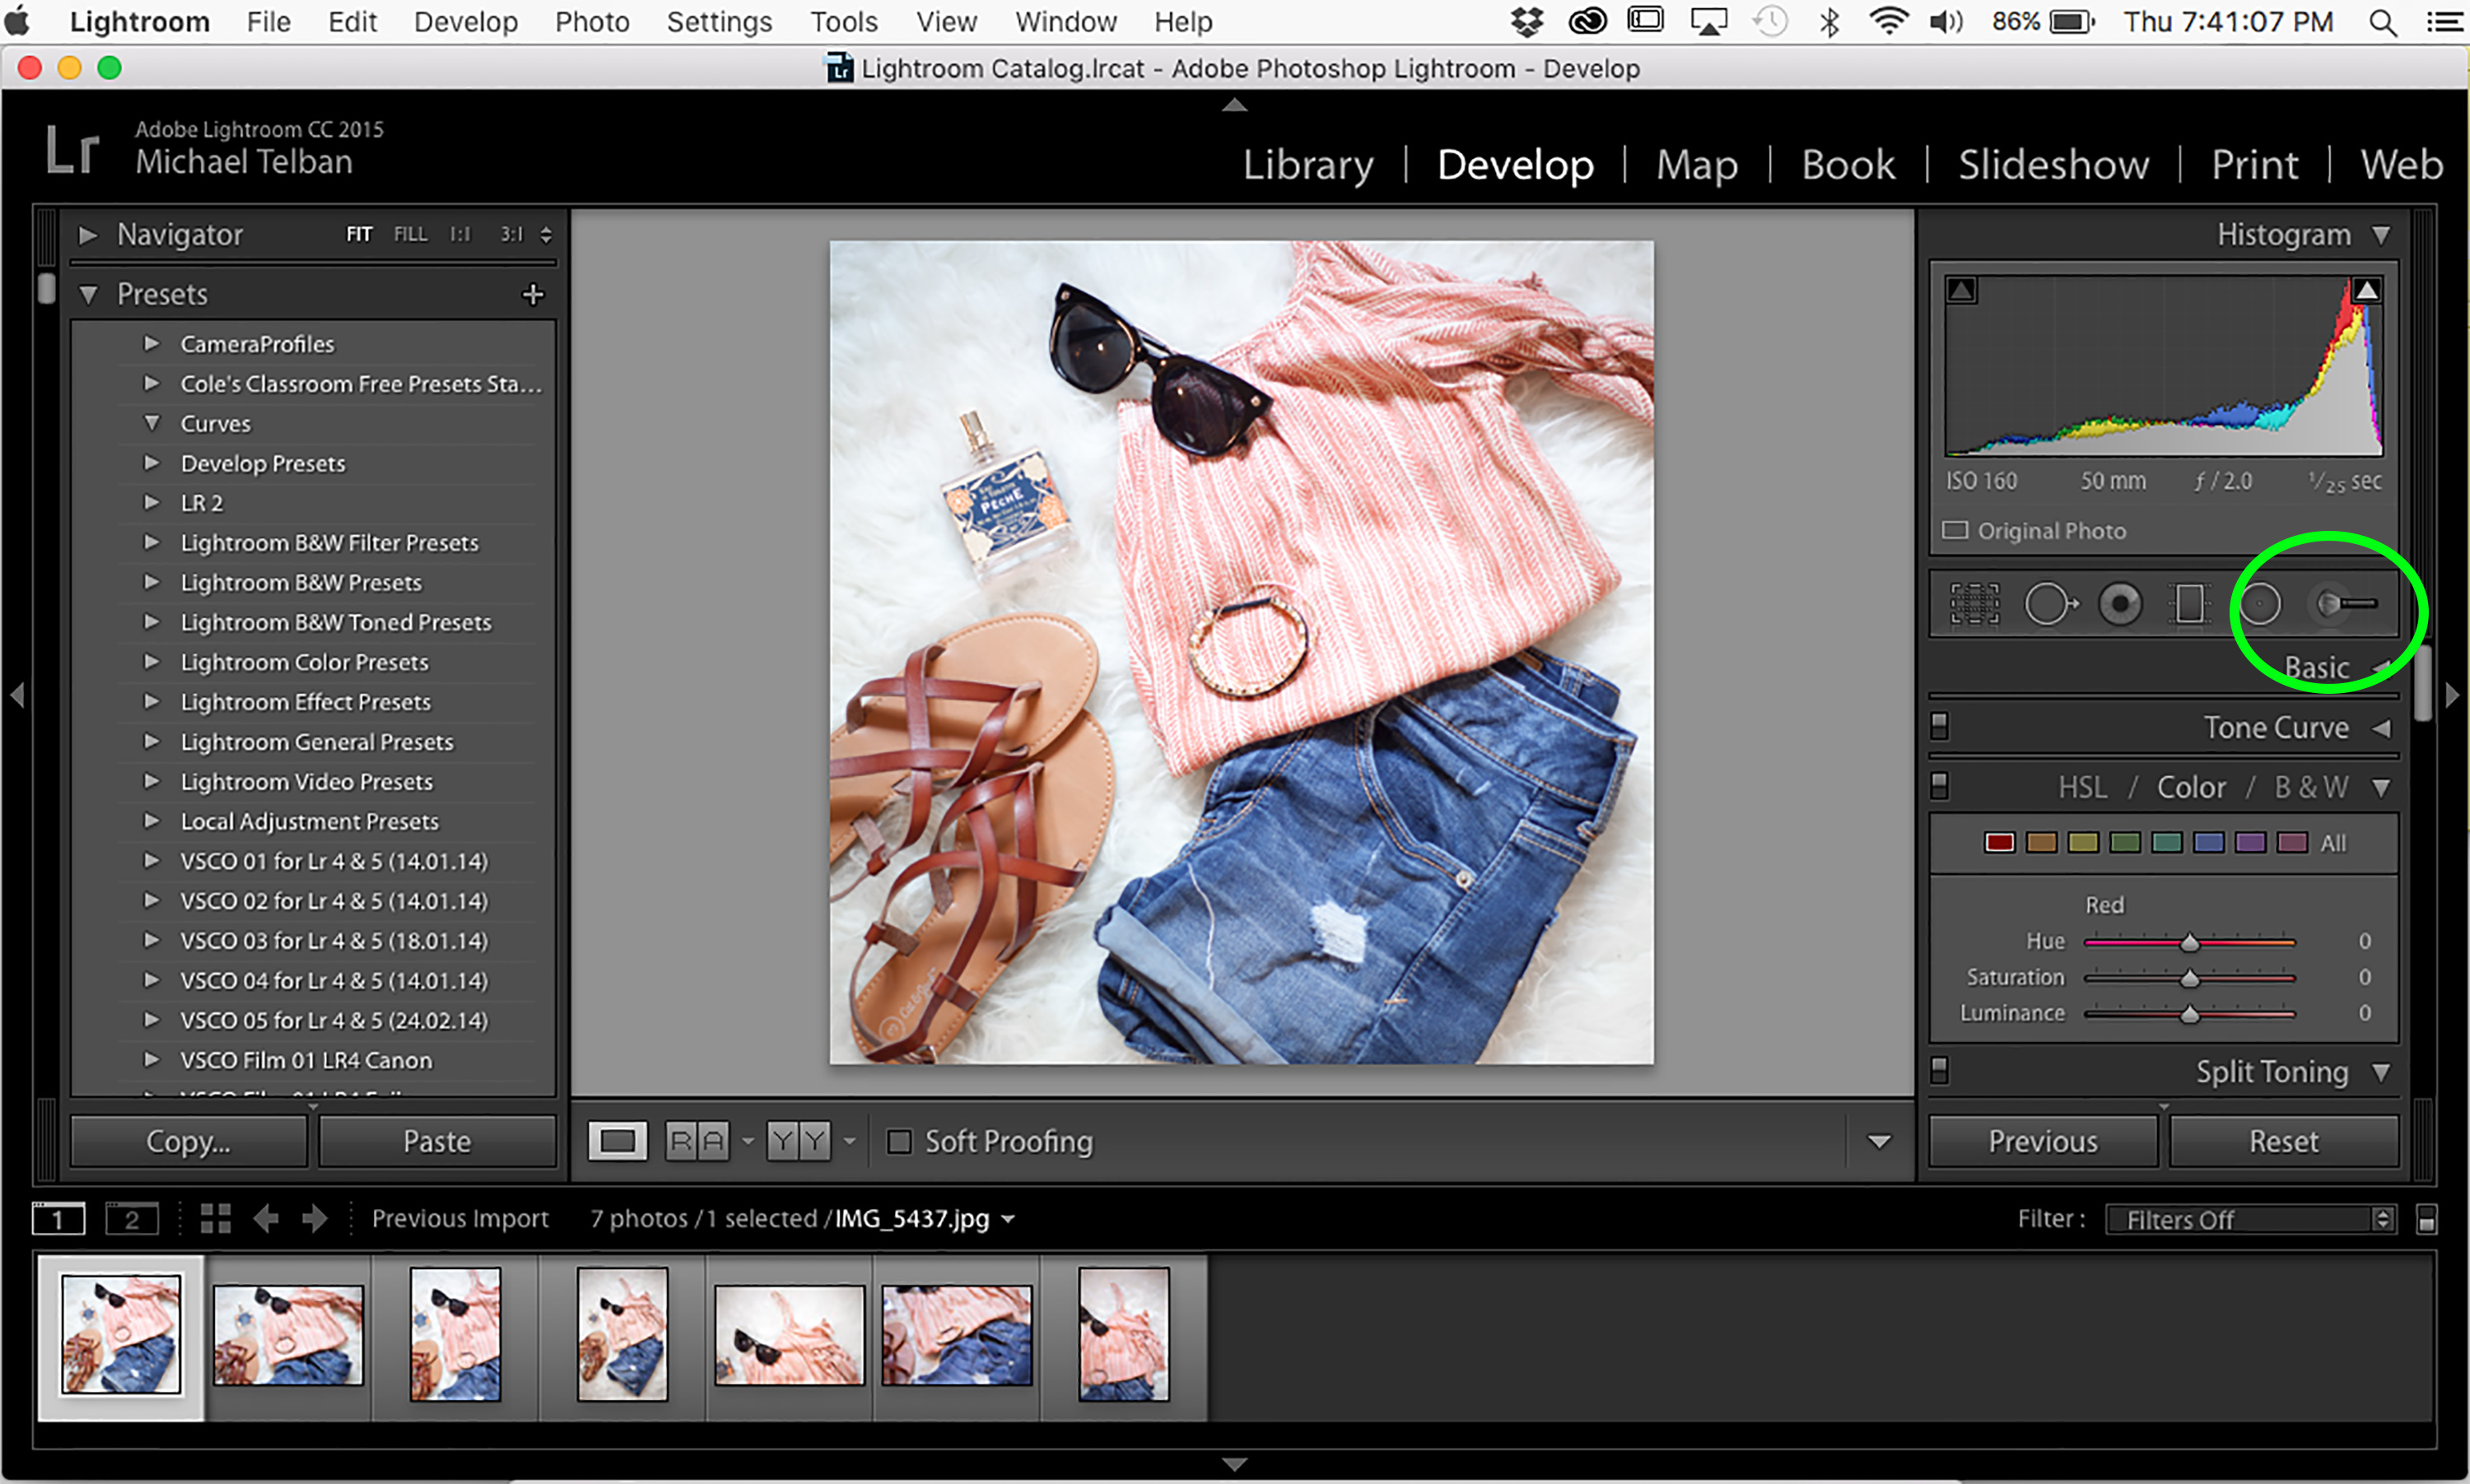
After Photoshop, I then take my photo into Lightroom. I use Lightroom to brighten up whatever white space there is in my photo. To do this, I click the tool that’s circled in the menu bar on the right.
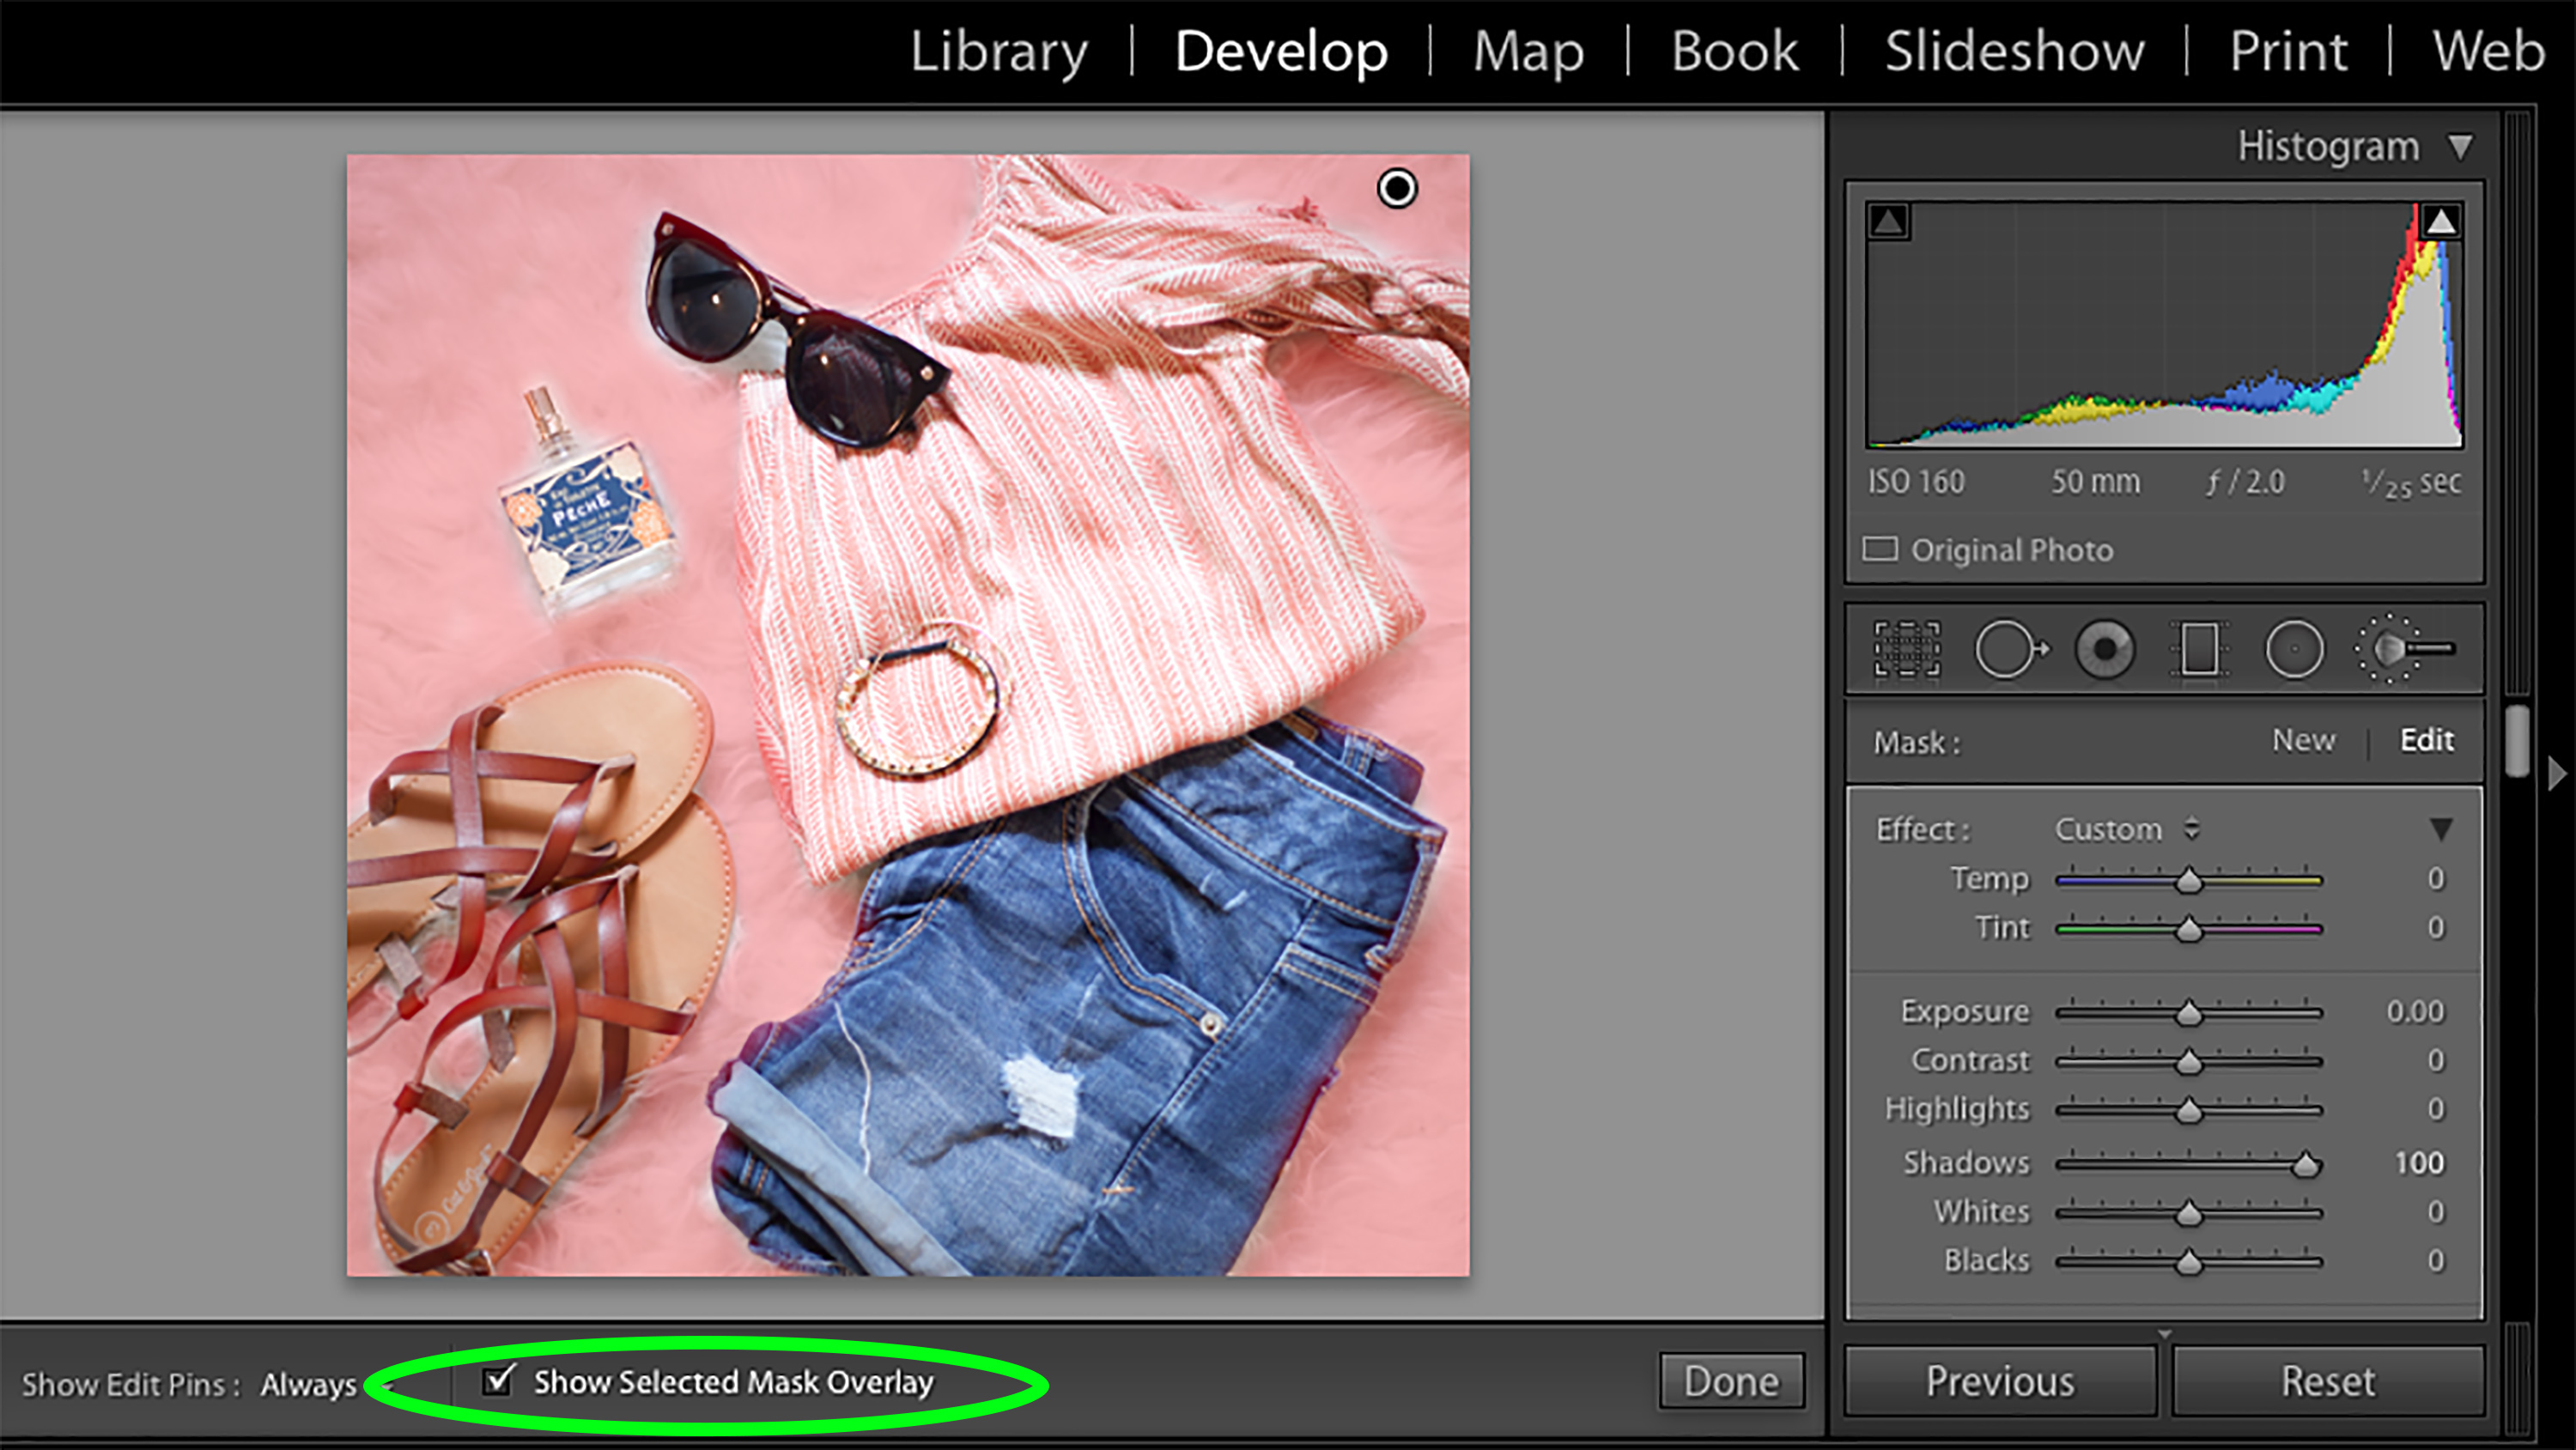
I then use this wand to select all of the white space that I want to take the shadows out of. The easiest way to do this is to click “Show Selected Mask Overlay”, as this will show you all of the white space you’re covering. After I have it all selected, I then un-click the selected mask overlay.
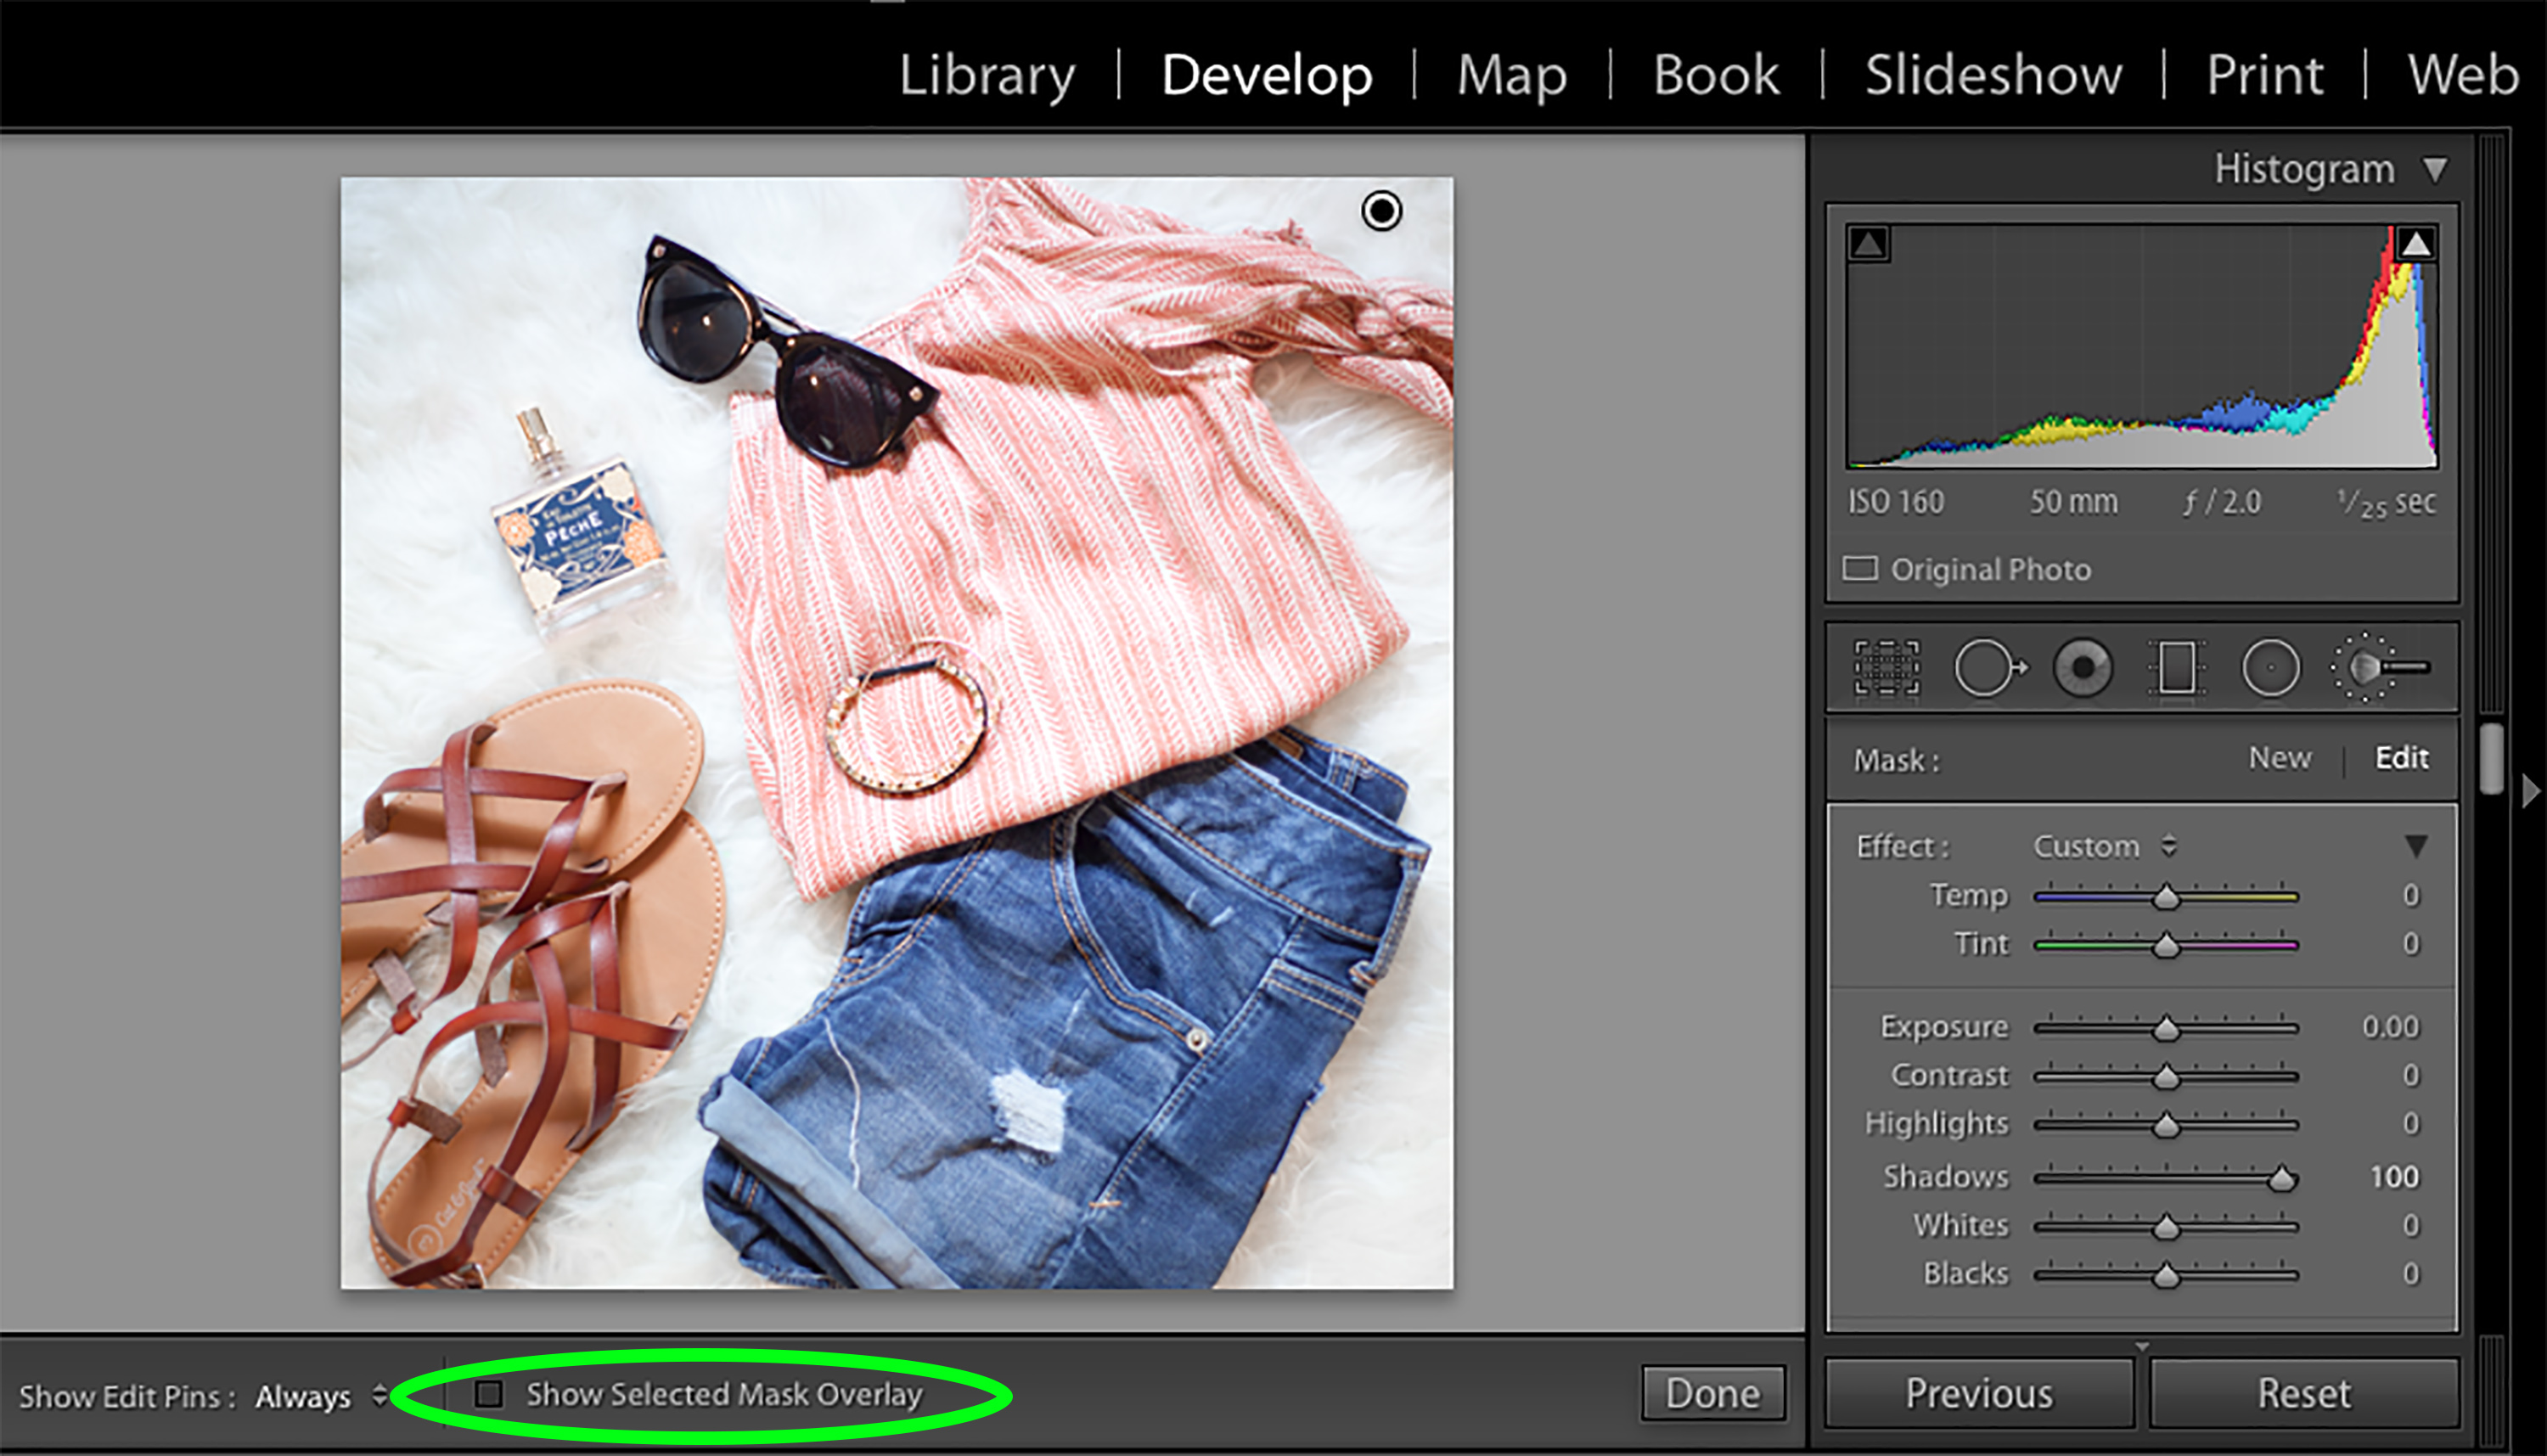
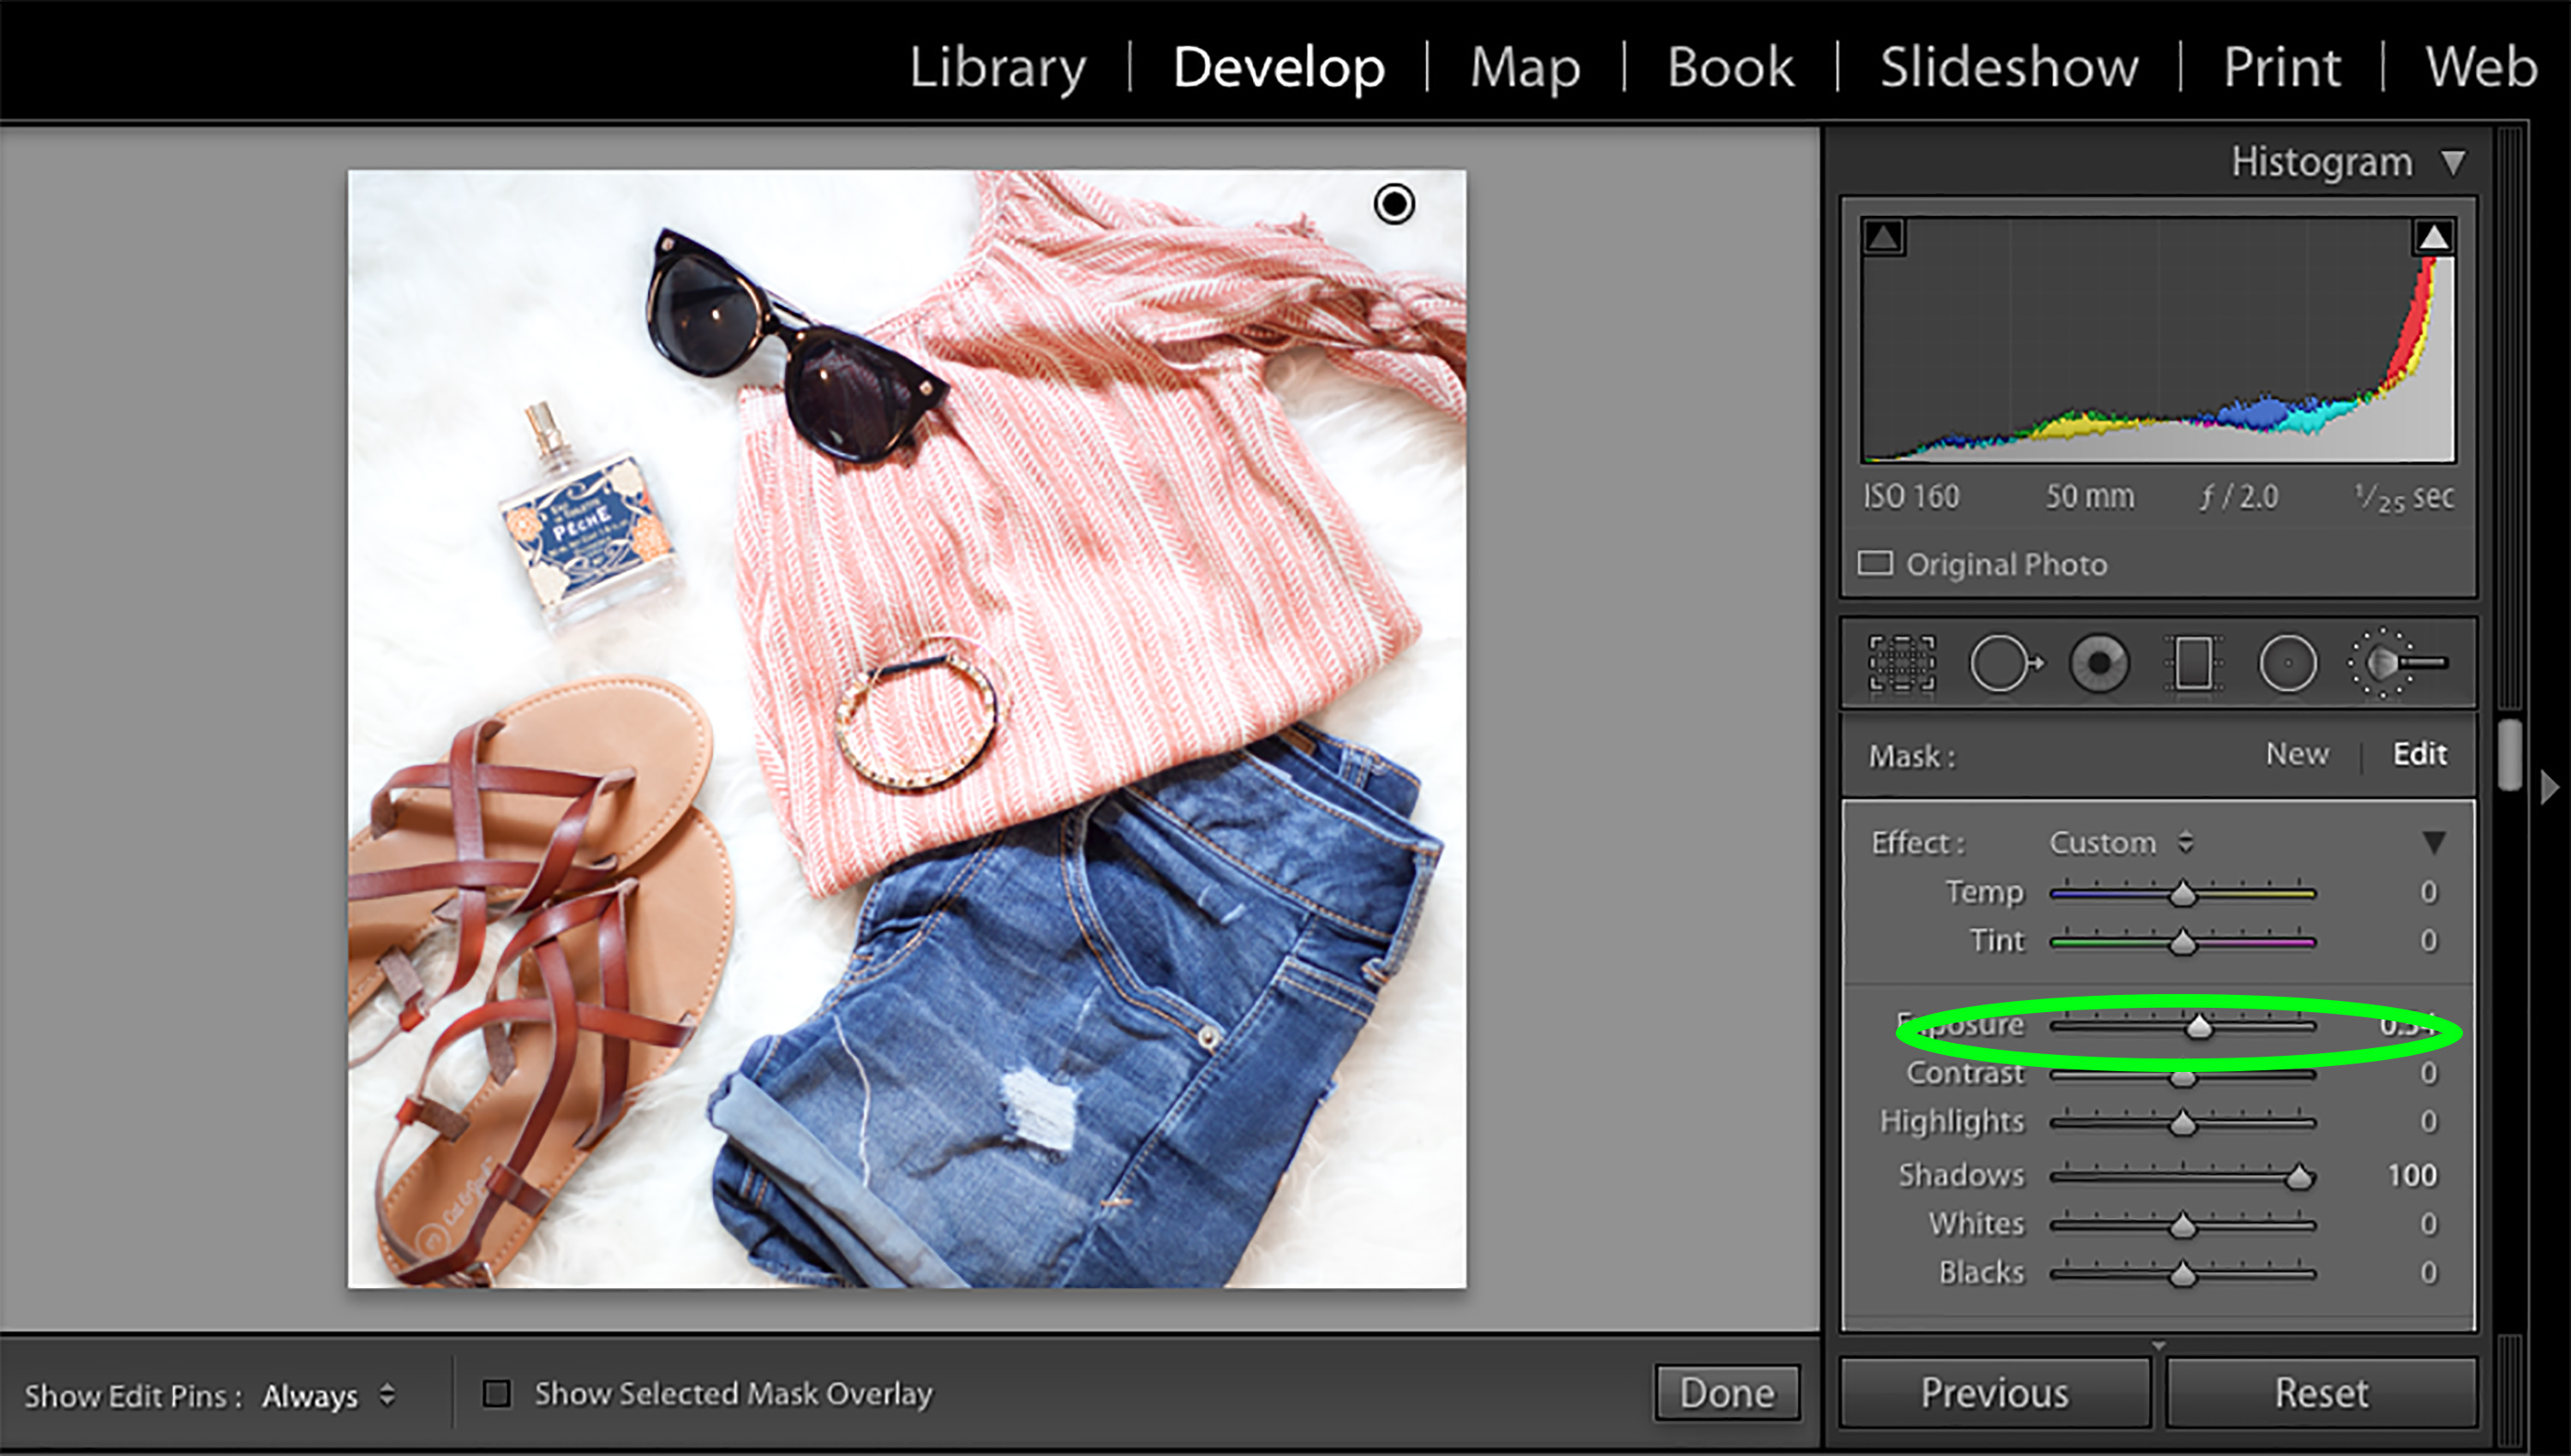
If I need to take more shadows out, then I’ll repeat this step until I’m satisfied. Once I’m satisfied with the amount of shadow removal there is, I’ll then move onto adjusting the exposure.
VSCO:
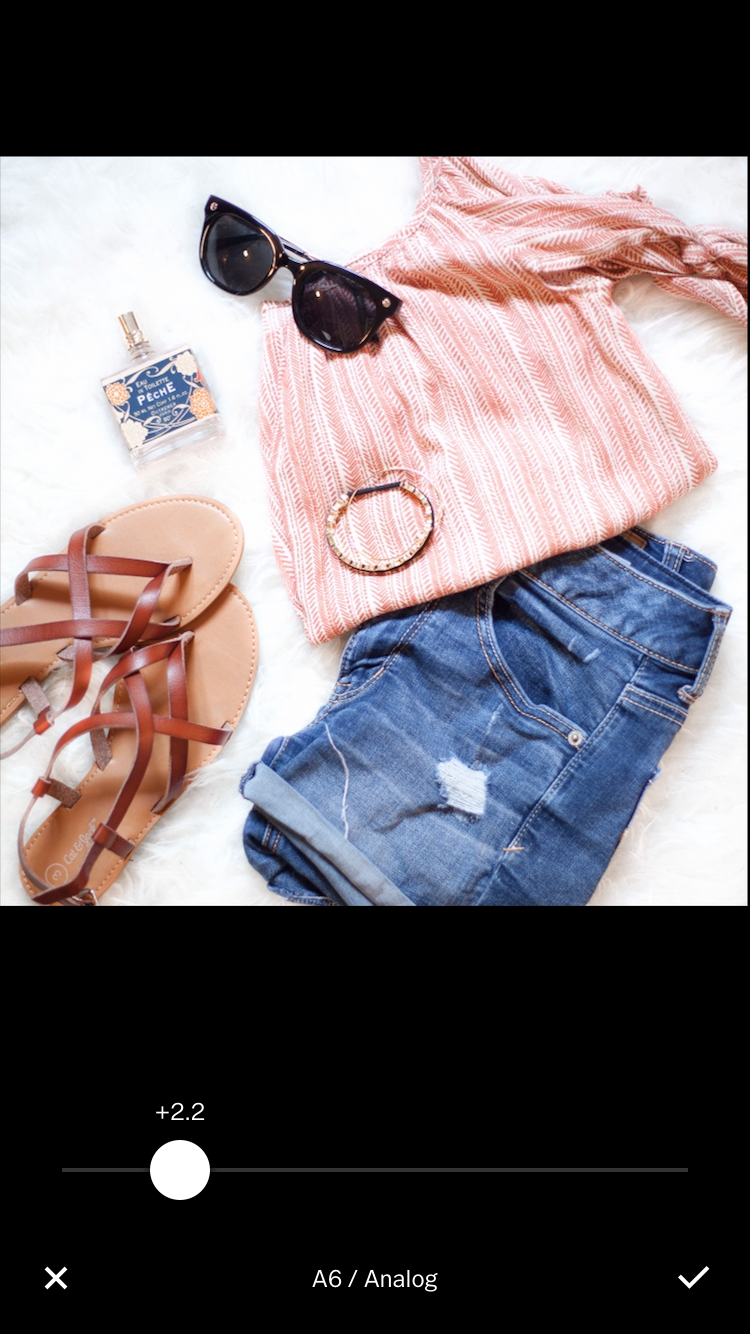
After I export the photo from Lightroom, I then transfer it by Dropbox to my phone. There, I use the VSCO app to edit my photo further. I love VSCO and can’t rave enough about it. The presets (filters) they have are just my style. Over the past few months, the preset I have been using most is A6.
PIXLR EXPRESS:
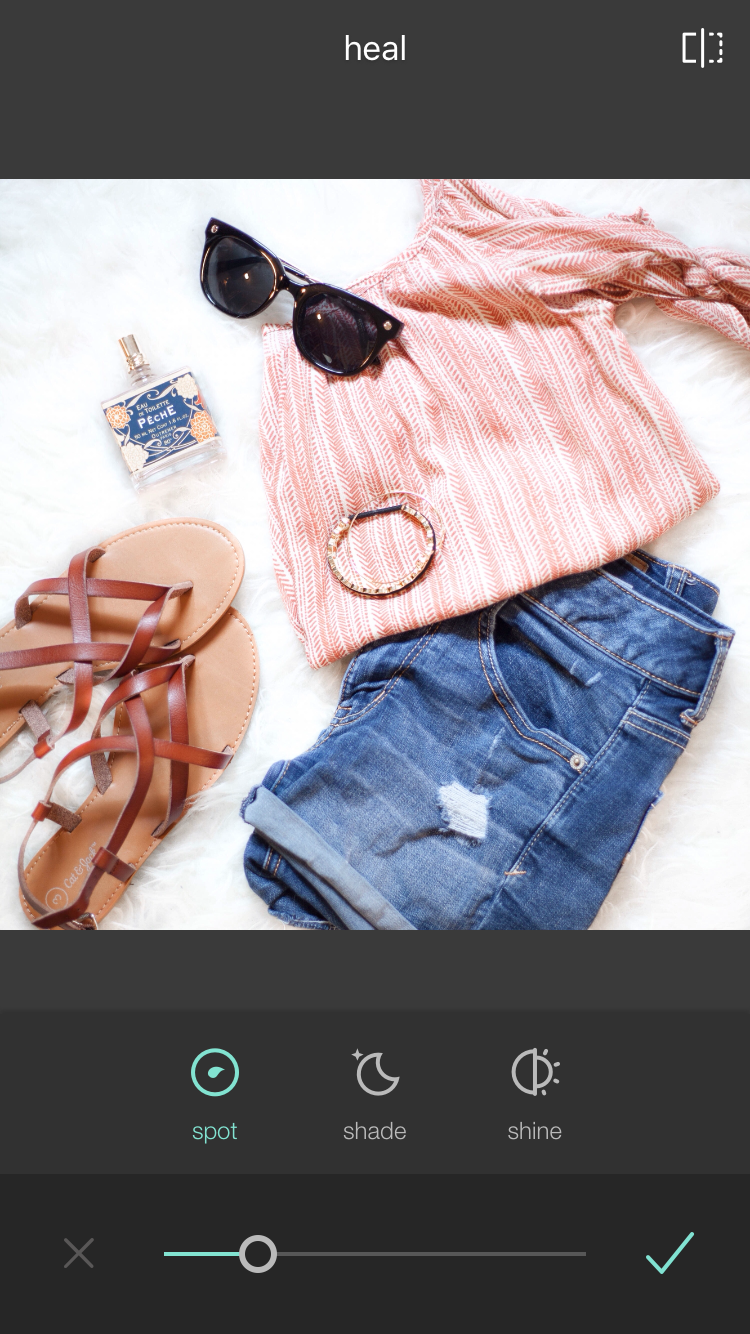
If I ever miss anything that needs a quick healing spot touch up, I turn to the Pixlr Express App on my phone. If you notice on the shorts in the photo above, you can see one random thread just hanging out there. I left that there on purpose, so I could let you in on this quick tip for quick fixes when editing on your phone!
Pixlr Express has a “Healing” tool, which helps to blur and get rid of blemishes and any other random spots. That’s what I used to get rid of the random thread on my shorts.
INSTAGRAM EDITING:
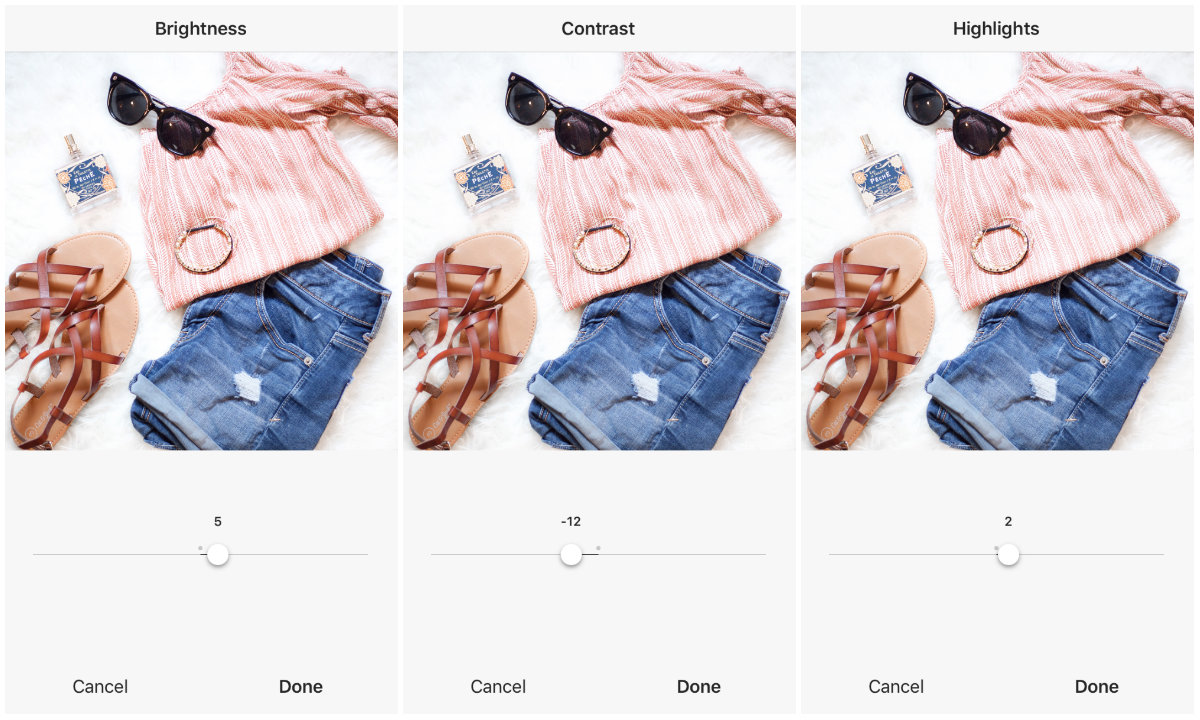
One thing that I’m proud of Instagram for is how they’ve stepped up their editing. You’re able to do a ton of editing right within the Instagram app, which is perfect for last minute touches. I typically boost the brightness and the highlights, and take down the shadows a tiny bit. For this photo, I adjusted the brightness, the contrast, and the highlights. Again, I ever so slightly make these adjustments simply because I still want my photo to look natural.
AND THAT’S A WRAP!
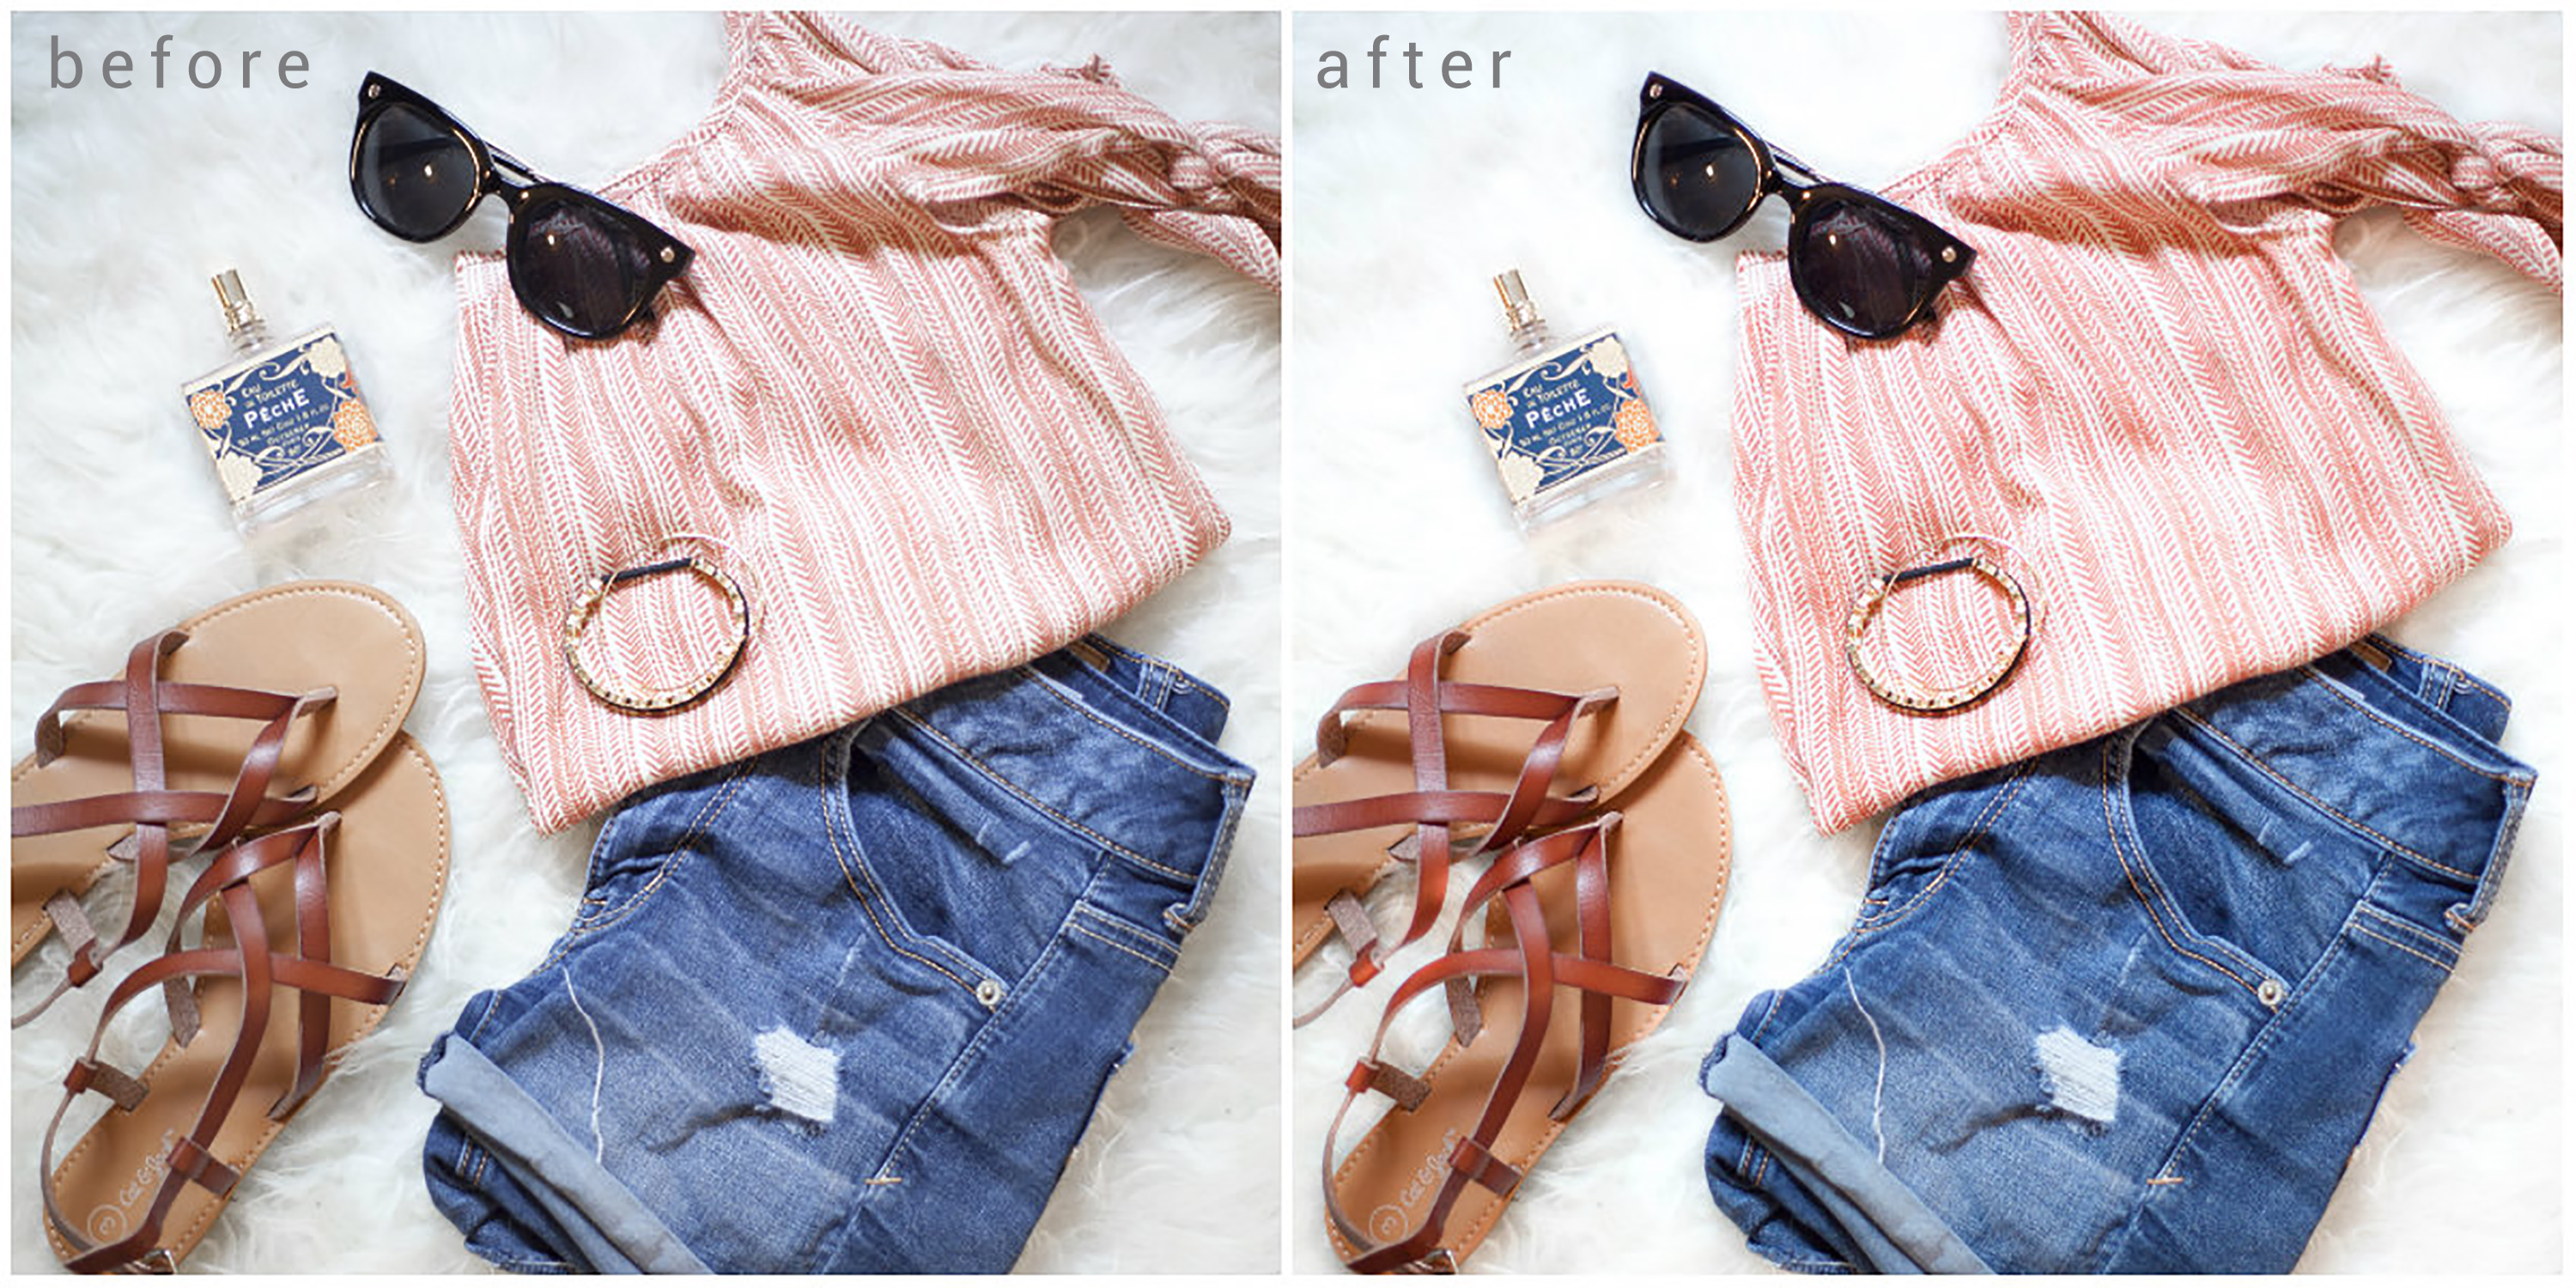
I know it’s a very lengthy process, but it’s pretty much second nature to me. I can fly through editing a photo with this process in 5 minutes.
What are some of your specific questions as to editing photos for Instagram? What kind of aesthetic are you aiming for? Let’s chat!
Let’s connect! >> Facebook | Instagram | Twitter | Pinterest | Snapchat

