In early November, Pinterest rolled out a new feature that has been long requested by its users: Sections. Over the weekend, I finally put in the time to using this new feature for my blog’s Pinterest board.
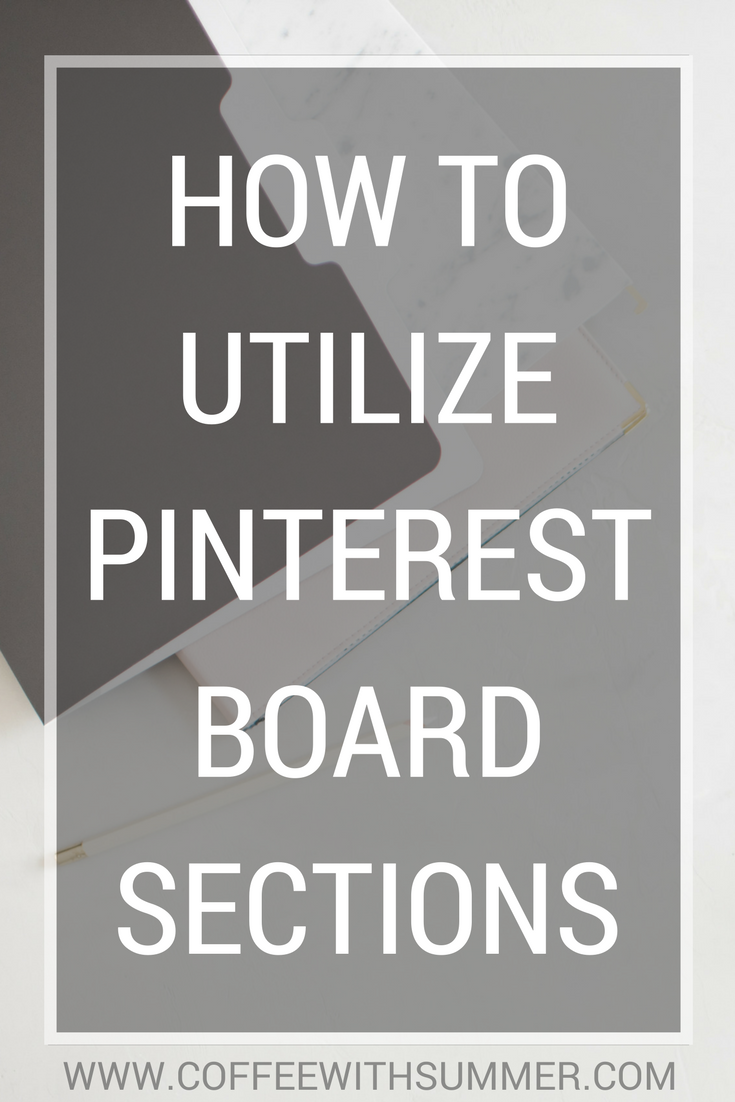
Pinterest’s board sections is a great tool that all bloggers need to take advantage of, especially for their blog’s Pinterest board. Before using the sections option, all of my pins were all scattered throughout my blog’s board. From blogging and social media tips to self-care, all of my pins were in one location. I had over 700 pins on my blog board, so you can imagine how hard it was to find a specific pin if I needed it, never mind how hard it was for my followers.
[bctt tweet=”How To Utilize Pinterest Board Sections” username=”SummerTelban”]
Sections open up the door to better organize your pins by category. For me, I now have 10 sections under the umbrella of my blog’s Pinterest board. This has been so helpful to me and I can only imagine how helpful it’ll be for my followers when they’re looking for a specific pin in a certain category.
Today, I’m sharing a step-by-step tutorial with you on how to create sections within one of your boards. It’s pretty easy, but I have learned some hugely helpful tricks that’ll help make the process faster for you!
HOW TO MAKE PINTEREST BOARD SECTIONS:
STEP ONE: Go to your blog’s Pinterest board and write down on a sticky note what sections you want to organize your board into. If you’re a lifestyle blogger, chances are, you’re going to have more sections to organize. If you have more of a focused niche, like beauty, you’ll want to organize into more specific sections.
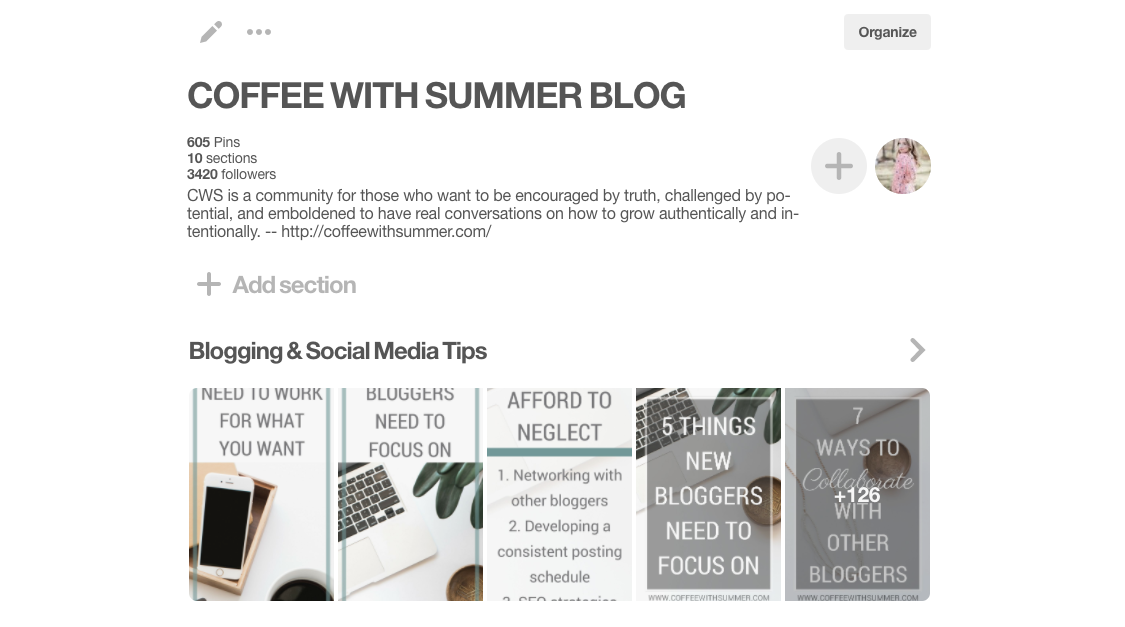
After you’ve written down your list of sections, list them again in the order you want them to be displayed on your board. Then, create them in that order.
You want to create them in order of importance because there isn’t an option to move the sections after they’re created. I’m sure this is something that Pinterest will improve in the future.
Learn from my mistake: I made the mistake of creating sections on a whim, which wasn’t in order of importance. So, this meant that my most important sections weren’t towards the top as I’d prefer them to be. Blogging, fashion, and self-care are my main categories, so it was key that I had those sections closer to the top of my blog’s board. I literally had to go through and redo most of my sections until they were in the order that I wanted. Such a headache, haha.
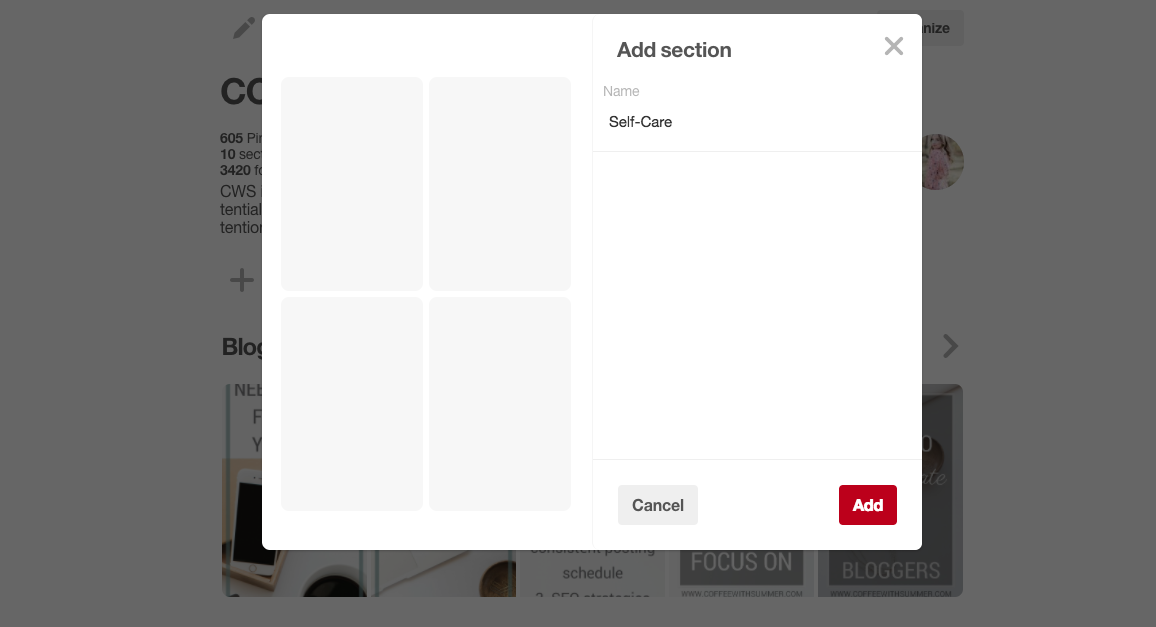
STEP TWO: After you’ve clicked “Add Section”, make sure you give it a searchable name. A searchable name is straight-forward, not something witty. While witty is cute and fun, it’s not searchable, so you’re losing out on potential reach. Instead of naming your fashion section “To Wear”, name it “Fashion”.
STEP THREE: Then, scroll down to where all of your pins are. There, you’ll see the “Organize” button. Click it and it’ll pop up another menu of choices.
The best way to organize your pins into sections is to use the “Move” option.
Learn from my mistake: So, here’s a laugh for ya! I spent over 5 hours putting my pins into sections. Instead of realizing there was a mass “move” option, I literally went in and edited every pin and moved them from there. YEAH. A huge time waster, haha. It wasn’t until I was finished that I discovered the nifty little “move” tool.
If you don’t have hours to waste, I recommend using the “move” option. It allows you to move up to 50 pins in one sweep. 😉

STEP FOUR: After you’ve clicked “Organize”, all you have to do to select a pin to move is to click on it. It’ll highlight red around the borders of the pin.
Related reading: How To Create Branded Pinterest Board Cover Images
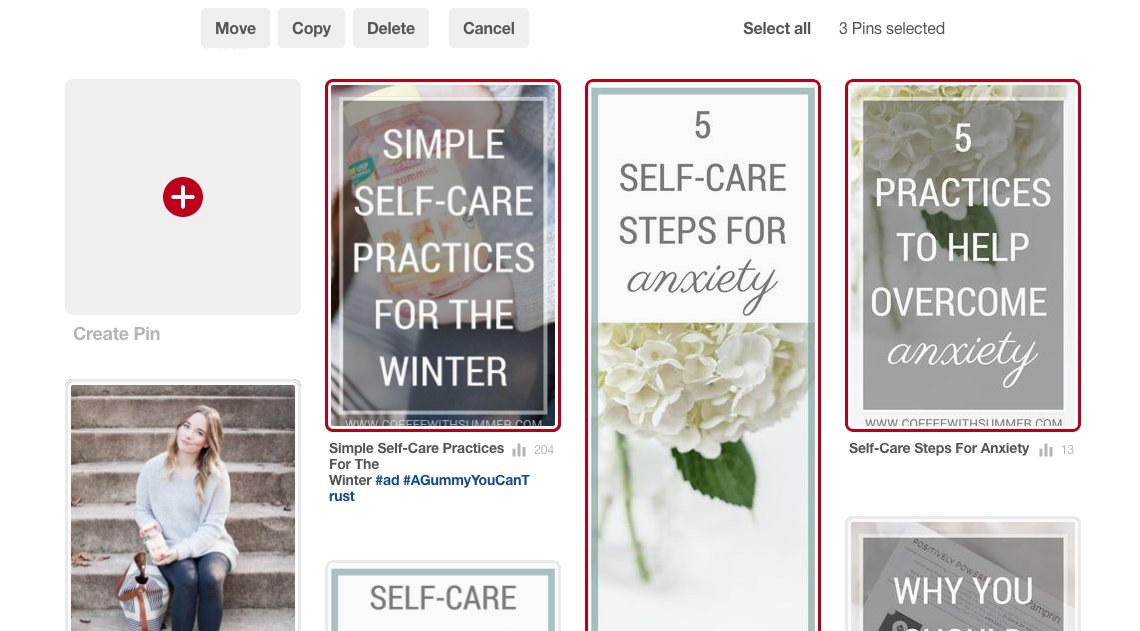
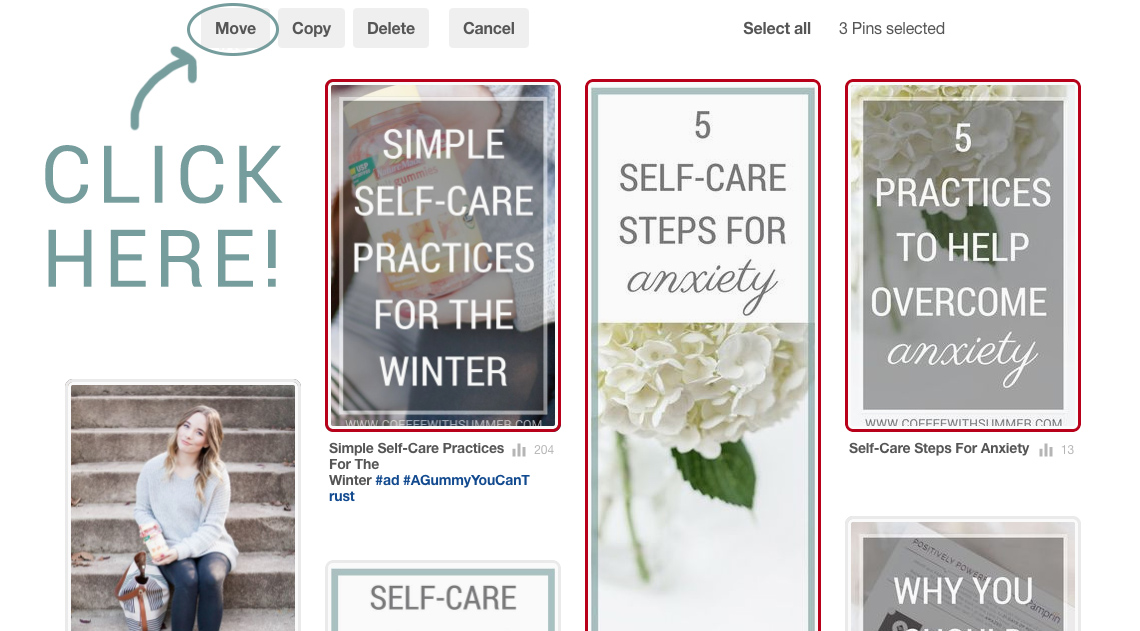
STEP FIVE: Once you have all of your pins selected, click “Move”. It’ll pop up with your board sections, making it easy for you to move it.
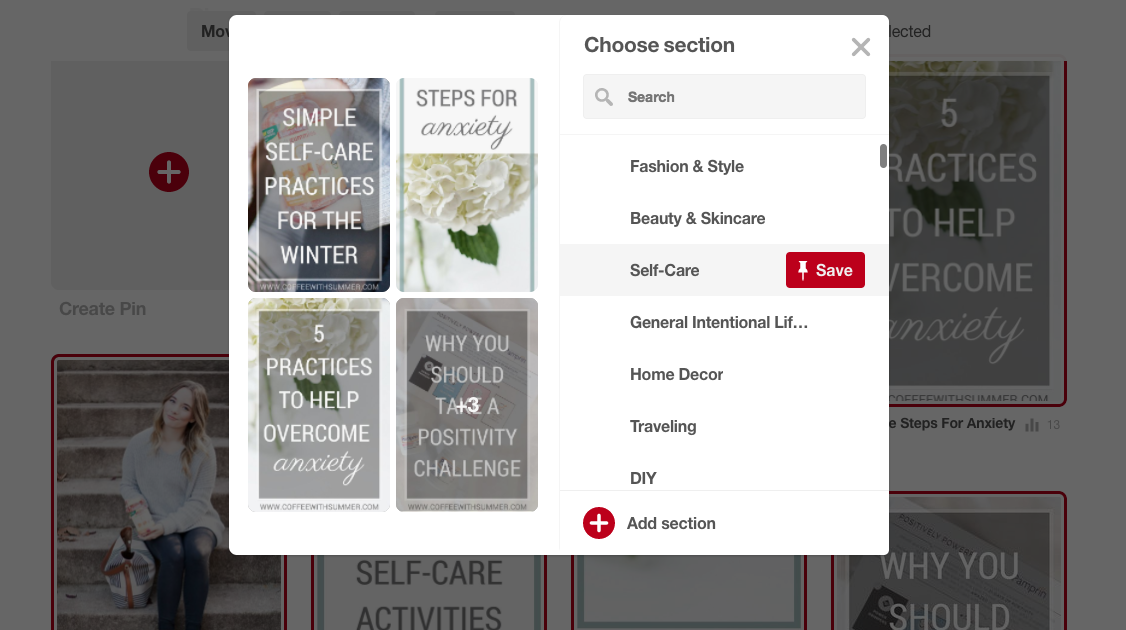
AND THAT’S A WRAP! Repeat these steps as many times for as many sections as you need to.
[bctt tweet=”How To Make Pinterest Board Sections (Step-By-Step Tutorial)” username=”SummerTelban”]
Another great perk other than the organization of sections is that it gives you the change to really clean out your pins. Any pins that don’t have repins, delete them. Any pins that are old and outdated, delete them. I felt so refreshed after organizing my pins into sections.
CLICK HERE TO SEE MY PINTEREST BOARD
I hope this is helpful for you! Please, let me know if you have any questions. I’d be glad to help further. 🙂
Have you organized your blog’s Pinterest board into sections yet? If not, is it now on your to-do list? Let’s chat!!
Let’s connect! >> Facebook | Instagram | Twitter | Pinterest

