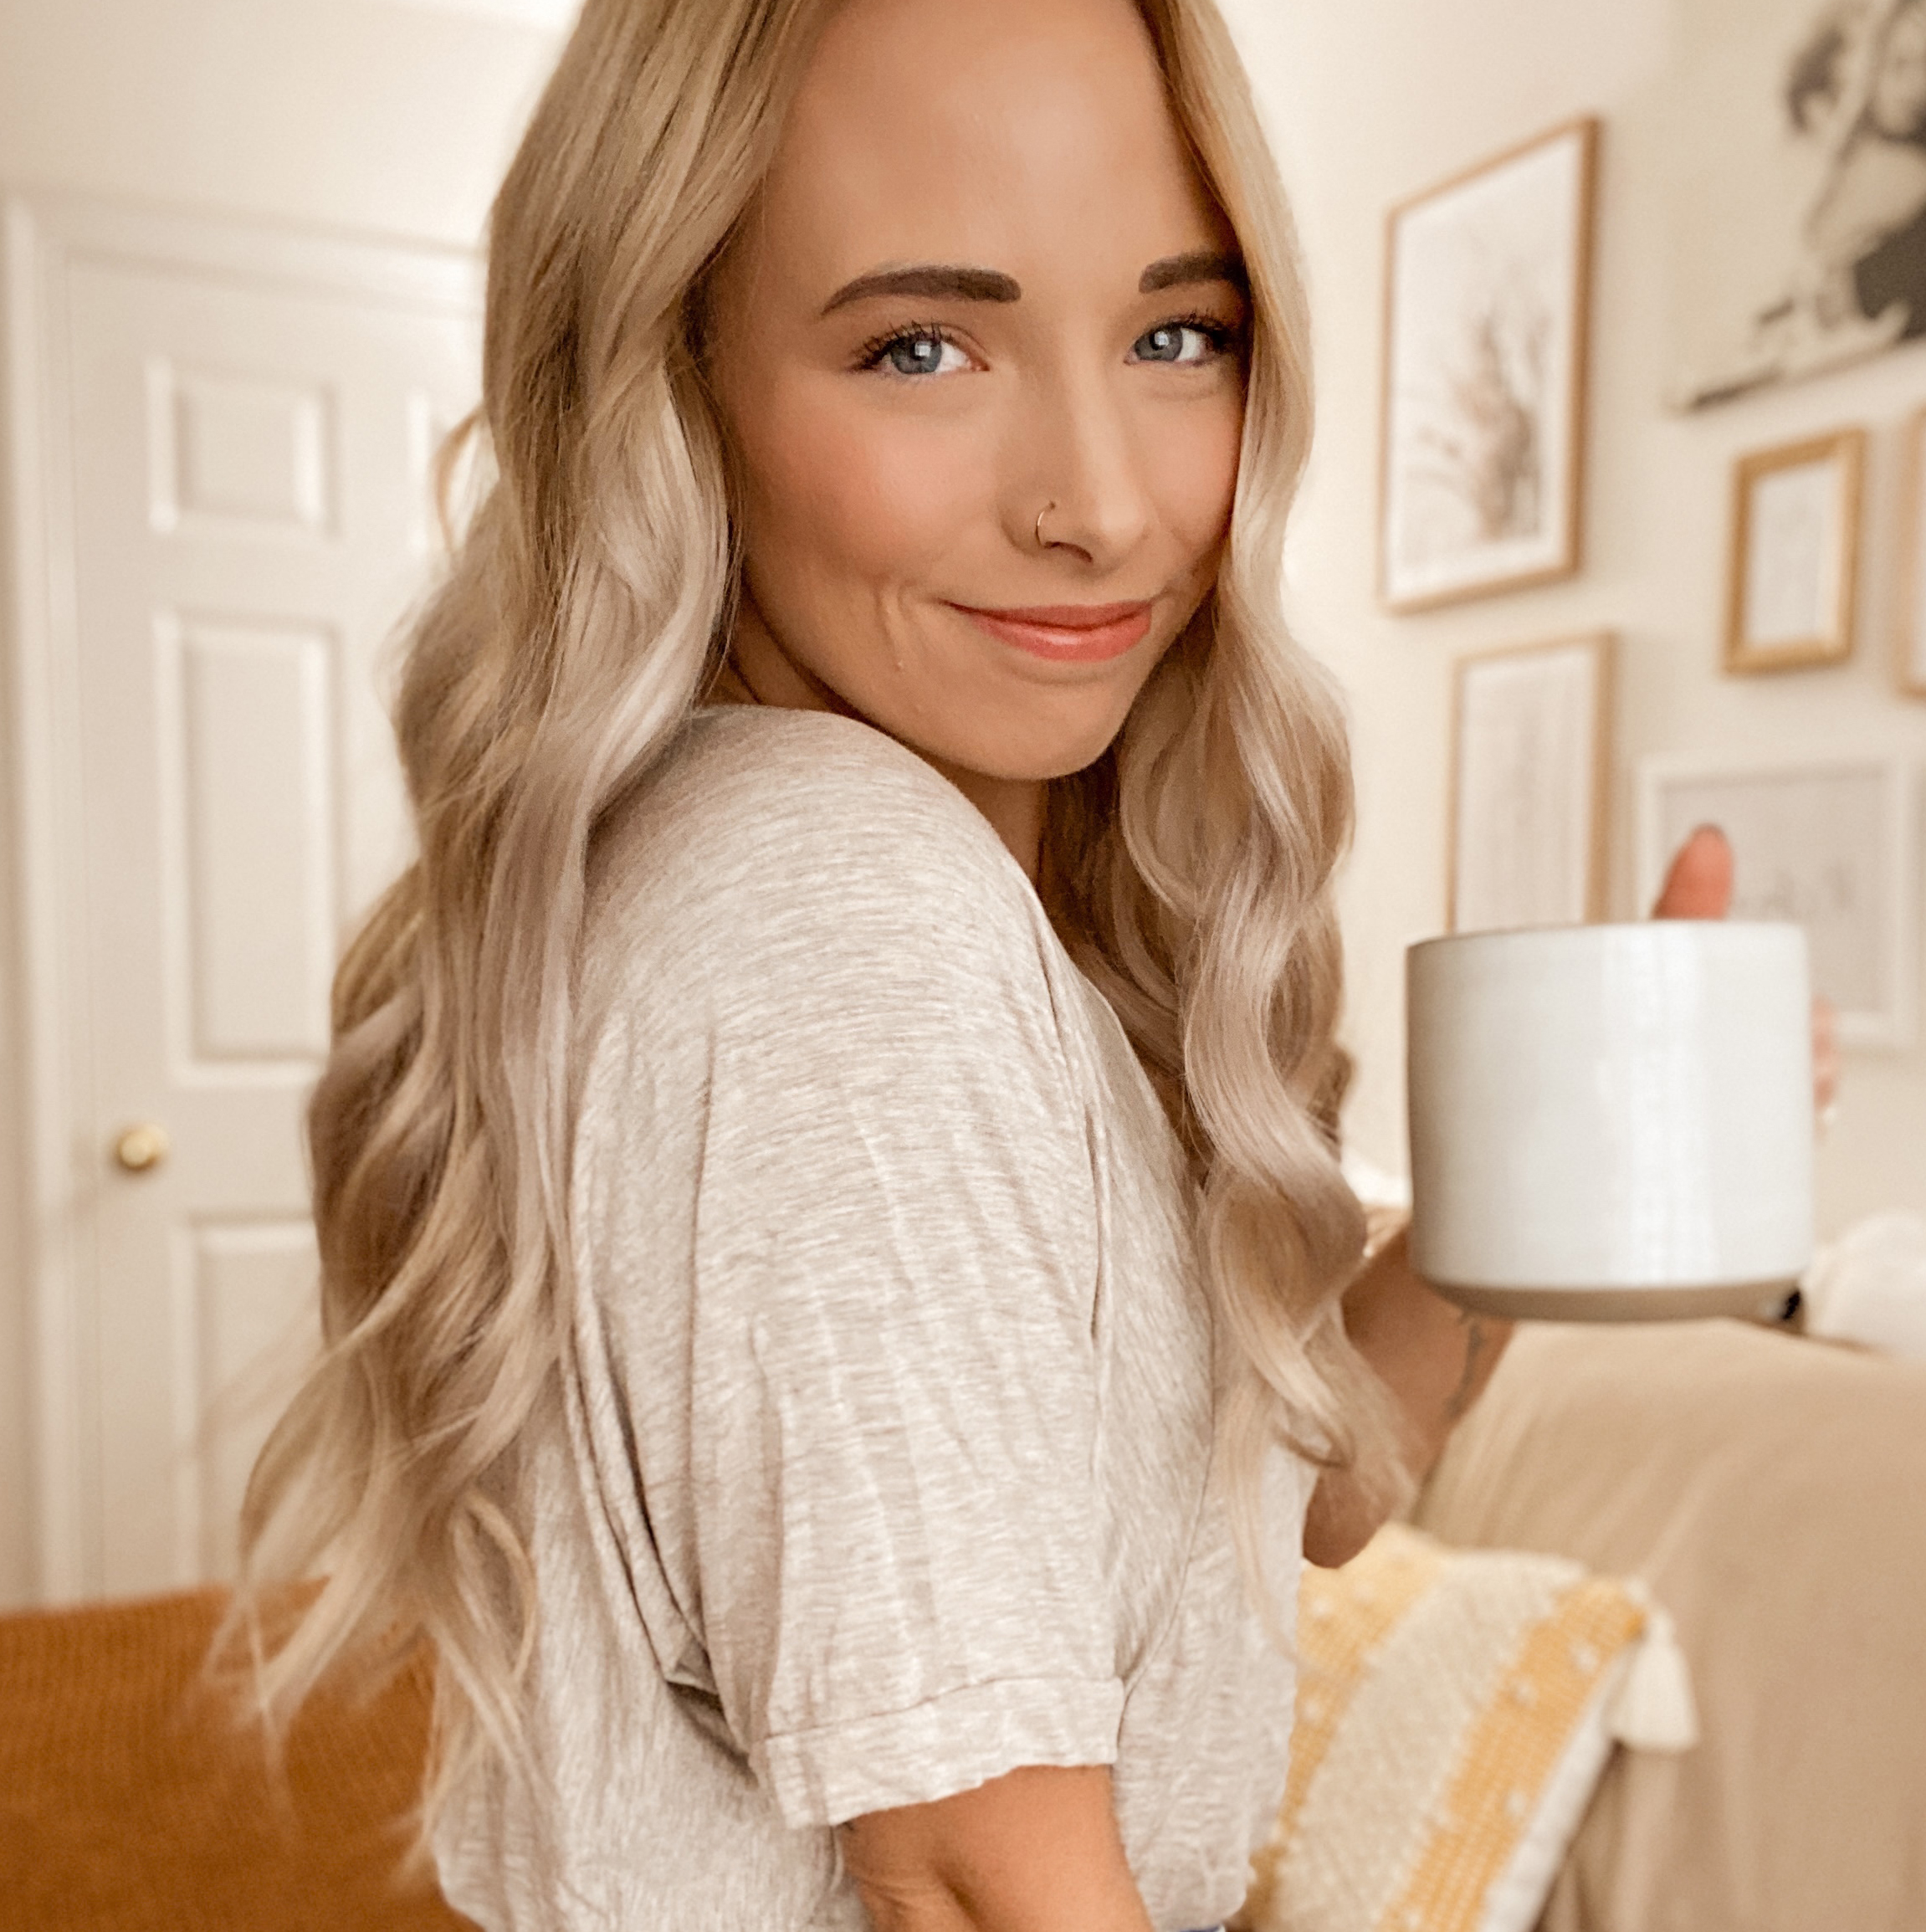
Hey there, mamas! Ever since I shared one of Taya’s 6-month milk bath photos the other week on Instagram, I have had some mamas reach out asking for tips…
… and since this photoshoot didn’t go *exactly* the way I had planned it, I figured I’d share my experience and give some tips on what I learned!
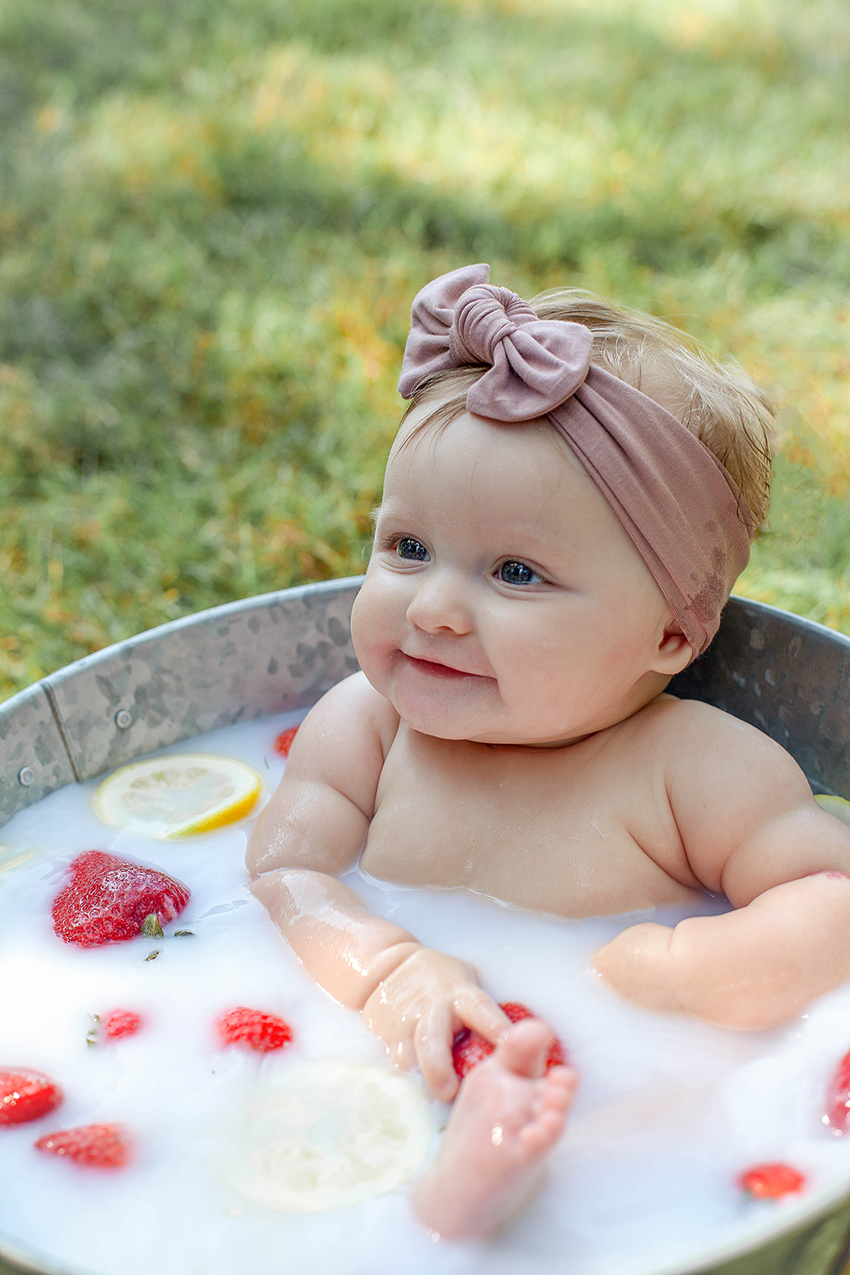
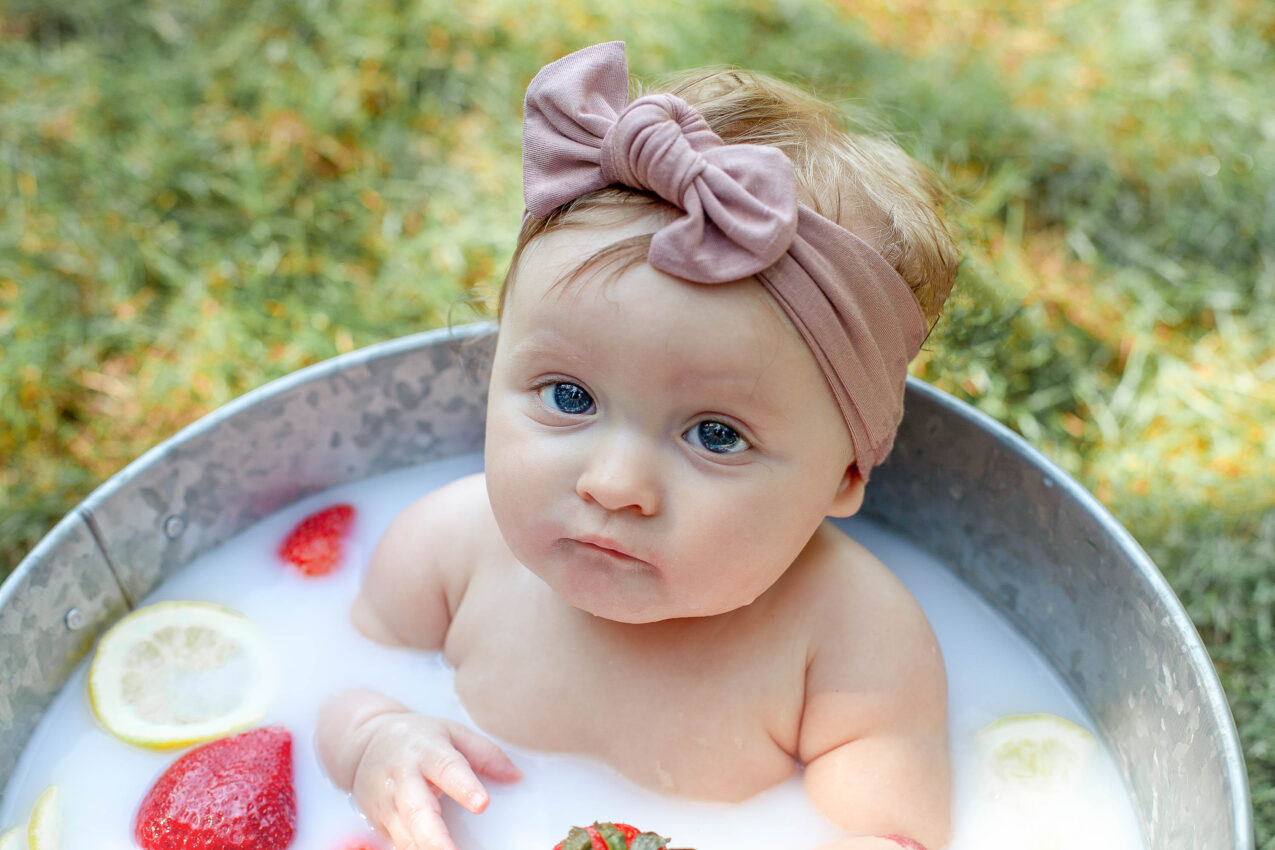
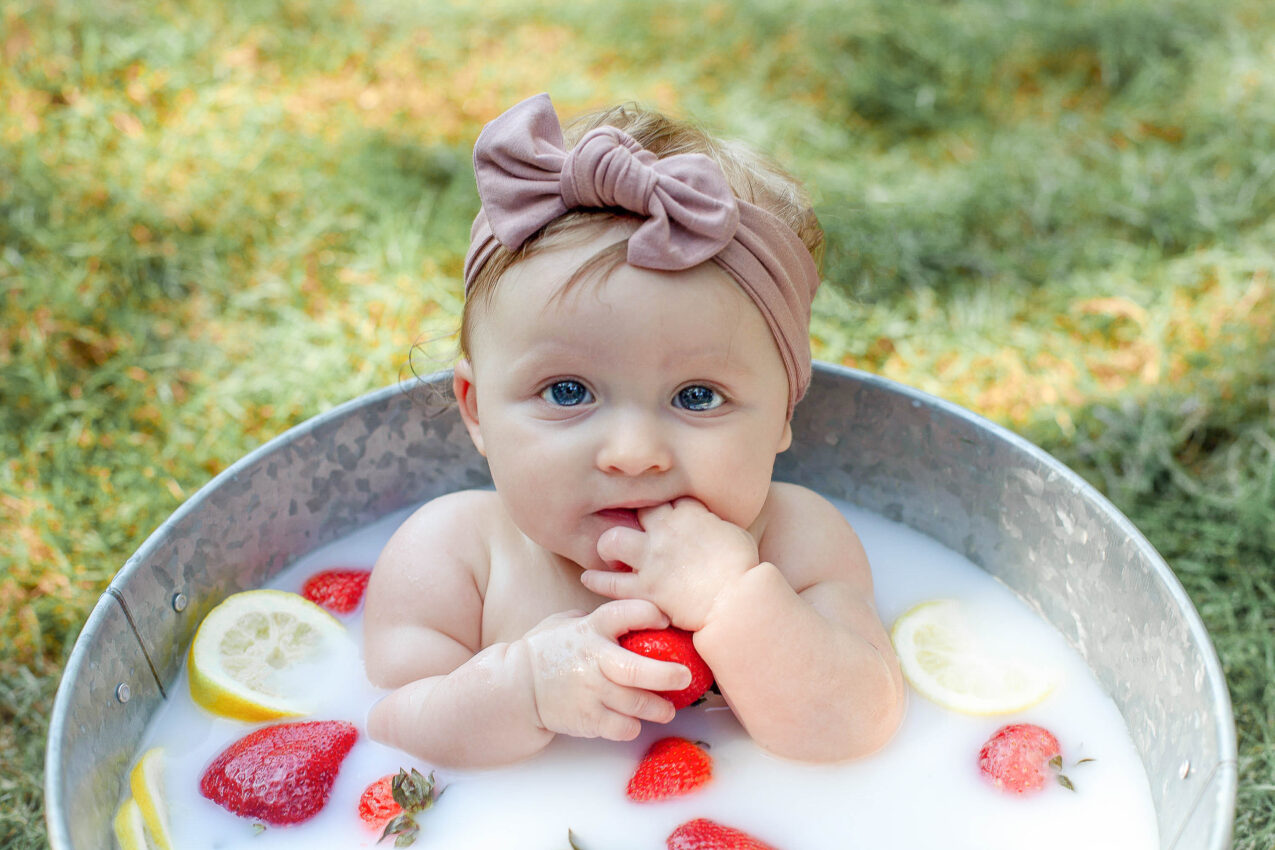
I knew that I wanted to do a milk bath photoshoot when Taya turned 6 months old because 1. hello, cute photos! 2. It also marked 6 months of exclusively breastfeeding. This was such a huge accomplishment for both of us so a milk bath was a great way to celebrate this milestone. 🙂 I’m SO happy with how the photos came out. Even though everything didn’t go as smoothly as I thought it would, this photoshoot was a huge success. Now let’s talk about all of the details!
TIPS FOR A MILK BATH PHOTOSHOOT:
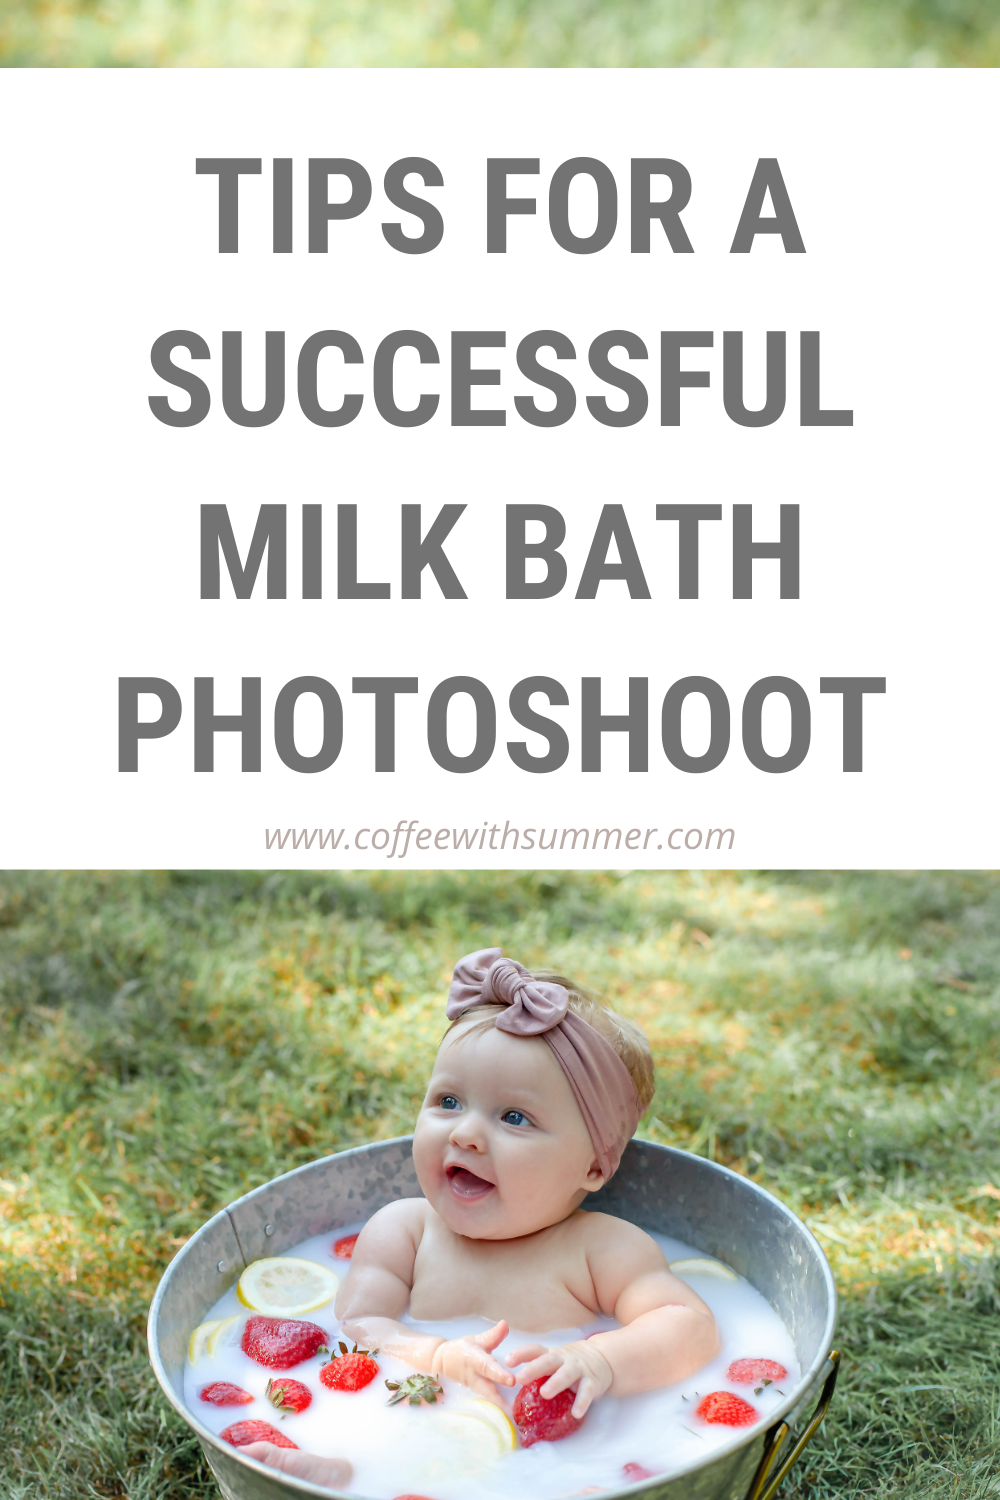
1. Choose Your “Theme” – I thought it’d be cute to use strawberries in the milk bath for a few different reasons. Strawberries (with whipped cream) was one of my cravings when I was pregnant with Taya and I really thought the color would contrast well with the milky water. I decided to throw some lemon slices in to add some more color and texture to the photos.
Pro tip: Faux flowers do NOT float. Blueberries do NOT float.
2. Get Your Supplies – The key to making a milk bath photoshoot a successful one is being prepared! You’ll need…
- A bucket – I used this galvanized tub (just under $9!) and it was the perfect size for what we needed. Taya weighed just over 12lbs and was about 24 inches at the time of the photoshoot.
- Props – Fruits, flowers, etc. The amount you’ll need is dependent on the look you’re going for. I wanted a good amount of milkiness to show, so I used a cup or 2 of lemon slices and 1 quart of strawberries.
- Towels – To make sure that the baby doesn’t slip in the tub, place some hand towels/towel in the tub. We used white hand towels. Have an extra towel on hand so that your baby can be dried off right away.
- Milk – You can use any kind of milk that you’d like. Since I don’t pump, I didn’t have breastmilk for this shoot. I simply used some whole milk and diluted it with warm water. You can also use powdered milk or flour to achieve the milky look.
3. Have At Least 3 People Helping – If you’re doing a milk bath with a baby, it is going to be A LOT more work than you’d think. Originally, it was just going to be me and my husband during the shoot but my in-laws both ended up being involved because we needed the extra hands and entertainment for Taya.
- Photographer
- Someone to entertain the baby (get them to look at the camera/smile)
- Someone to adjust the baby (trust me, this will happen way more than you’d think, haha)
4. Preparing The Milk Bath – This was the part that I thought I was really in control over but learned more about as we went with preparation. I ended up filling the tub with too much water so once I added the milk and Taya to the tub, it was a MESS. So, let me share what you should do instead of what I did. 😉
- Fill *almost* halfway with hot water (bath temperature)
- Then add in whatever you’re using to achieve the milky look and stir until the mixture is your desired milkiness! I recommend not adding much more liquid after the halfway point. This depends on the size of the tub you’re using, though.
- Place the towel(s) at the bottom of the tub.
- Gently put the baby in the tub BEFORE placing the fruit/flowers/props into the tub. Once the baby is in, you’ll have a better idea of how much of the fruit, etc. you’ll want to put into the tub.
I recommend having whoever is taking the photos to start shooting as soon as the baby is in the water. This is the perfect time to finalize camera settings and angles. Plus, it’s always nice to have some behind-the-scenes candid shots. Forewarning, the baby will most likely be very interested in everything in the tub, haha.
5. Be Patient & Go With The Flow – Doing any kind of photoshoot with a baby takes patience and flexibility. Sometimes a baby might not be in a picture-taking mood or something might not go exactly as you had planned. While it’s necessary to have a plan and an idea in mind for the photoshoot, it’s ultimately a go with the flow type of thing. Be willing to adjust your original vision a bit (if needed) and be open to new ideas and the spontaneous.
Baby milk bath photoshoots are definitely messy and they take a lot of hands-on-deck but I promise, they are 100% WORTH it!
[bctt tweet=”Tips For A Baby Milk Bath Photoshoot” username=”SummerTelban”]
PIN FOR LATER!!
Are you planning a milk bath photoshoot for your little one? Tell me what theme you’re going to go with! I hope you have a blast!
XO,