Thank you Facebook Marketplace for sponsoring this post. There’s something for everyone!

Now that it’s springtime, Michael and I have been working hard around our home. We started our spring cleaning early to meet some personal goals of ours and we’ve also started some fun DIY projects around the house.
We’ve been living in our home for just about a year and a half now and guess what? We still have some small projects and some furnishing to do. Mike and I are both really intentional with the work we put into our house, as well as the DIY or repurposing projects that we take on.
When it comes to furnishing your very own home, it can be tricky, especially for me. I’m very particular with the style I like but let’s be real… furniture is not cheap! Instead of purchasing brand new furniture at a high cost, Mike and I decided to do some second-hand furniture shopping on Facebook Marketplace.
Why you should use Facebook Marketplace:
After giving it a go and having great success, I needed to share about it with you! We love using Facebook Marketplace because it’s an easy and convenient way to buy items to repurpose and to sell items that we no longer need. Facebook Marketplace makes it easy to find all kinds of items like furniture, clothing, electronics and much more. It’s amazing what you can find on there. What’s the best part? It’s all local to you!
When browsing on Facebook Marketplace, you have the option to select the category you’re best interested in and you can also select up to how many miles in your vicinity that you want to look at. If you’re looking to spruce up your home with a new accent piece or home decor, check out your Facebook Marketplace!

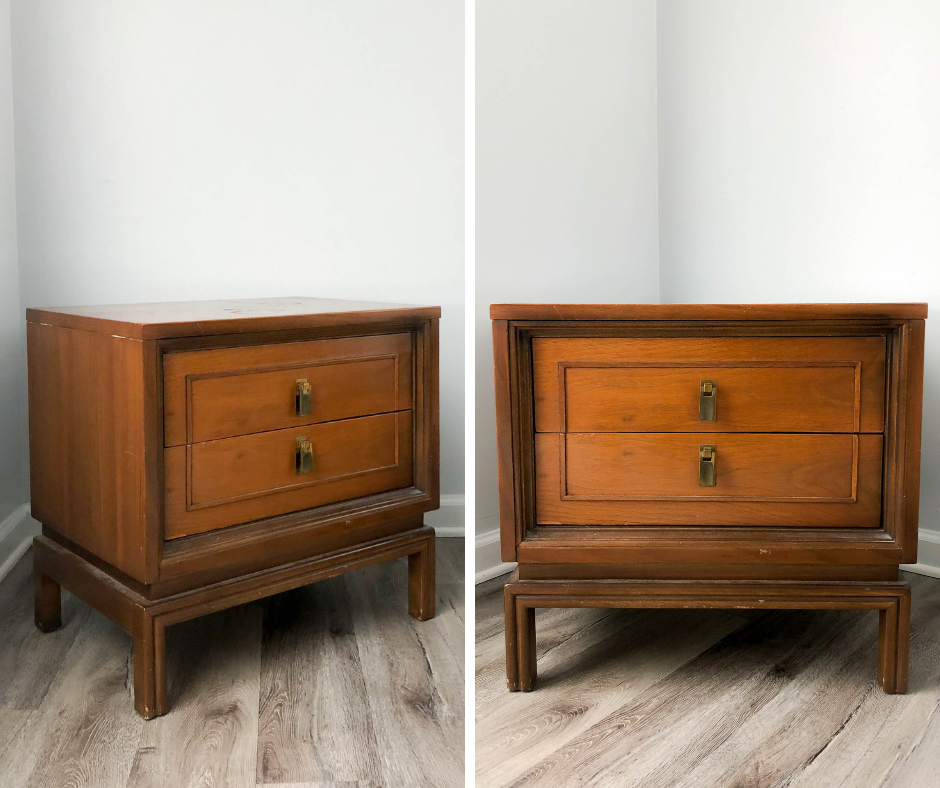
I found this wooden bedside table on Facebook Marketplace for a steal of a price and I knew the second I saw it that it could be repurposed into an amazing piece. I decided that instead of keeping it a bedside table that I would repurpose it into an accent piece for our upstairs living room.
The decor style that I love is actually a good mix between two styles: bohemian and mid-century modern. Even though most would say this piece in its original state is very traditional, I actually saw a hint of both boho and mid-century modern in this piece, which is really why I decided to purchase it.
As you can see, it has some minor scuffs around it and the hardware was really dated. While the wood and its original finish were beautiful at one time, it was definitely in need of a major makeover.
Let me walk you through the very simple steps we took to take this drab bedside table to turn it into a stunning accent piece for our living room.


HOW TO REPURPOSE AN OLD BEDSIDE TABLE:
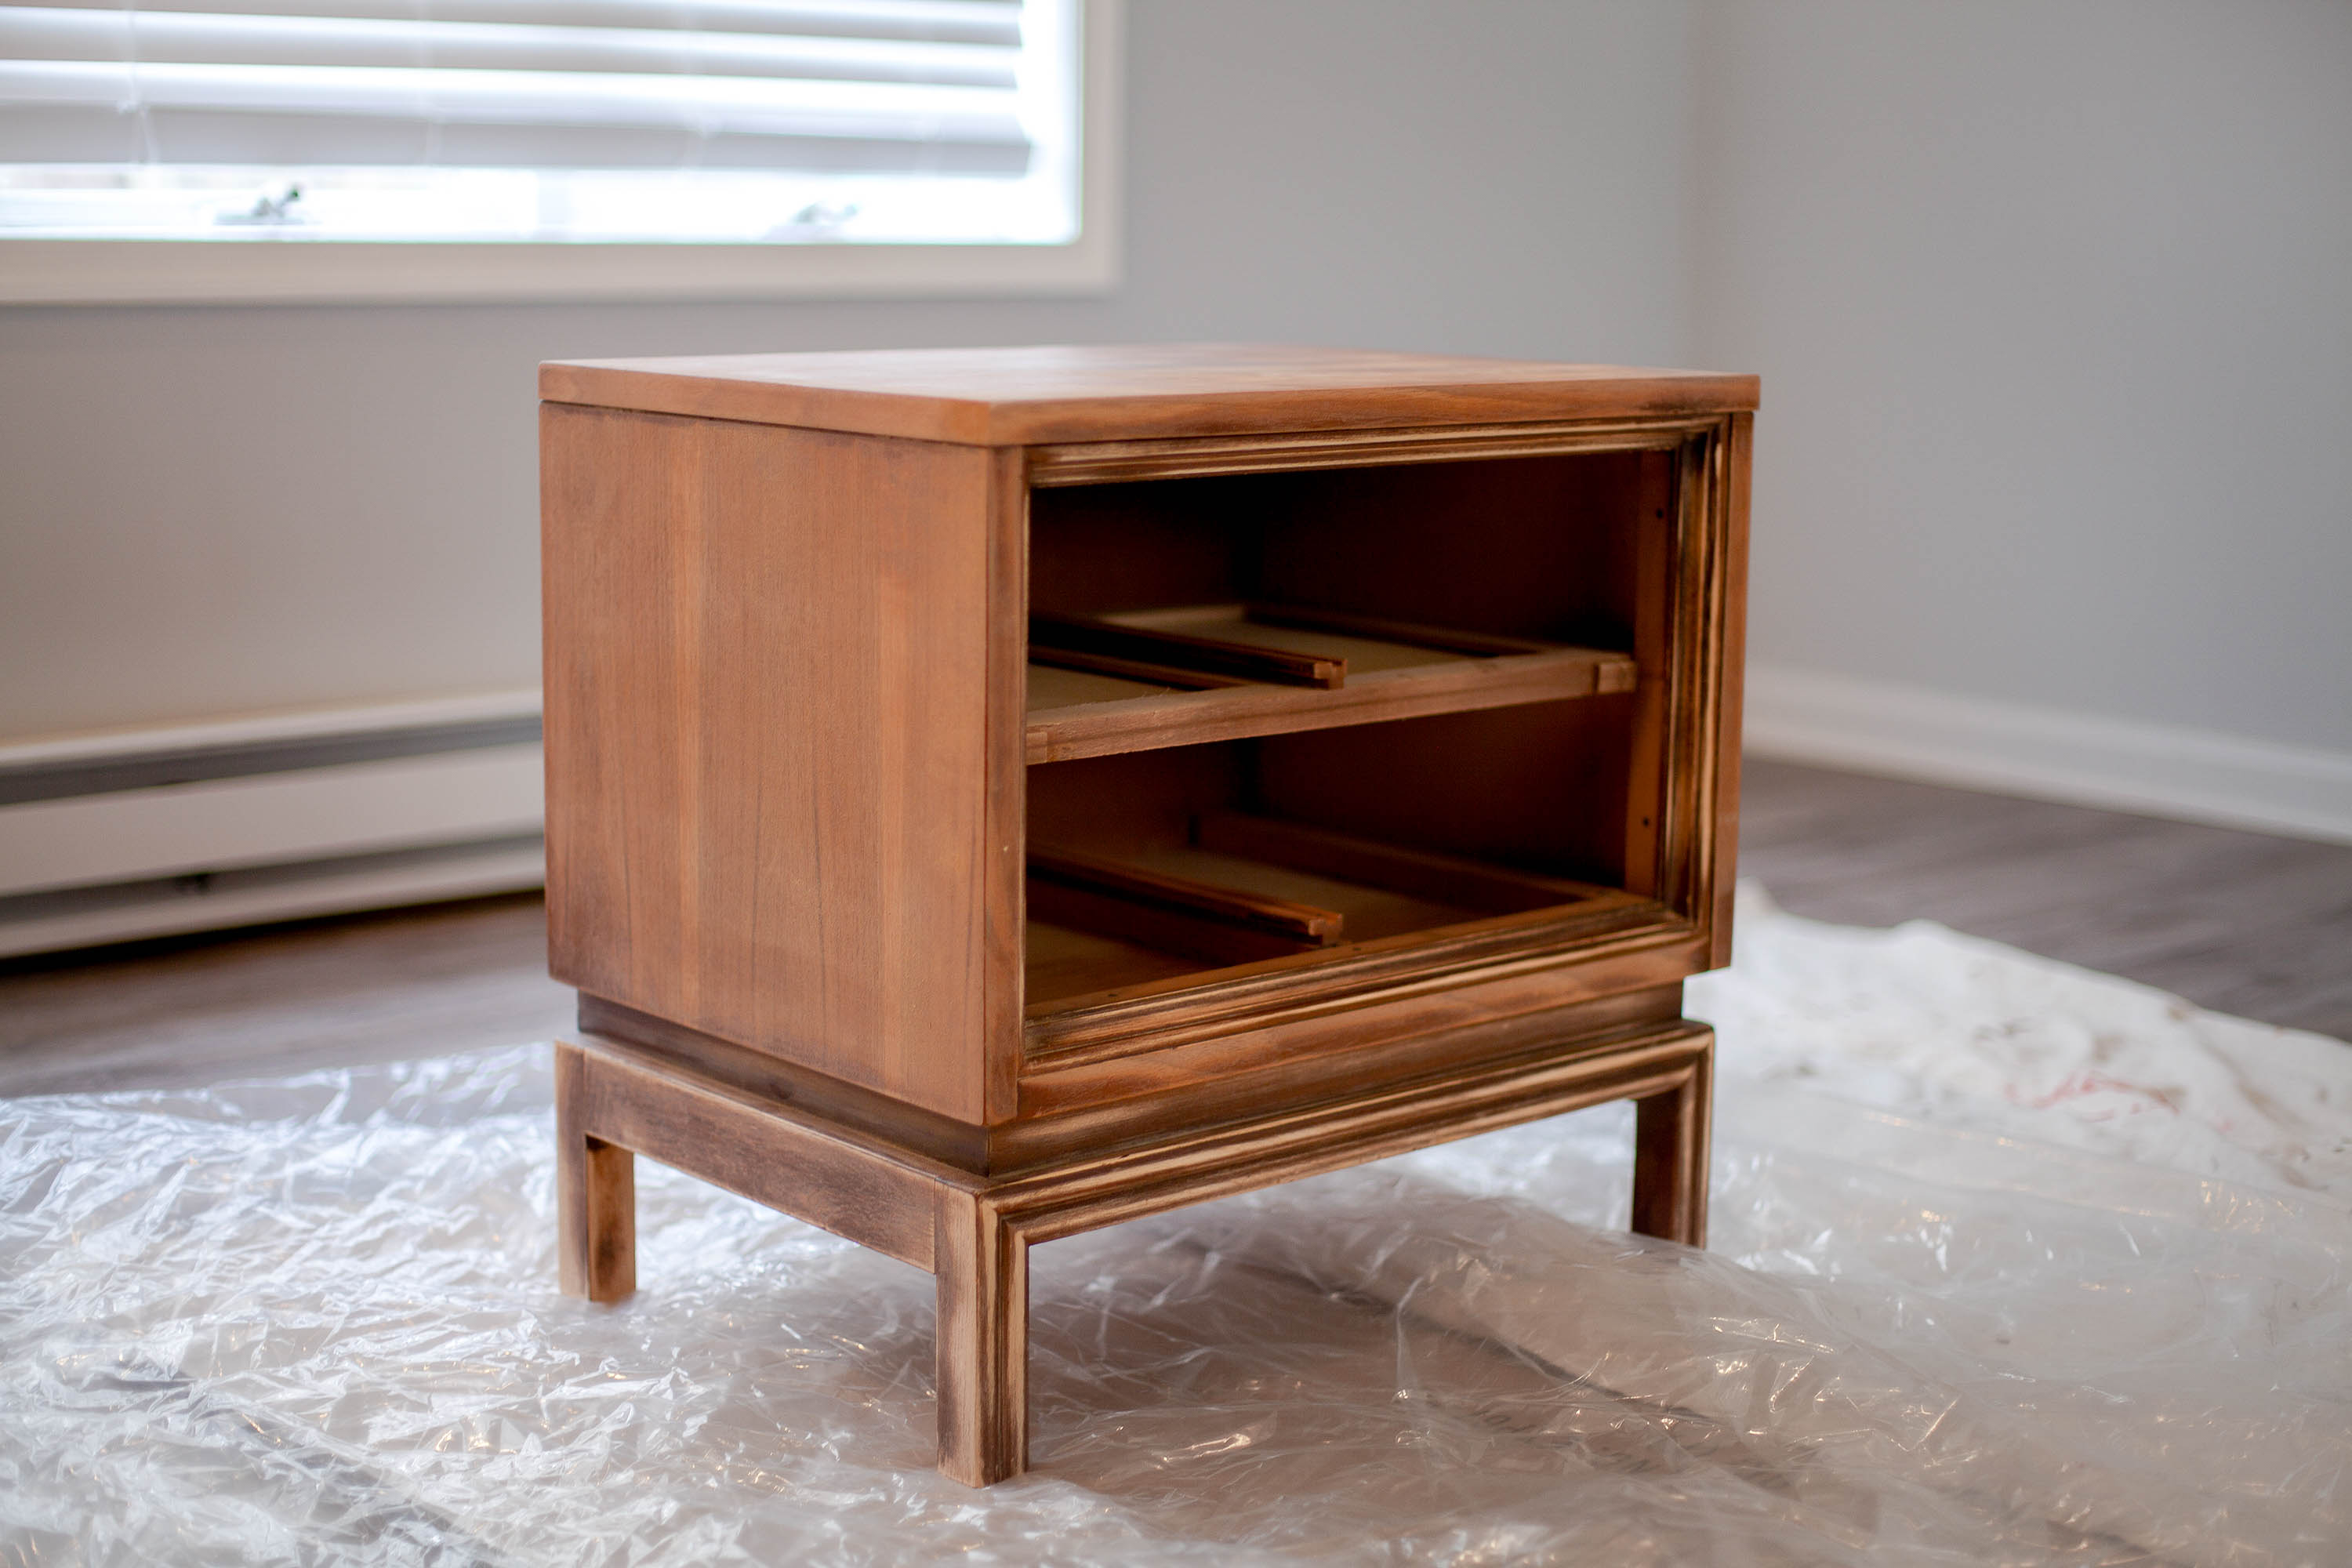
1. Sand It Down // After picking up our fun find on Facebook Marketplace, the first thing we did was give this piece a proper sanding job. This was Michael’s main part of the project, haha. He used a palm sander to sand the top and sides of the piece, which went really quickly. As you can see, the front of the piece has some detailed grooves, and this took some time to really get in there and refine those small spaces. Mike used sandpaper to get in between the small spaces. Overall, it took an hour to get it in its best condition to start painting.
2. Finalize Your Color Choice // If you’ve been around CWS for a while, you know that I love all things bright and white. My original plan was to paint this piece white, but after getting the full vision in my head, I decided against my original plan and chose to paint it a medium gray. We actually had the perfect shade of gray left over from another project, so I was over the moon. What can I say? I love my neutral colors!


3. Paint The Difficult Areas First // The first area I wanted to focus on was the front part that had all of the details and grooves. I wanted to make sure that I really got the paint in there good and that it was also an even paint job. This was slightly difficult (time-consuming) since this paint was a bit thick, but I got the job done!
We also painted the front of the drawers before moving onto the rest of the piece itself.
4. Paint The Rest Of It // My recommendation is to paint the side of an accent table first and then save the top for last. I was using a medium-width angled brush, but after painting the sides, I decided I wanted to switch to a roller. Again, the paint I was using was on the thicker side so, in order to get the best and most even paint job, we had to break out the roller. The paint ended up looking much more smooth with the roller!
In the photos below, you can see the difference between what the paint looked like when using a brush vs. what it looked like after using a paint roller instead.


5. Let Dry // Even though the paint we used was thick, it actually dried really fast! We had put the ceiling fan on to help speed up the process.
6. Put The Hardware On The Drawers // After a couple of hours, we put the new hardware on the drawers and oh my gosh, I was in love!
7. Let The Drying Continue Overnight // Even if your piece might feel dry to the touch, that doesn’t mean it’s completely done the drying process. So, we let everything dry throughout the night before placing the drawers back into the accent table the next day.


THE FINISHED PRODUCT!
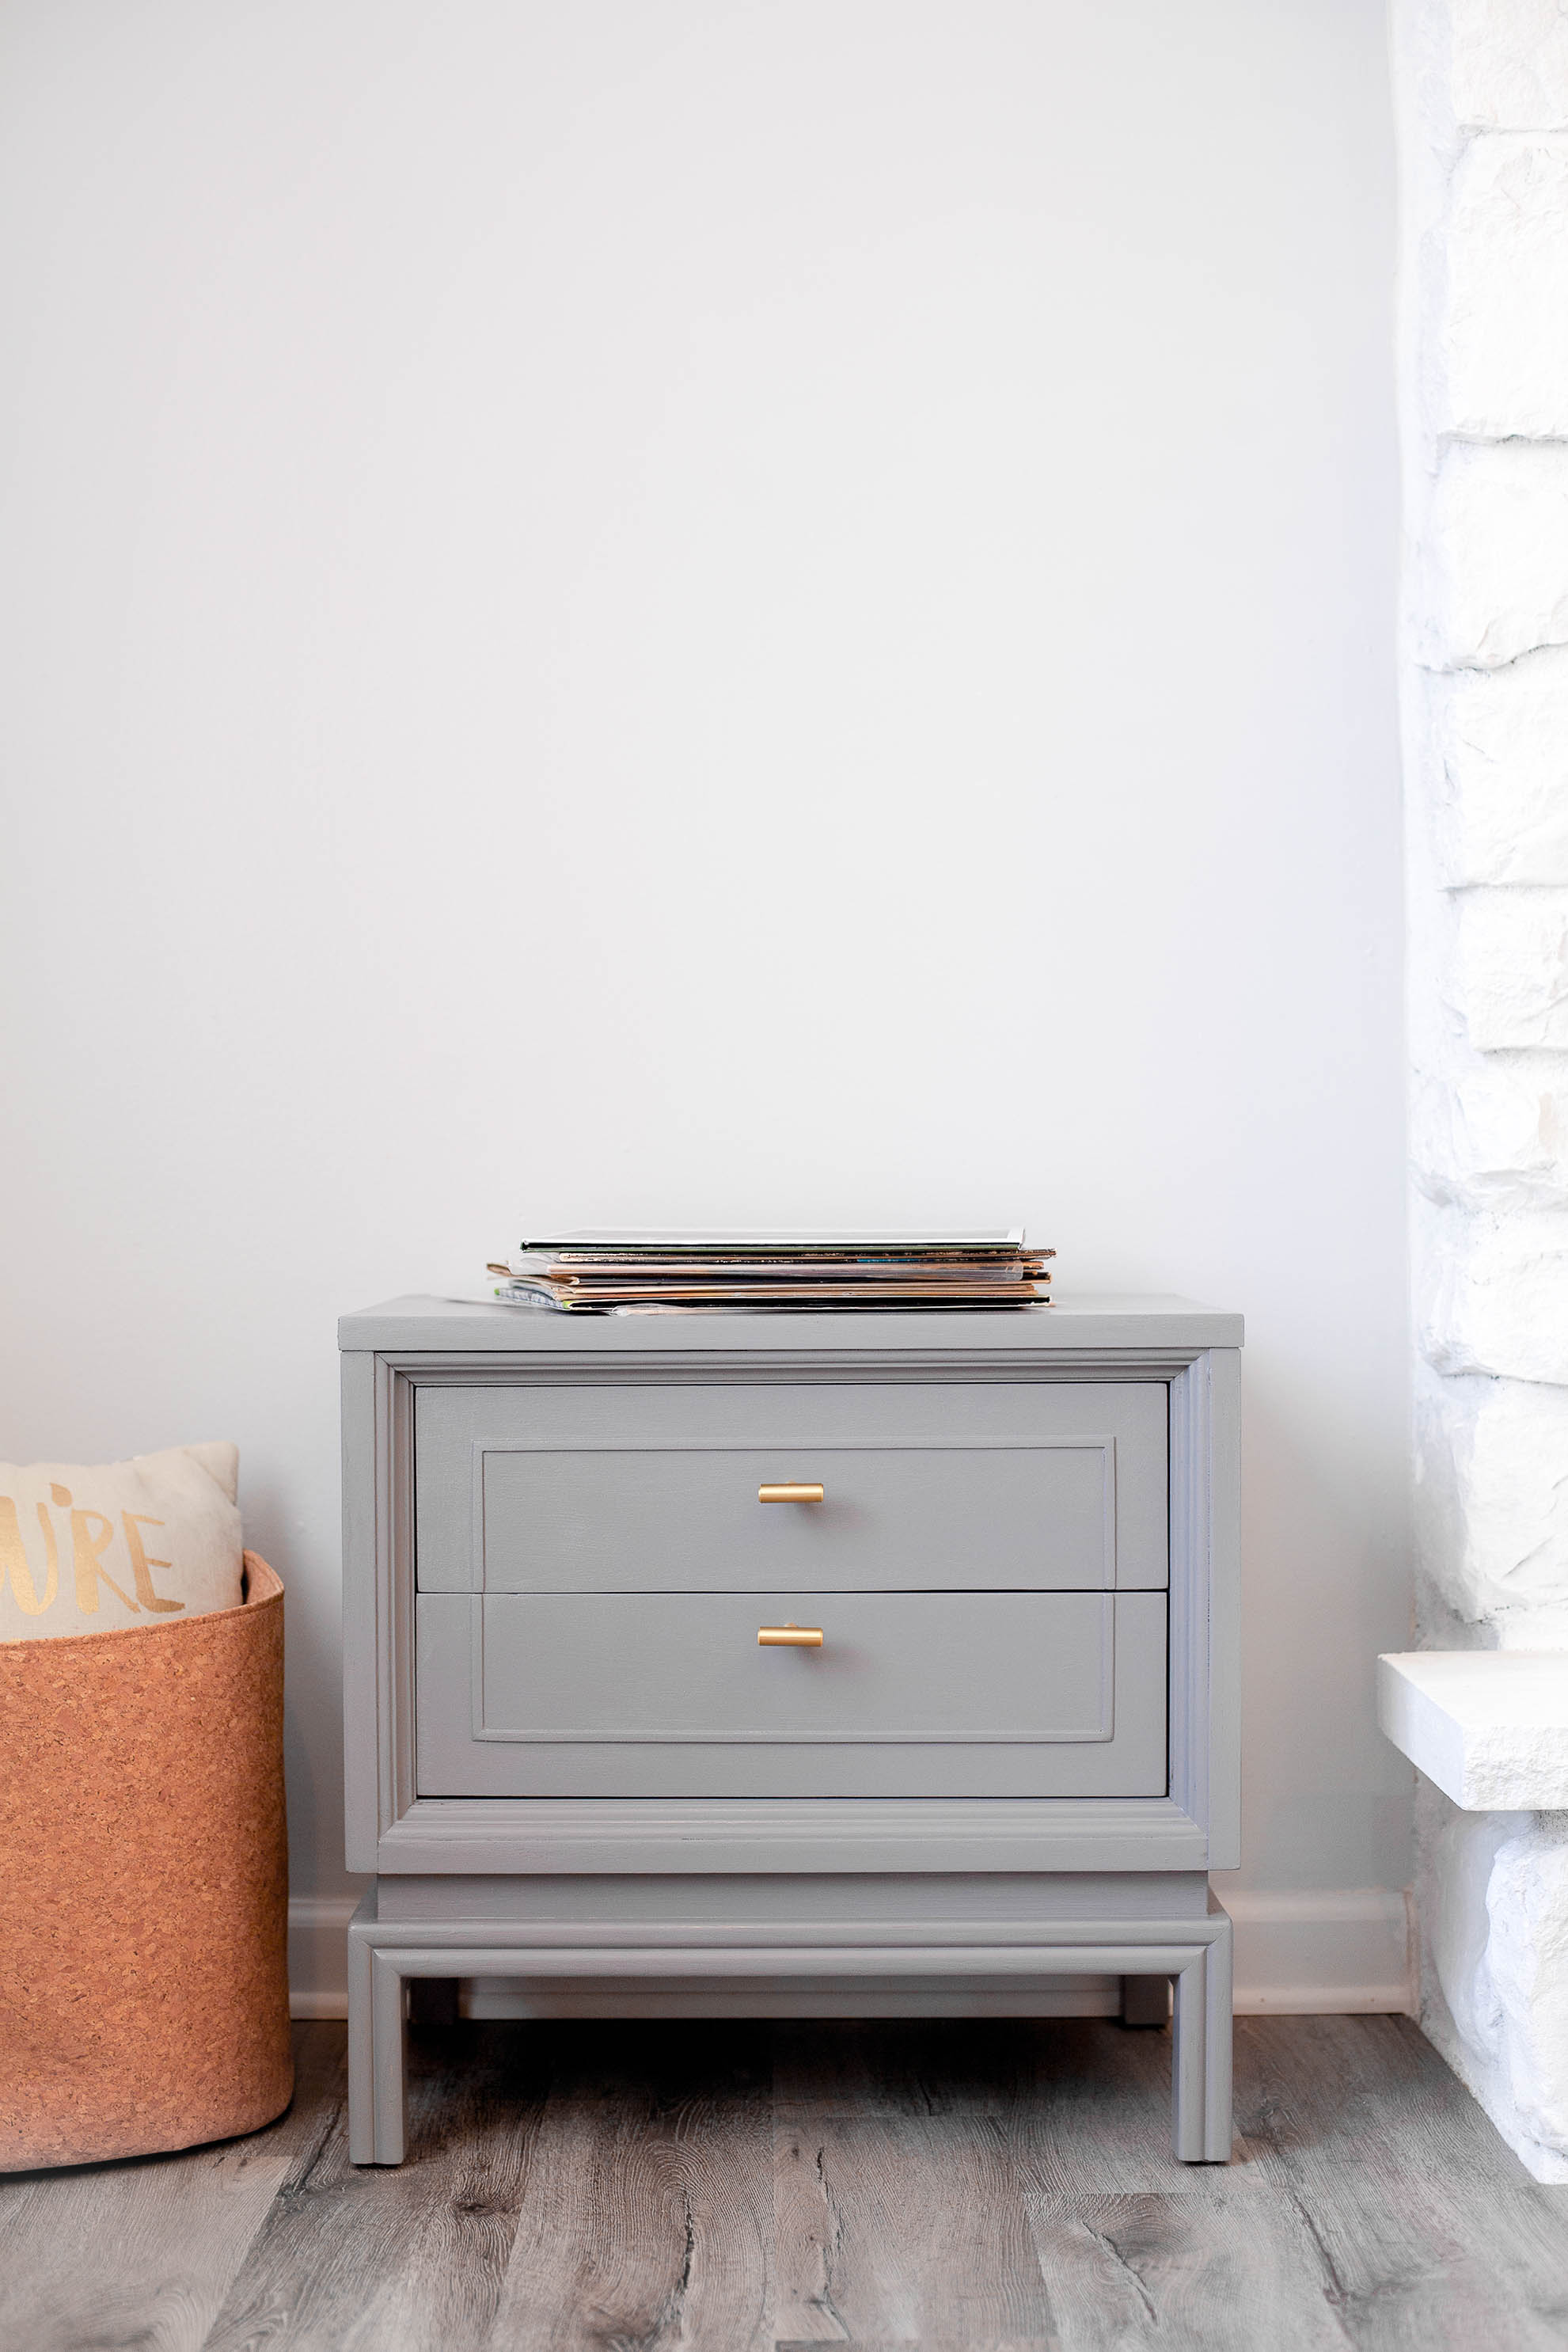
Seriously, how gorgeous is this piece?! I am swooning over it. I am so glad that I saw the potential that it had when it was an insanely drab bedside table. Now it’s a clean and smooth mid-century modern beauty!
If you’re wondering why I decided to put a smaller accent table in our upstairs living room area, here’s why! 1. The living room space is quite small. 2. Having a smaller piece against this wall leaves the wall space more open, giving the appearance of a larger room.
For now, I have some of my favorite vinyl records stored on top, but soon it’ll be home to my new record player. I am so stoked! Let me know what you think!


We are so happy that we decided to try Facebook Marketplace! What a success! We will continue to turn to Facebook Marketplace whenever we’re looking to do some home decor updates and other projects in the future.
In addition to purchasing great items, we’re also going to be selling some furniture of ours that we don’t have a use for anymore. This way, we can finally clear out our storage unit, haha! It’s quick and easy to sell on Facebook Marketplace, just like it is to buy.
All you have to do is snap a few photos of the item you’re looking to sell, write a description about it, name your price, and then you’re done. It’s the perfect way to spring clean your home and closets, and even better – put some extra cash in your pockets!

Have you ever used Facebook Marketplace before, whether that was for buying or selling? If so, which did you use it for? How did it go? I’d love to hear! Let’s chat!
Let’s connect! >> Facebook | Instagram | Twitter | Pinterest


