Today is the day that many of you have been waiting for! I’m spilling my entire editing process for my fashion photos. Are you excited to dive in?!
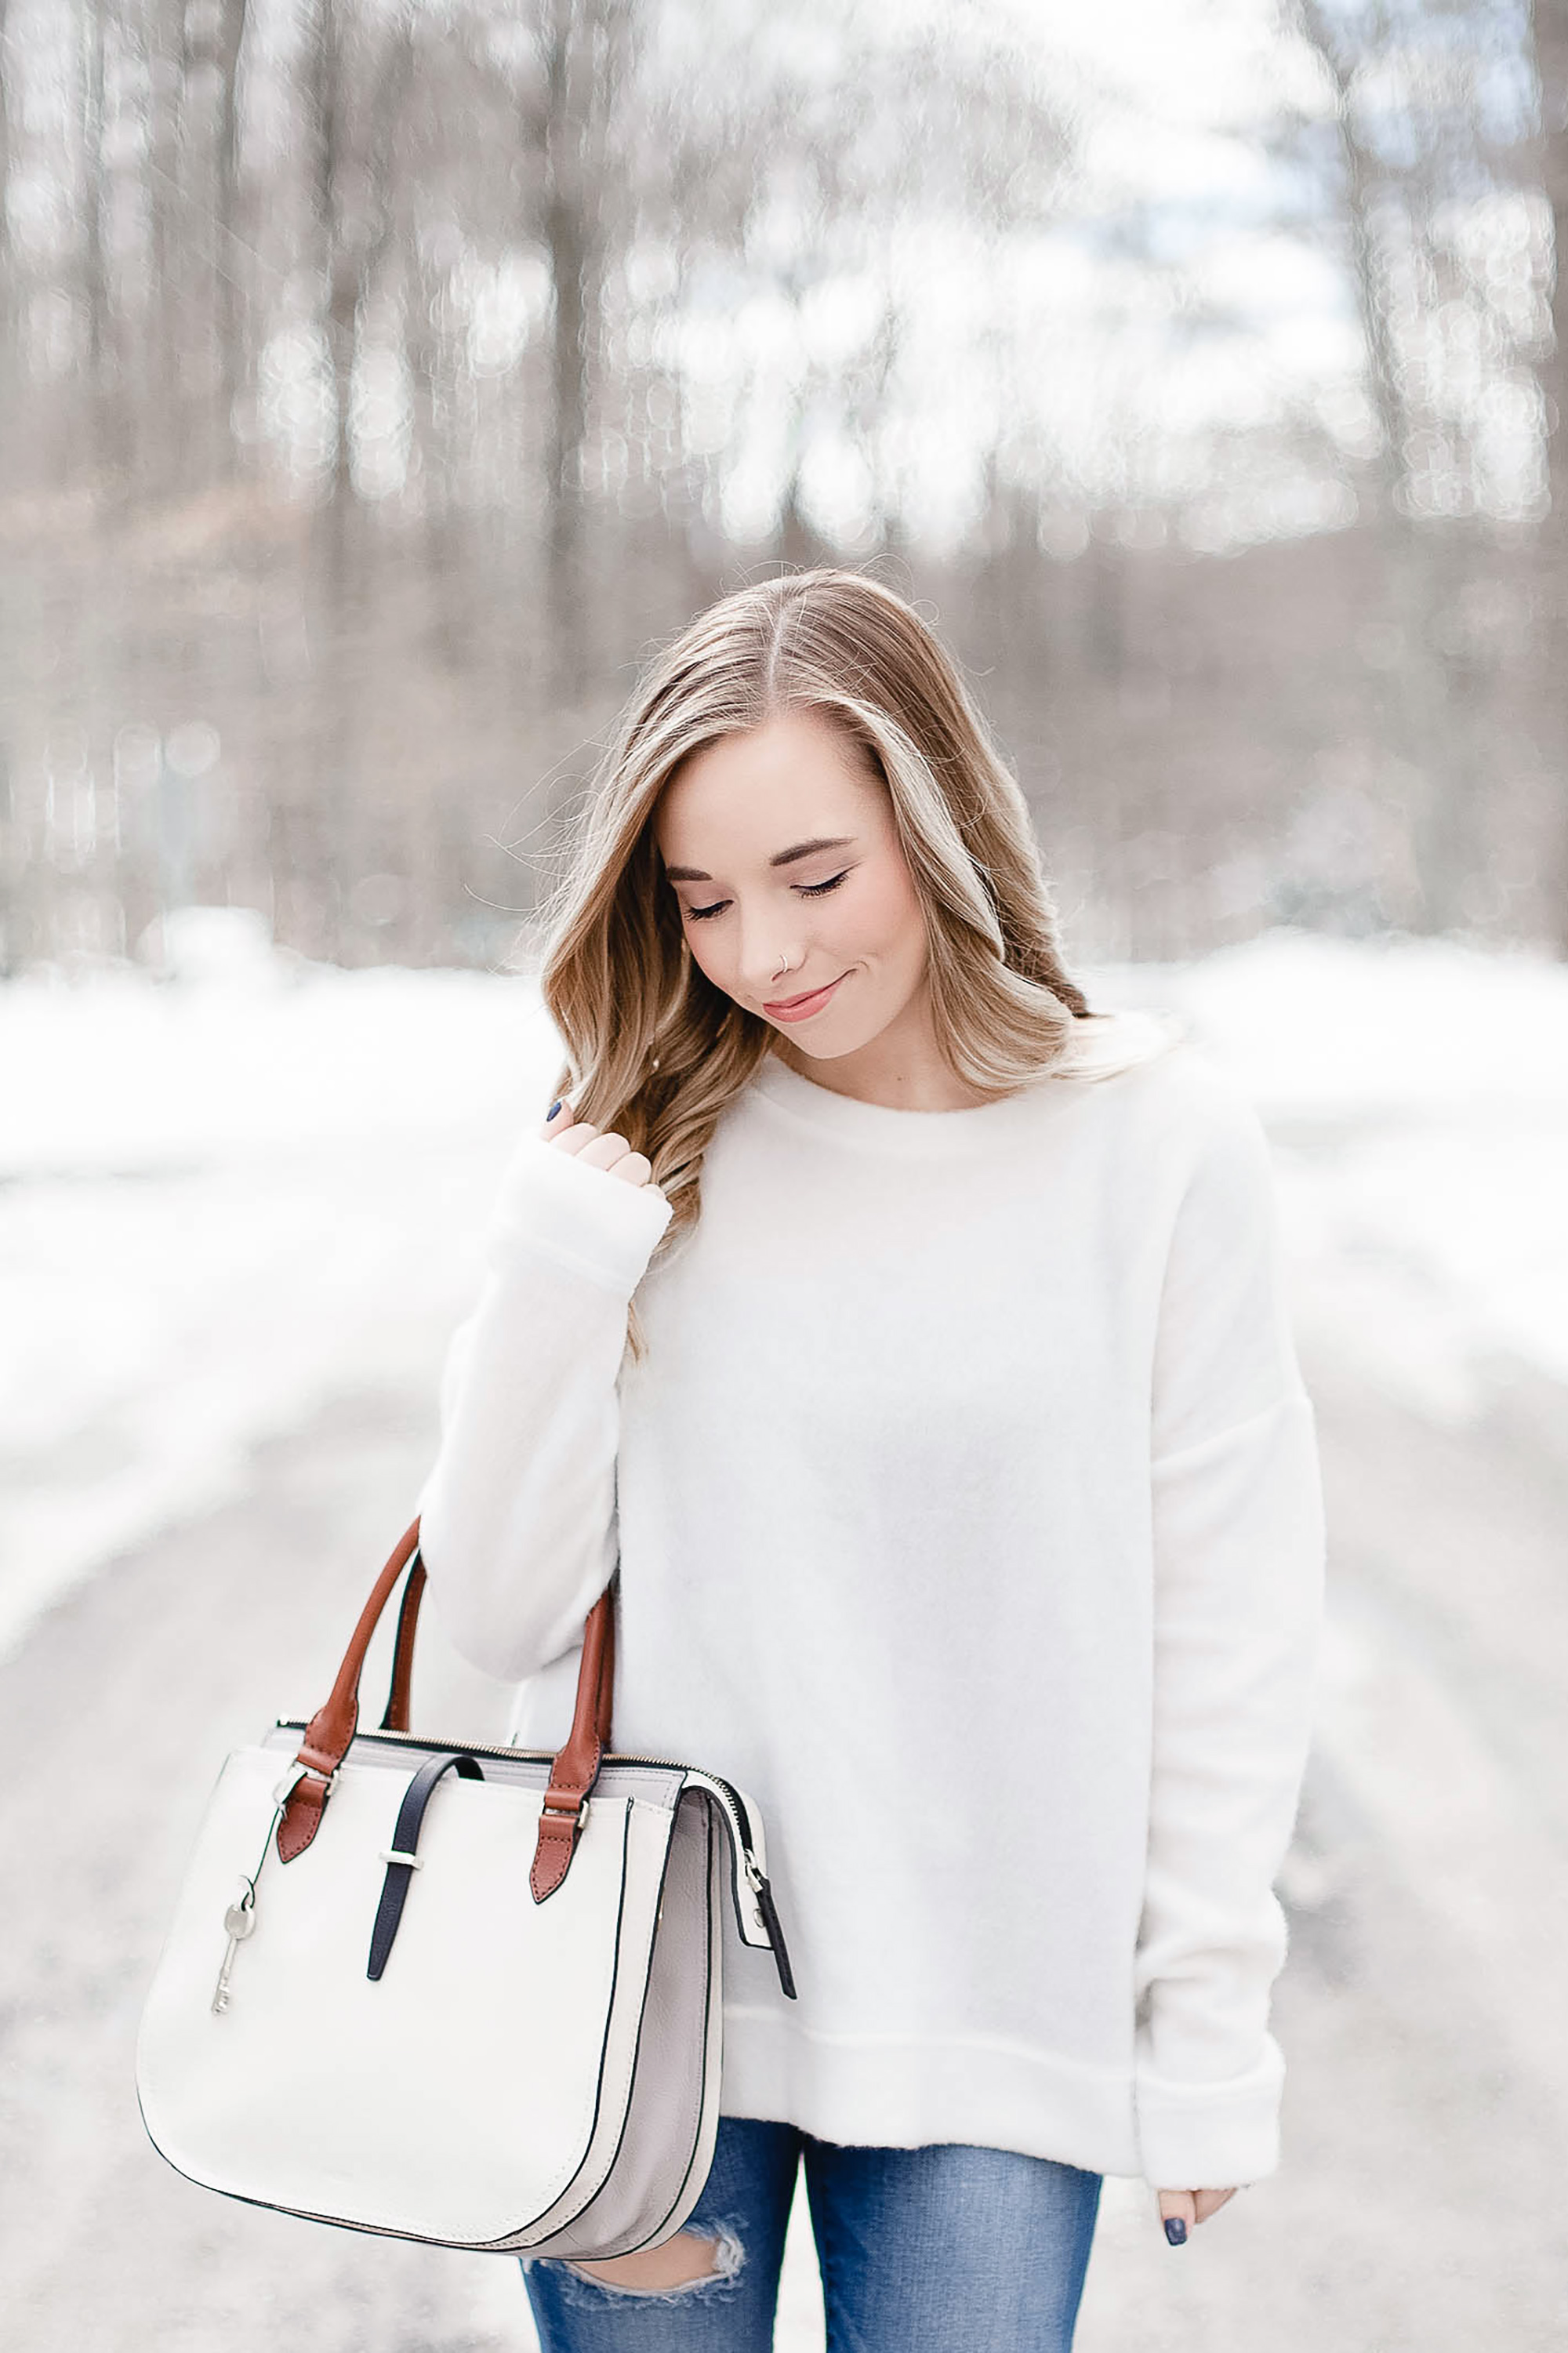
Last year I shared about how I edited my photos for Instagram. My process has definitely evolved over the last year and I’m really happy with my current process. I edit both my fashion photos and all other photos (stock, lifestyle, product) pretty much the same way, but with little, personal tweaks to each. Since I edit them all in a similar way, I’m just going to show you my process on one of my fashion photos today. 🙂
Just a heads up – it is a long process when you’re new to it but once you’ve got it down, it’s like second nature! Let’s get at it.
[bctt tweet=”A Step-By-Step Tutorial On How I Edit My Blog Photos” username=”SummerTelban”]
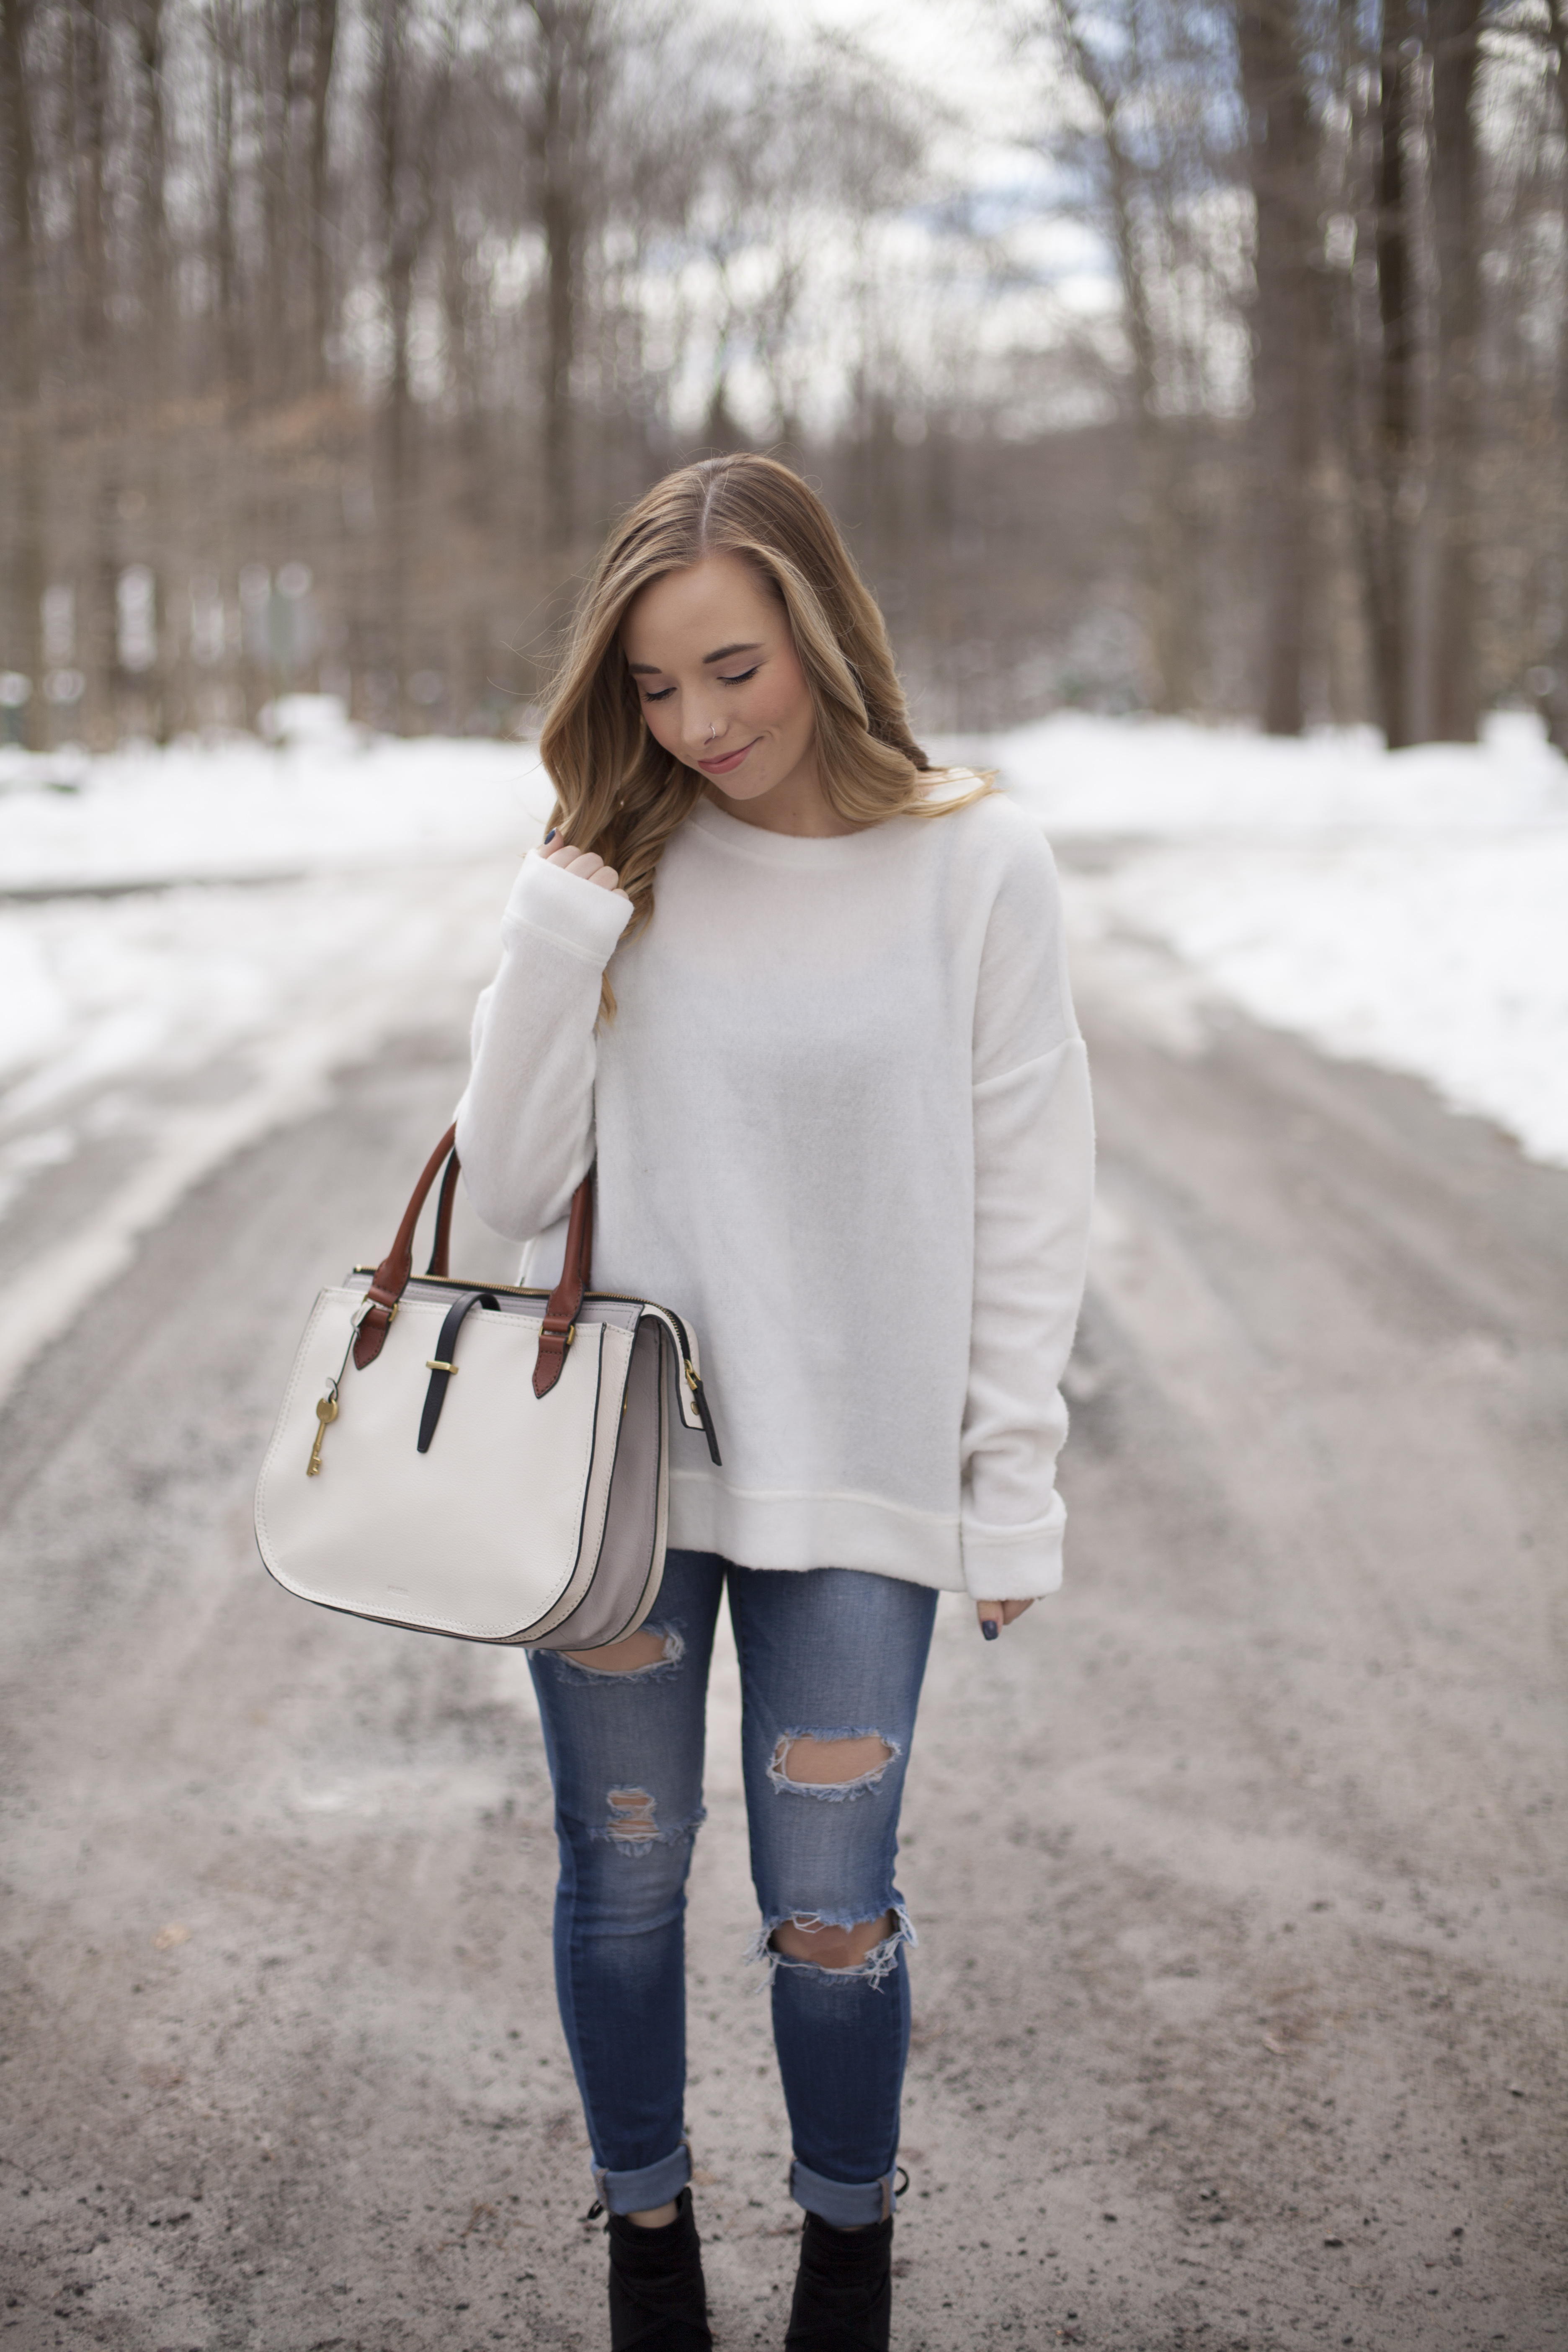
OVERVIEW:
The photo above is the original photo shot in RAW. I shoot with a Canon 5D Mark ii with a 50mm f/1.4 lens for the majority of my photos. The photo editing programs that I use are Photoshop, Lightroom, and Snapseed.
The aesthetic that I always go for is bright and crisp, yet natural. I’m not huge on bright colors and always prefer muted tones. If you’re going for a similar aesthetic or one that’s slightly different, my editing process is a great place for you to start and then make your own.
STEP 1:
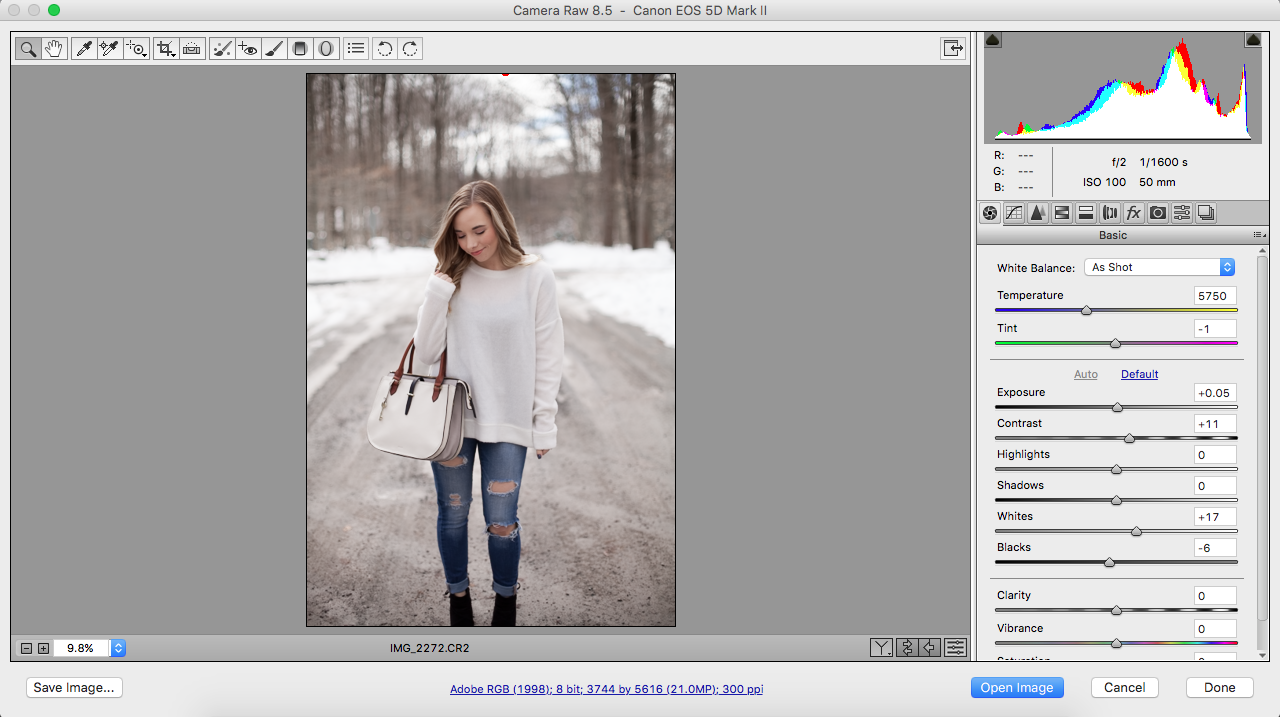
The first step in my editing process is to open up my photo in Adobe Camera Raw in Photoshop. You’re only able to access the Camera Raw editor if you actually shot in RAW with your camera. I highly recommend shooting in RAW if you have a camera that allows you to because there is more data, which allows for more in-depth editing.
Here, the first thing I usually do is press “auto” under the Basics section as you can see on the right side of the screenshot above. Auto simply adjusts the exposure, contrast, highlights, etc. to where it thinks it should be based on the data in the photo. I typically increase the exposure a tad more than it suggests. I sometimes adjust the white balance here, as well.
You can see that the auto setting for exposure was increased to +0.05 but I took it a step further and increased it to +0.55.
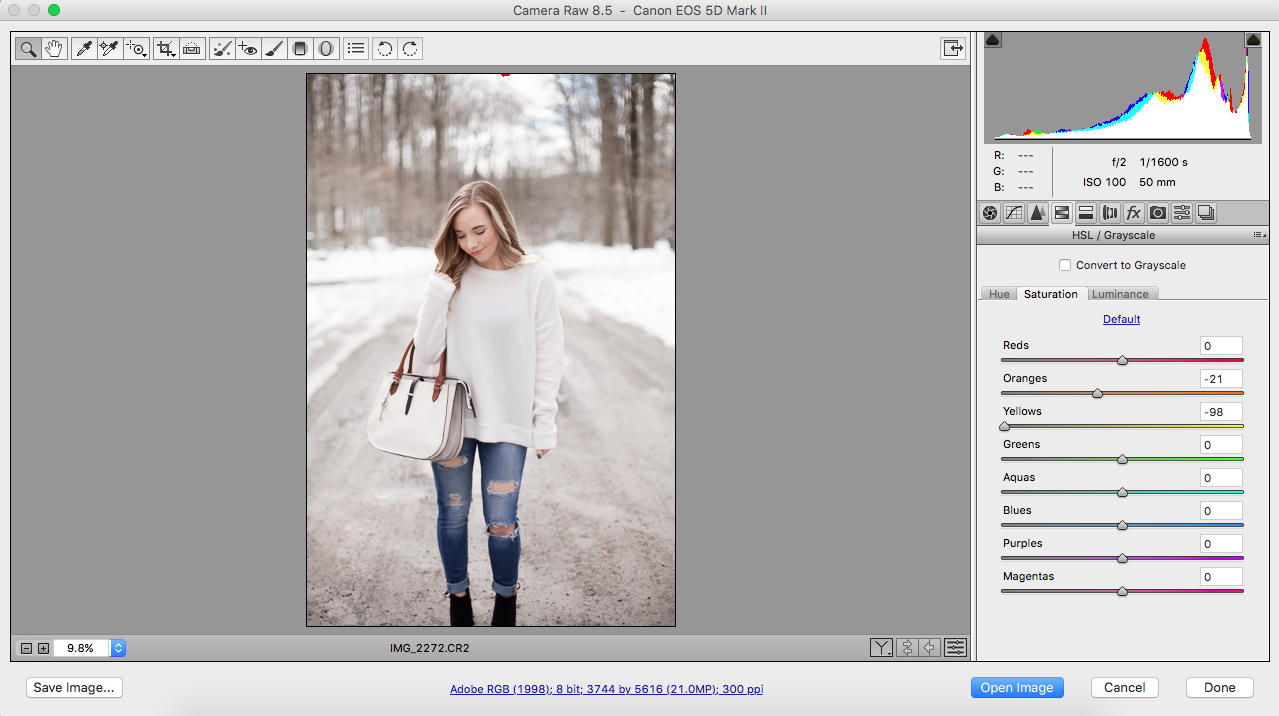
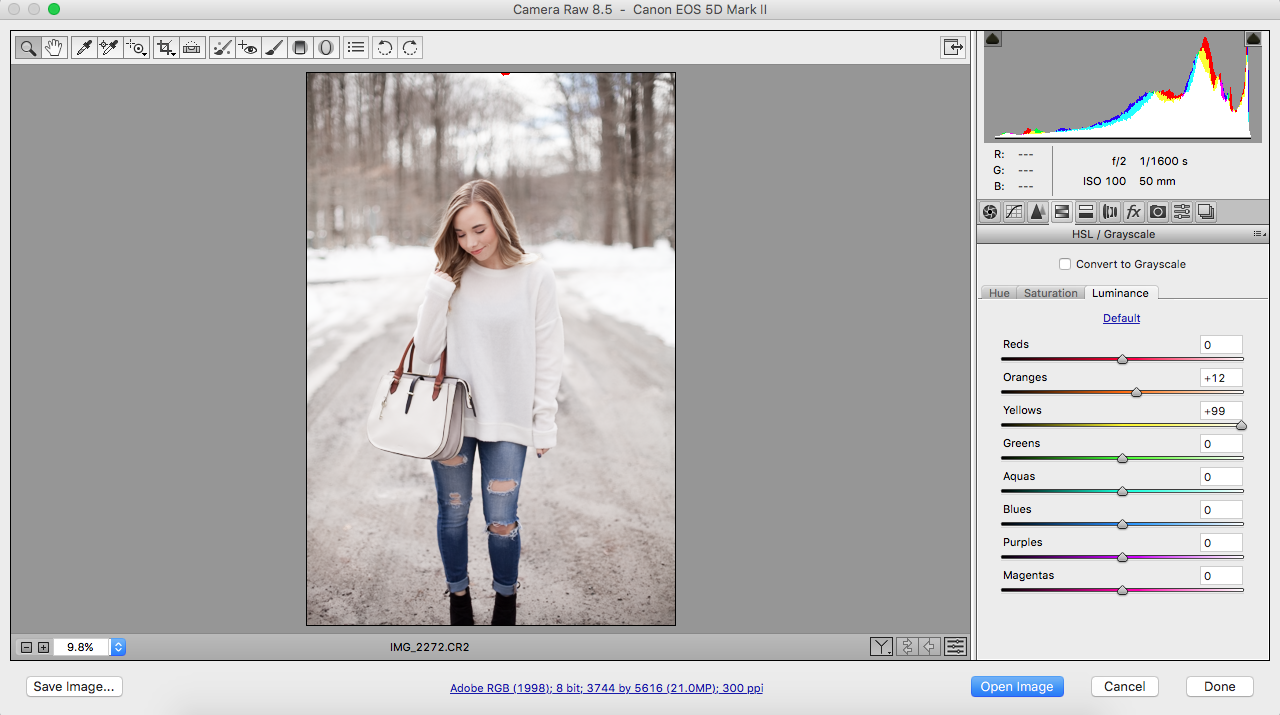
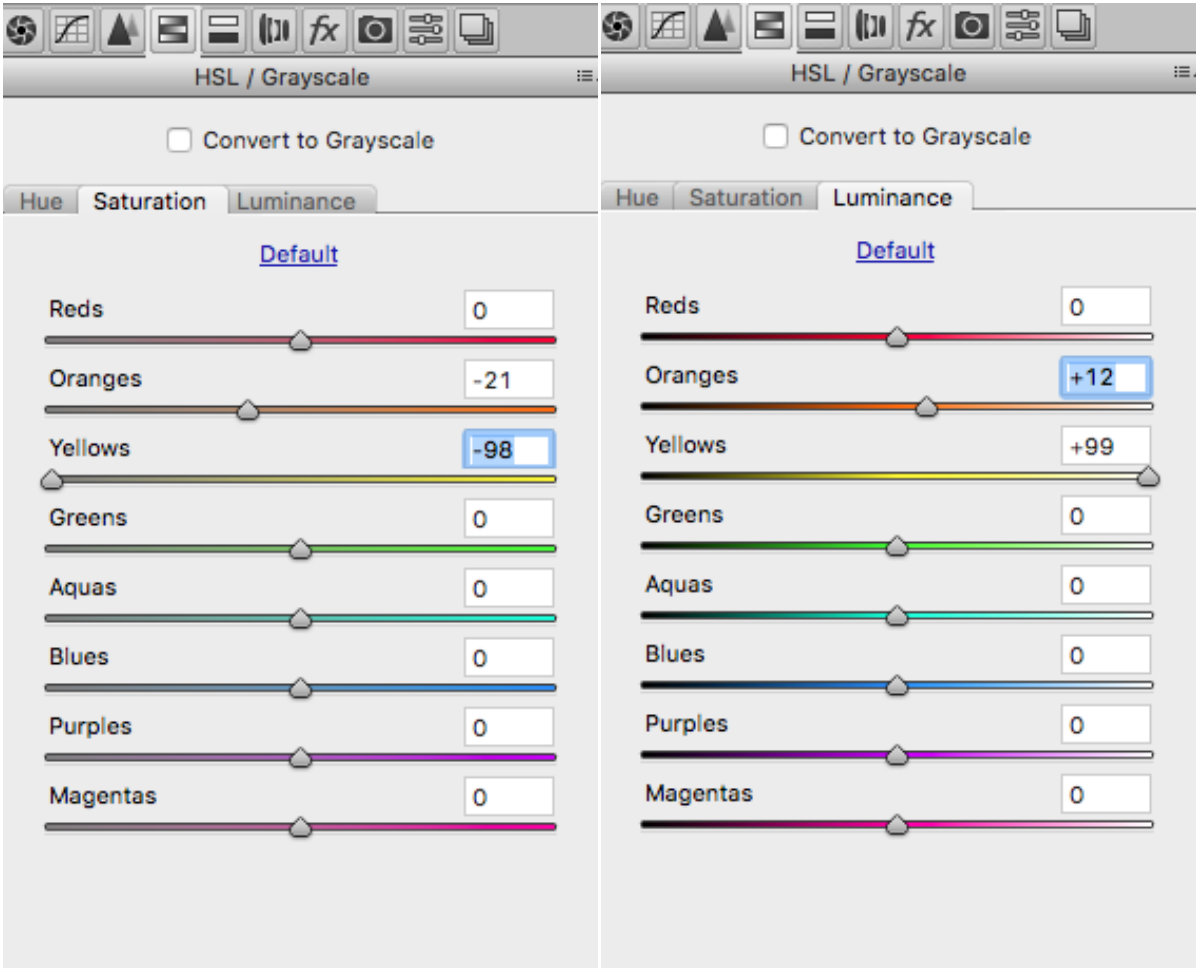
I then switch from basics to “HSL / Grayscale” where I’ll adjust saturation and luminance. Like I said before, I go for more of a muted look. 95% of the time, I’ll take down the saturation of the yellows to -95 and I’ll take down the saturation of the oranges to about -20. Then I switch over to luminance and boost the yellow anywhere from +70 to +99 to brighten the yellows. I’ll also increase the luminance of the oranges but by the tiniest bit.
You can see my general setting below.
STEP 2:
After I’m finished in the Camera Raw editor I open the photo in Photoshop. There all I typically do is edit out any blemishes that I have. That’s my personal preference. If something isn’t permanently on me, it’s edited out.
Then I size down my photo to 2000 x 3000 and save it.
STEP 3:
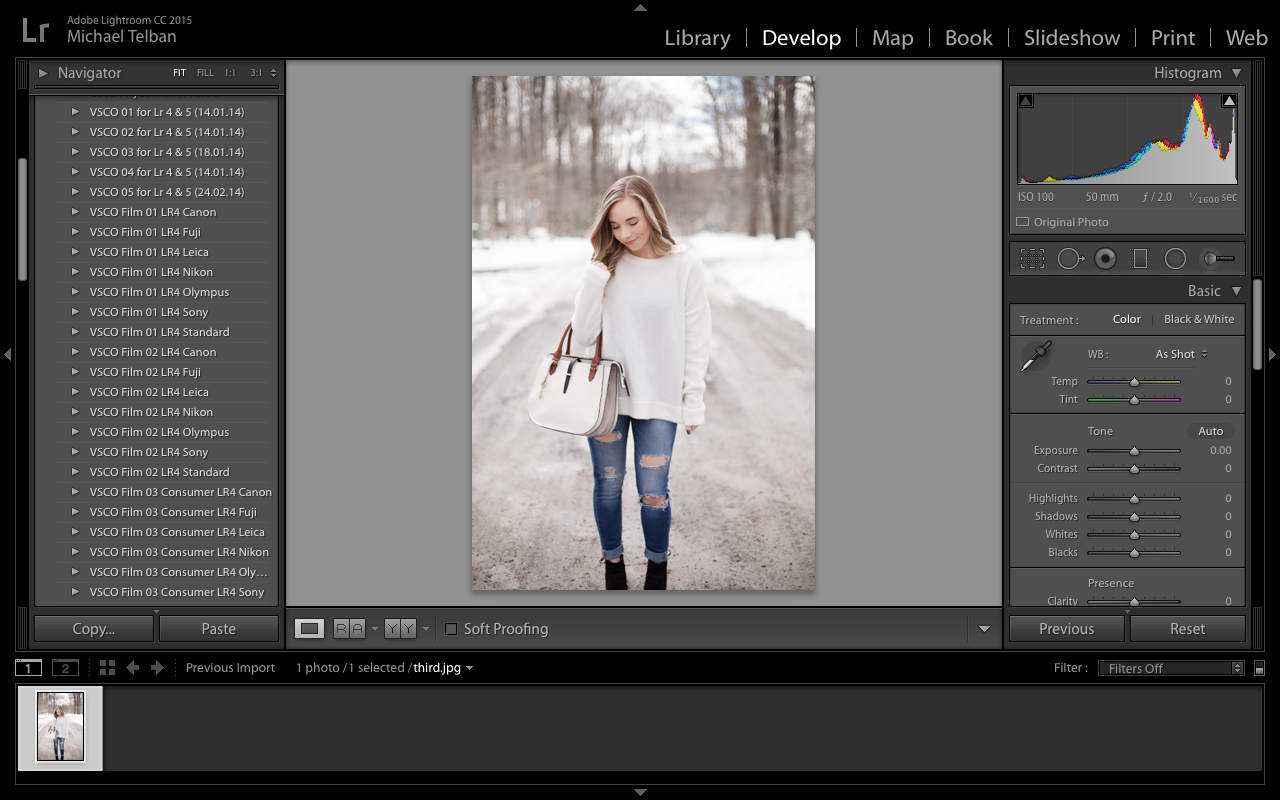
Now it’s Lightroom time! Once I get my photo into Lightroom, the first thing I do is go to my “go-to” presets and play around with which one suits my photo best. As of recently, my go-to preset has been the general “Bright and Airy” preset. To be honest, I have NO idea where I found this preset but it was a free one that I found when searching for free light and airy presets.
But, the other presets I have been using recently are THESE ones! They’re only $11.00 and are great base presets that you can easily adjust to make your own preferred aesthetic.
UPDATE: Other presets I love using!
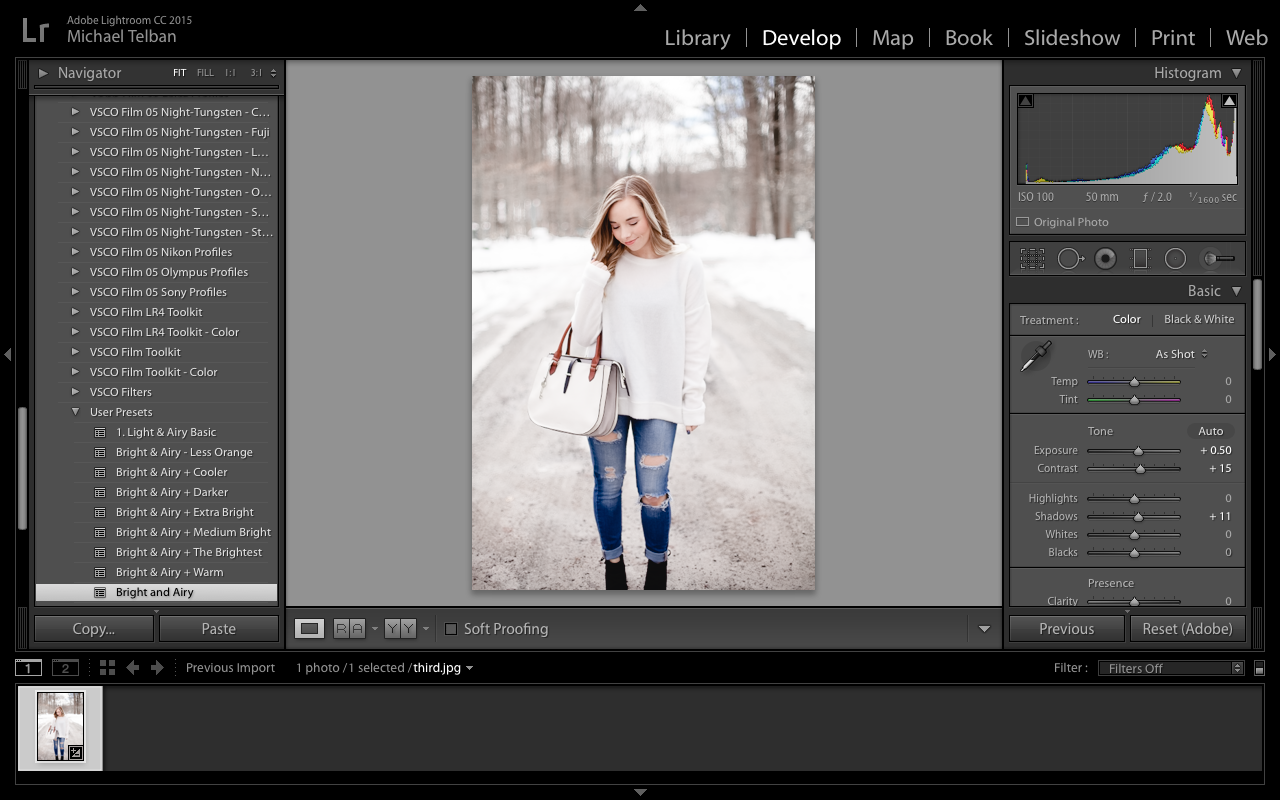
The “Bright and Airy” preset that I used for this photo isn’t a drastic preset by any means. The only change it adds to my photo is that it brightens it slightly and added a tiny bit of contrast to it. It also added a vignette to the corners of the photos. I am personally not a fan of vignette and if you’re like me, you’ll want to know my trick to get rid of it.
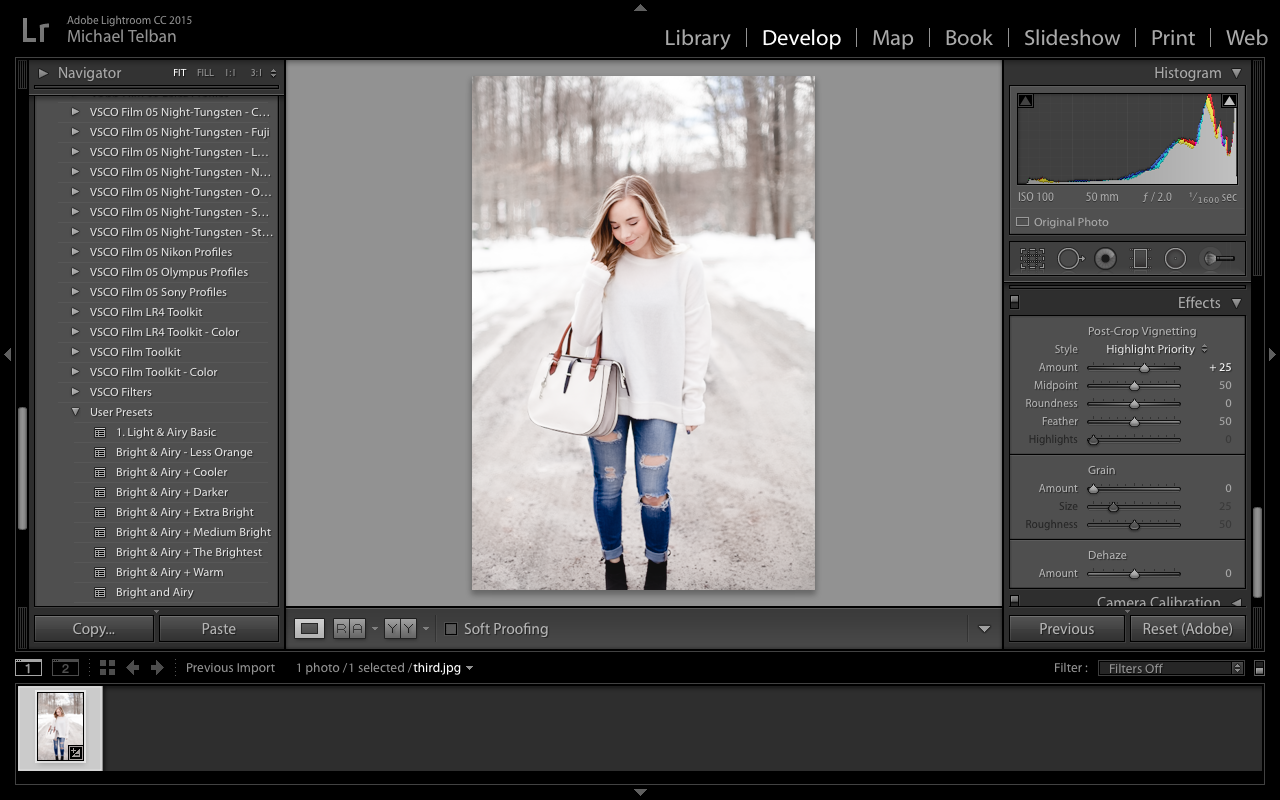
I get rid of the dark vignette by scrolling down to “effects” in the right sidebar. There, I up the highlight priority amount and nothing else. I up it to about +25 but it differs from photo to photo.
Below you can see the huge difference that just a basic Lightroom preset with some minor customizations can do for your photos!

STEP 4:
Once I’m finished in Lightroom I bring my photo back into Photoshop to adjust the Color Balance. This really depends on the photo – how it was shot, the correct (or your preferred) white balance. The red tones in this photo were too much for my liking, so I edited the color balance to be more in the cyan tones (-10 to be exact).
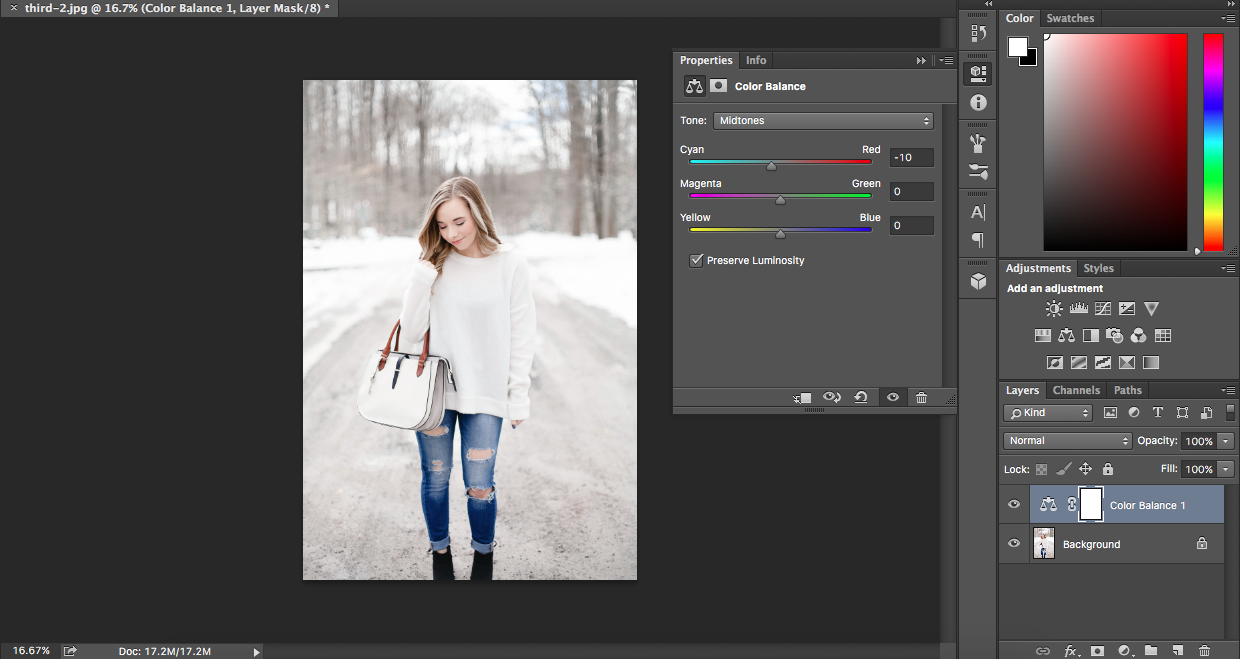
From there, I simply cropped the photo down to where I wanted the crop to be. Depending on the photo, I’ll crop it before the extensive editing but for others, I’ll wait until close to the end to decide.
STEP 5:
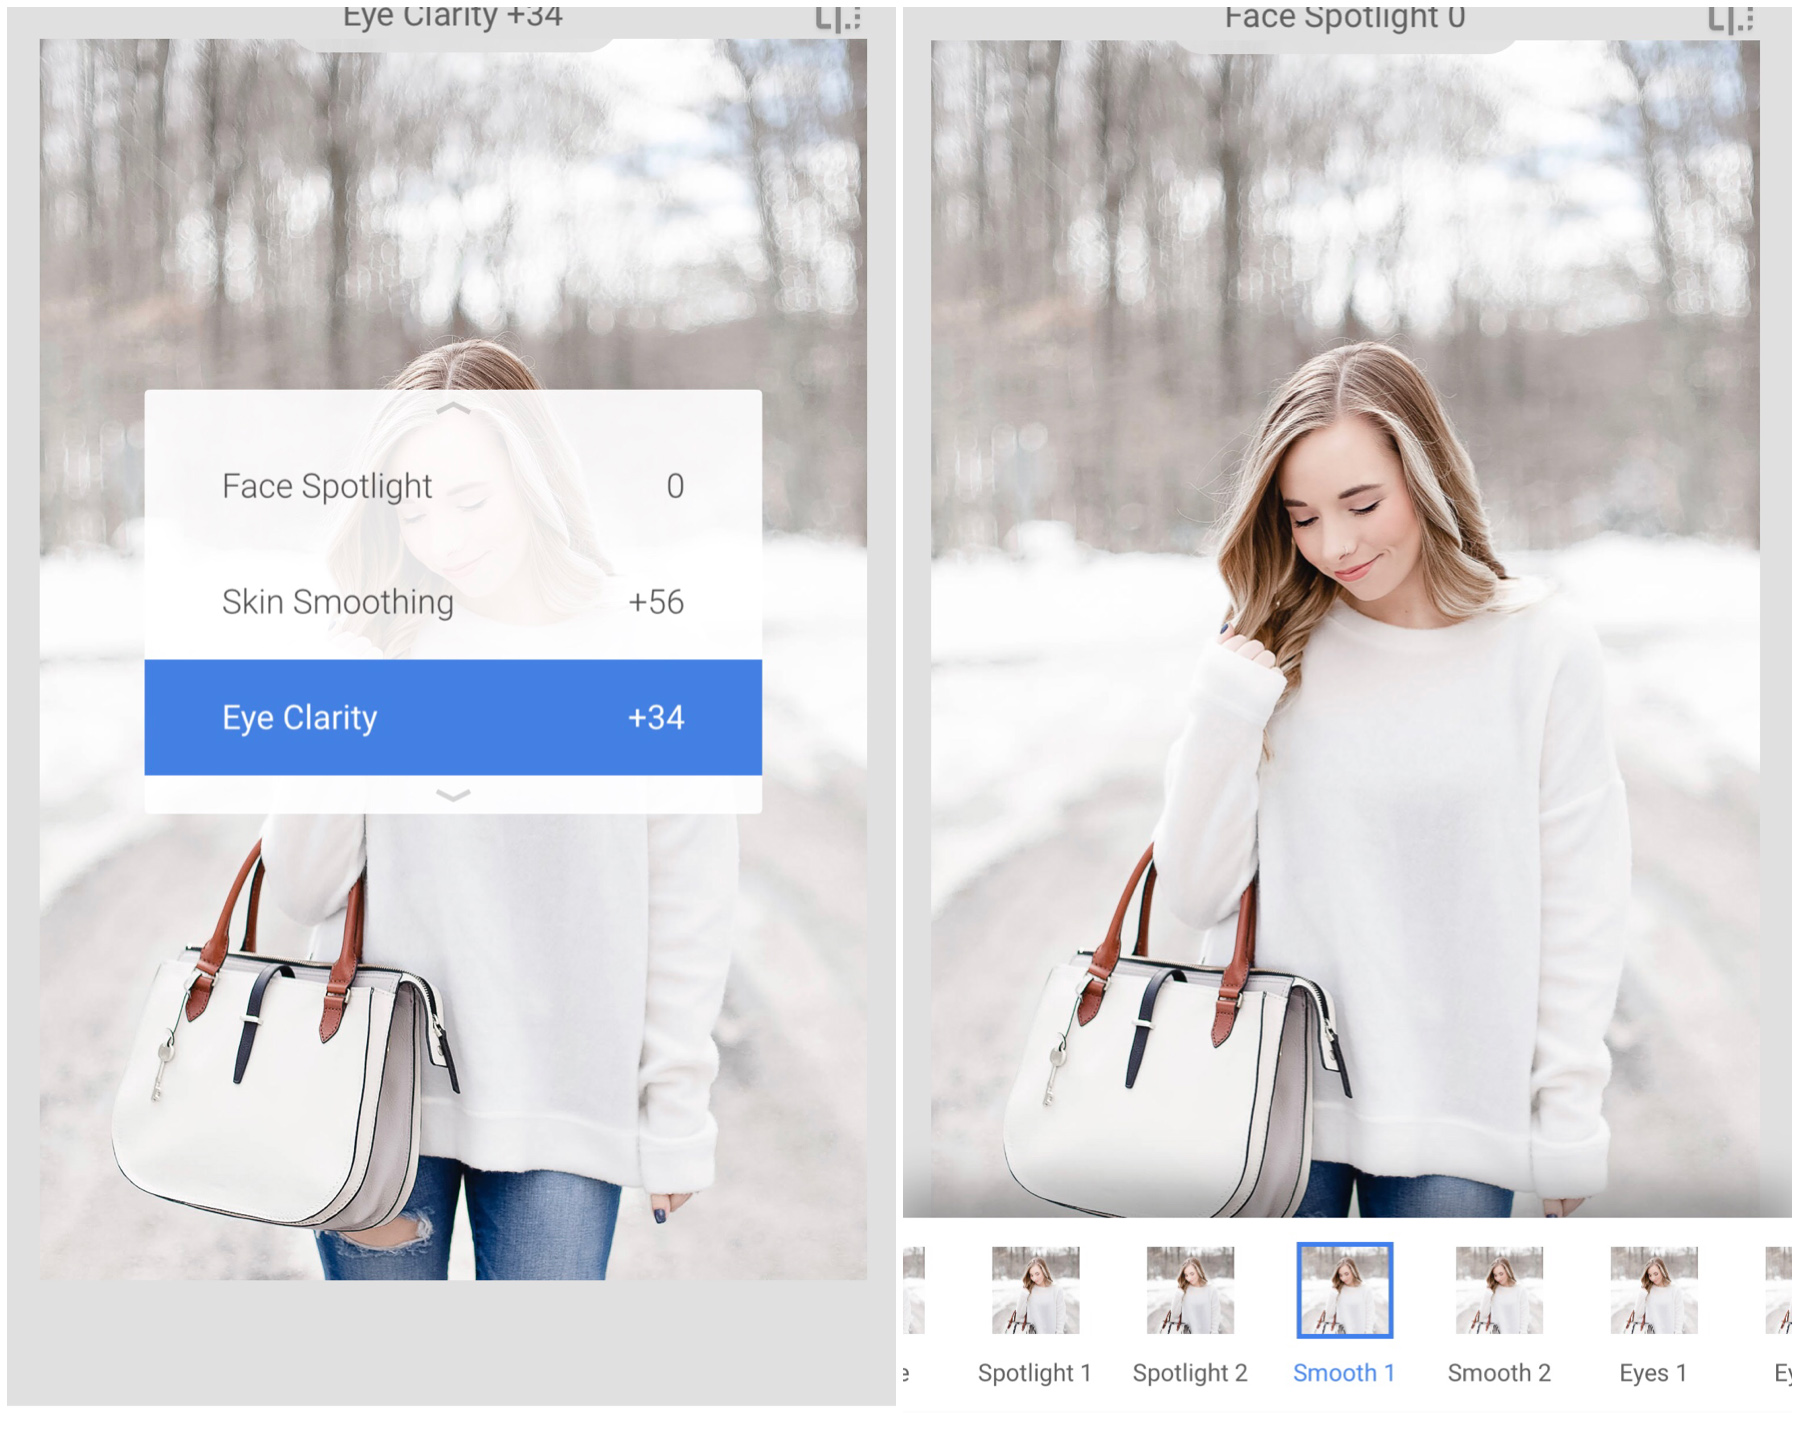
After I’m done editing from my desktop, I Dropbox my photos to my phone. Once my photo is on my phone, I open up my photo in Snapseed which is a free app! Snapseed has a ton of different neat tools to use to edit from your phone. One of my favorite tools in Snapseed is the portrait tool.
The portrait tool allows you to edit the face spotlight, smoothness of skin, and brightness of your eyes. I boost skin smoothness to usually around +50 and brighten my eyes anywhere from +20 to +30.
[bctt tweet=”How I Edit My Fashion Photos” username=”SummerTelban”]
AND THERE YOU HAVE IT!
That’s my current photo editing process. It changes from time to time but the basics stay the same. I hope this step-by-step tutorial was helpful to you! I know that a decent camera, Photoshop, and Lightroom are huge investments but they really do pay off and make a huge difference.
If you have any questions about my editing process, feel free to drop them below and I’ll get back to you! What’s your biggest struggle in editing your photos? Let’s chat!
Let’s connect! >> Facebook | Instagram | Twitter | Pinterest | Snapchat


